How to Make Shapes Transparent in Google Slides


Learn how to make shapes transparent in Google Slides with our step-by-step guide, including useful tips and tricks.
Google Slides is a powerful tool for creating visually appealing presentations. One often-overlooked feature is the ability to make shapes transparent. This can be particularly useful for layering text, highlighting content, or creating a visually striking background. In this guide, we’ll walk you through the process of making shapes transparent in Google Slides, while sharing some tips and tricks to enhance your presentations.
Why Use Transparency in Google Slides?
Before diving into the steps, it’s essential to understand the benefits of using transparency in your slides:
- Enhanced Visual Appeal: Transparent shapes can add depth and sophistication to your slides.
- Highlighting Key Points: Use transparent shapes to draw attention to specific content without overshadowing it.
- Layered Design: Transparent shapes allow for creative layering, which can make your slides look more professional.
How to Make Shapes Transparent in Google Slides?
Step-by-Step Guide to Making Shapes Transparent
Step 1: Insert a Shape
- Open your Google Slides presentation.
- Go to the slide where you want to insert a shape.
- Click on the “Insert” menu at the top.
- Select “Shape” from the dropdown, and choose the type of shape you want (e.g., rectangle, circle, arrow).
Step 2: Customize the Shape
- Click on the shape you’ve inserted to select it.
- Use the corner handles to resize the shape as needed.
- Move the shape around the slide to position it where you want it.
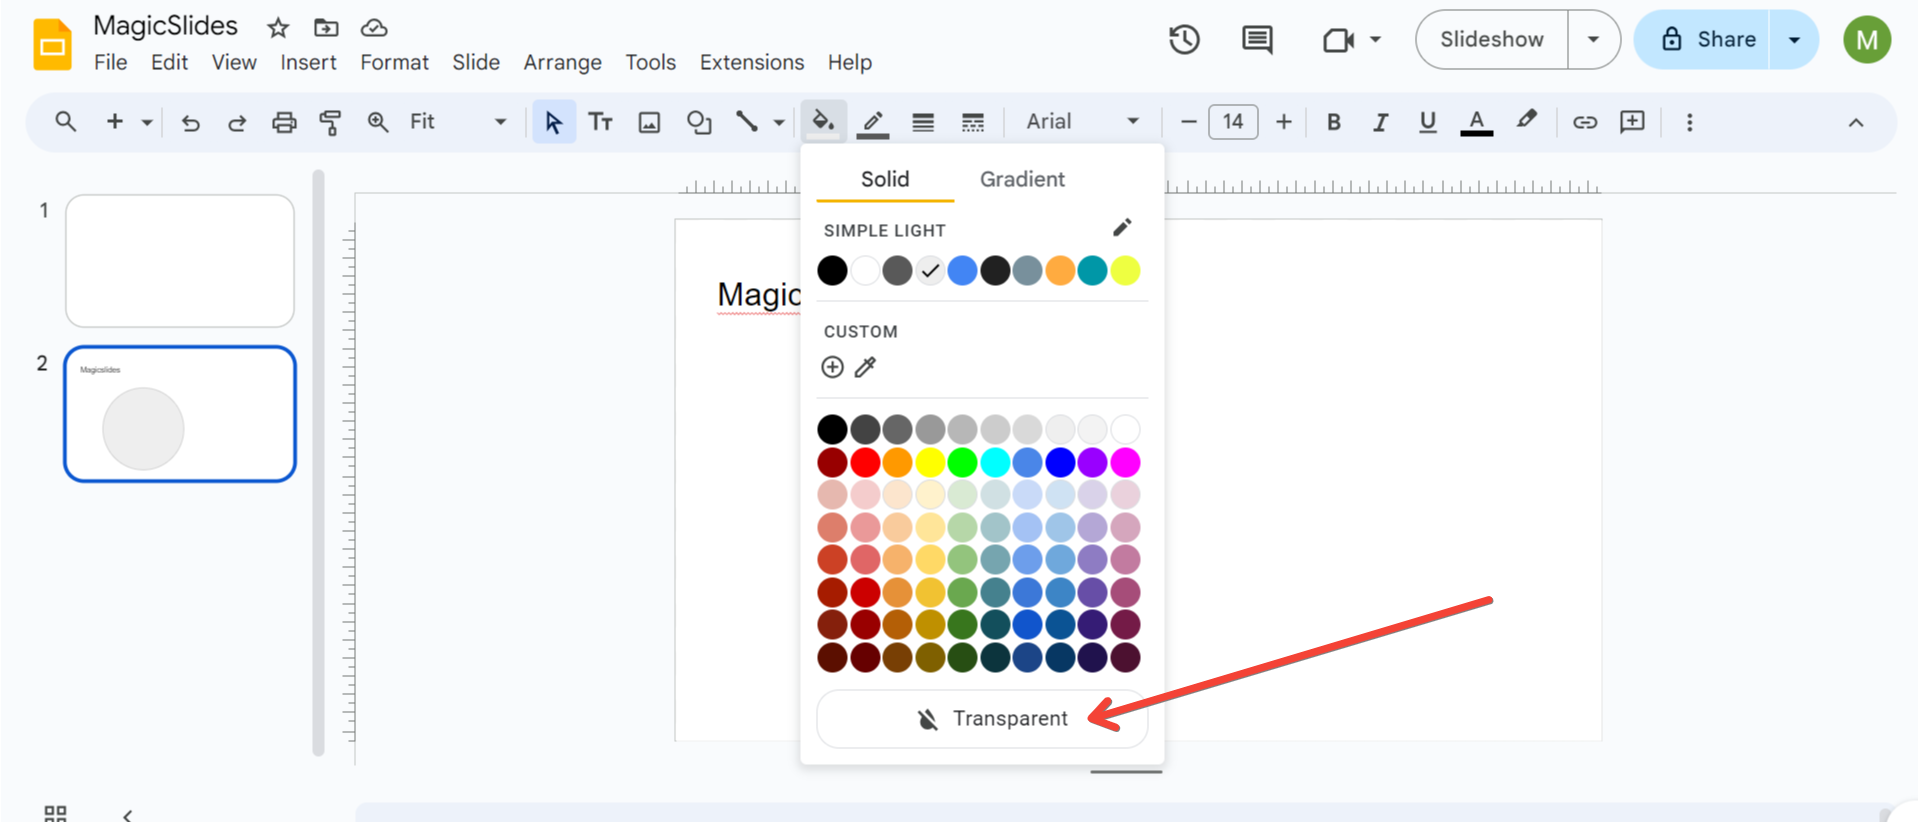
Step 3: Adjust the Shape’s Transparency
- With the shape still selected, click on the “Fill color” icon (a paint bucket) in the toolbar.
- You’ll see a button labeled “Transparent.” Click on this to make the shape transparent.
Step 4: Adjusting Border Transparency (Optional)
- If your shape has a border, you can adjust its transparency too.
- Click on the “Border color” icon (a pencil) in the toolbar.
- Select “Custom” from the color palette.
- Use the transparency slider to adjust the border's visibility.
Step 5: Apply Effects and Enhancements (Optional)
- You can add shadows or reflections to the shape by selecting the shape and clicking on the “Format options” menu in the toolbar.
- Explore options like “Drop Shadow” or “Reflection” to add a professional touch to your shape.
Tips and Tricks for Using Transparent Shapes in Google Slides
- Layering Shapes and Text: Place transparent shapes over images or other shapes to create a layered effect. This can make your slides more engaging and visually dynamic.
- Highlighting Text: Use a semi-transparent shape behind text to highlight it without blocking the background image or design.
- Creating Overlays: Use a large, semi-transparent rectangle over the entire slide as an overlay. This is a great way to make text stand out or create a more subdued background for other elements.
- Using Gradients: Google Slides also allows you to add gradient fills to shapes. You can create a transparent gradient by adjusting the transparency level of one or more of the gradient colors. This adds depth and interest to your shapes.
- Combining Transparency with Animations: Apply entrance or exit animations to your transparent shapes to create a more dynamic presentation. For example, a transparent shape can gradually appear or disappear, creating a smooth visual transition.
- Transparent Images: If you have an image with a transparent background (like a .png file), you can use it alongside transparent shapes to create unique visual effects.
- Grouping Shapes: If you’re using multiple shapes together, group them to maintain their alignment and size when adjusting transparency. To group shapes, select all the shapes you want to group, right-click, and choose “Group.”
- Custom Colors and Brand Consistency: Use custom colors that match your brand palette for shapes and adjust their transparency. This maintains brand consistency and professionalism in your presentations.
Troubleshooting Common Issues
Issue 1: Transparency Slider Not Showing
If the transparency slider is not visible, make sure you have selected the “Fill color” or “Border color” options, and then click on “Custom.” The transparency slider is located within this custom color menu.
Issue 2: Shape Not Appearing Transparent
If your shape doesn’t seem to be getting transparent, ensure you have selected the shape itself, and not just its border. Also, double-check that you are using the transparency slider in the “Fill color” settings, not the “Border color” settings.
Issue 3: Text Visibility Over Transparent Shapes
When placing text over a transparent shape, the text may become harder to read. To fix this:
- Increase the shape's transparency slightly so the background becomes more visible.
- Change the text color to a contrasting one.
- Add a subtle shadow to the text for better visibility.
Conclusion
Using transparency in Google Slides is a simple yet effective way to elevate your presentations. Whether you’re highlighting important points, creating layered designs, or just adding some visual interest, transparent shapes are a versatile tool. Experiment with different transparency levels, shapes, and layering techniques to find what works best for your presentation needs.
By following these steps and tips, you’ll be well on your way to creating stunning and professional slides that capture and hold your audience’s attention. Happy presenting!
4o


