How to Make a Calendar in Google Slides: A Step-by-Step Guide


Discover how to create a customized, shareable calendar in Google Slides with our easy, step-by-step guide, perfect for any team.
Creating a calendar in Google Slides can be a convenient way to manage your schedules visually and share them seamlessly with others, whether for personal planning, business meetings, or educational purposes.
This guide will walk you through the detailed process of making a calendar in Google Slides, from setting up your slide to customizing the calendar for your specific needs.
Google Slides, part of Google's suite of productivity tools, is widely known for its presentation capabilities. However, its flexibility allows for various other uses, such as creating customized calendars.
This can be particularly useful for those who need a personalized planning tool that integrates easily with other Google services.
Why Use Google Slides for Your Calendar?
Ease of Access
Google Slides is accessible from any device with internet connectivity, making it easy to update your calendar on the go.
Customization
Unlike standard calendar applications, a Google Slides calendar can be fully customized to match your preferred aesthetics or branding.
Sharing and Collaboration
Google Slides allows for real-time collaboration and sharing, making it an ideal tool for teams to manage schedules collectively.
Getting Started with Google Slides
Setting Up Google Slides
- Open Google Slides: Visit Google Slides and sign in with your Google account.
- Start a New Presentation: Click on "Blank" or choose a template if you prefer.
Basic Slides Setup
- Title Slide: Create a title slide for your calendar. This can include the month, year, and any relevant graphics or logos.
- Layout Selection: For the calendar slides, select a simple layout, typically one with a title and a large space for the calendar itself.
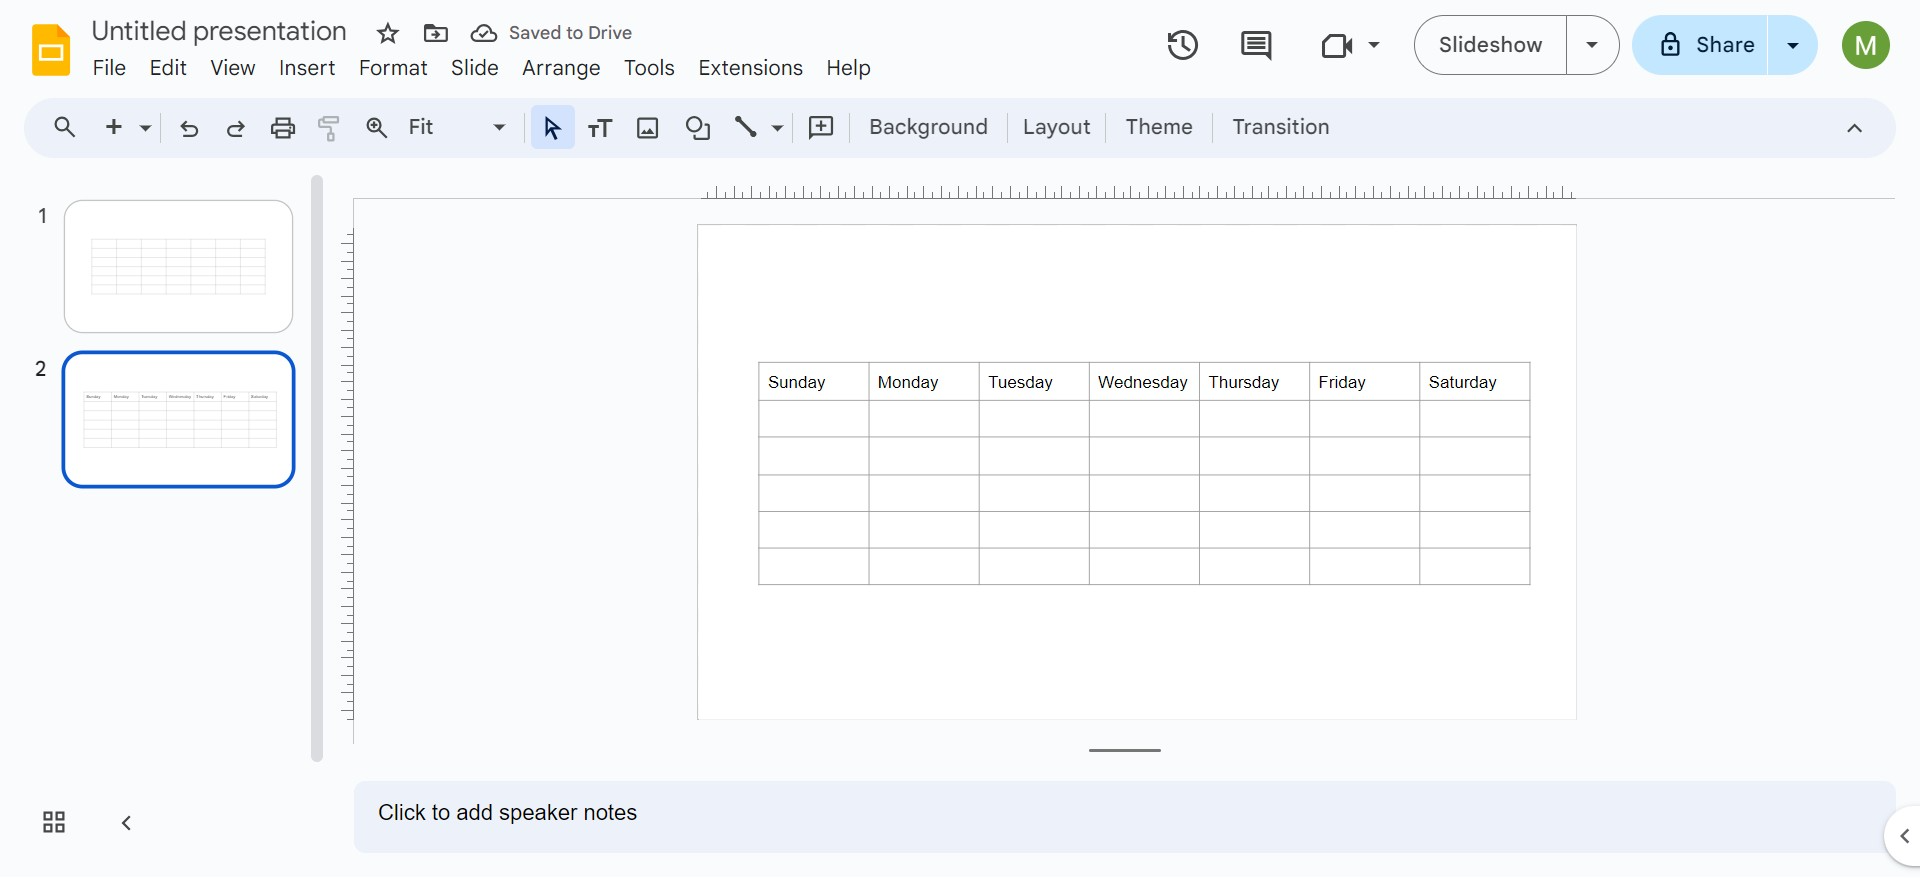
Creating the Calendar Grid
Inserting a Table
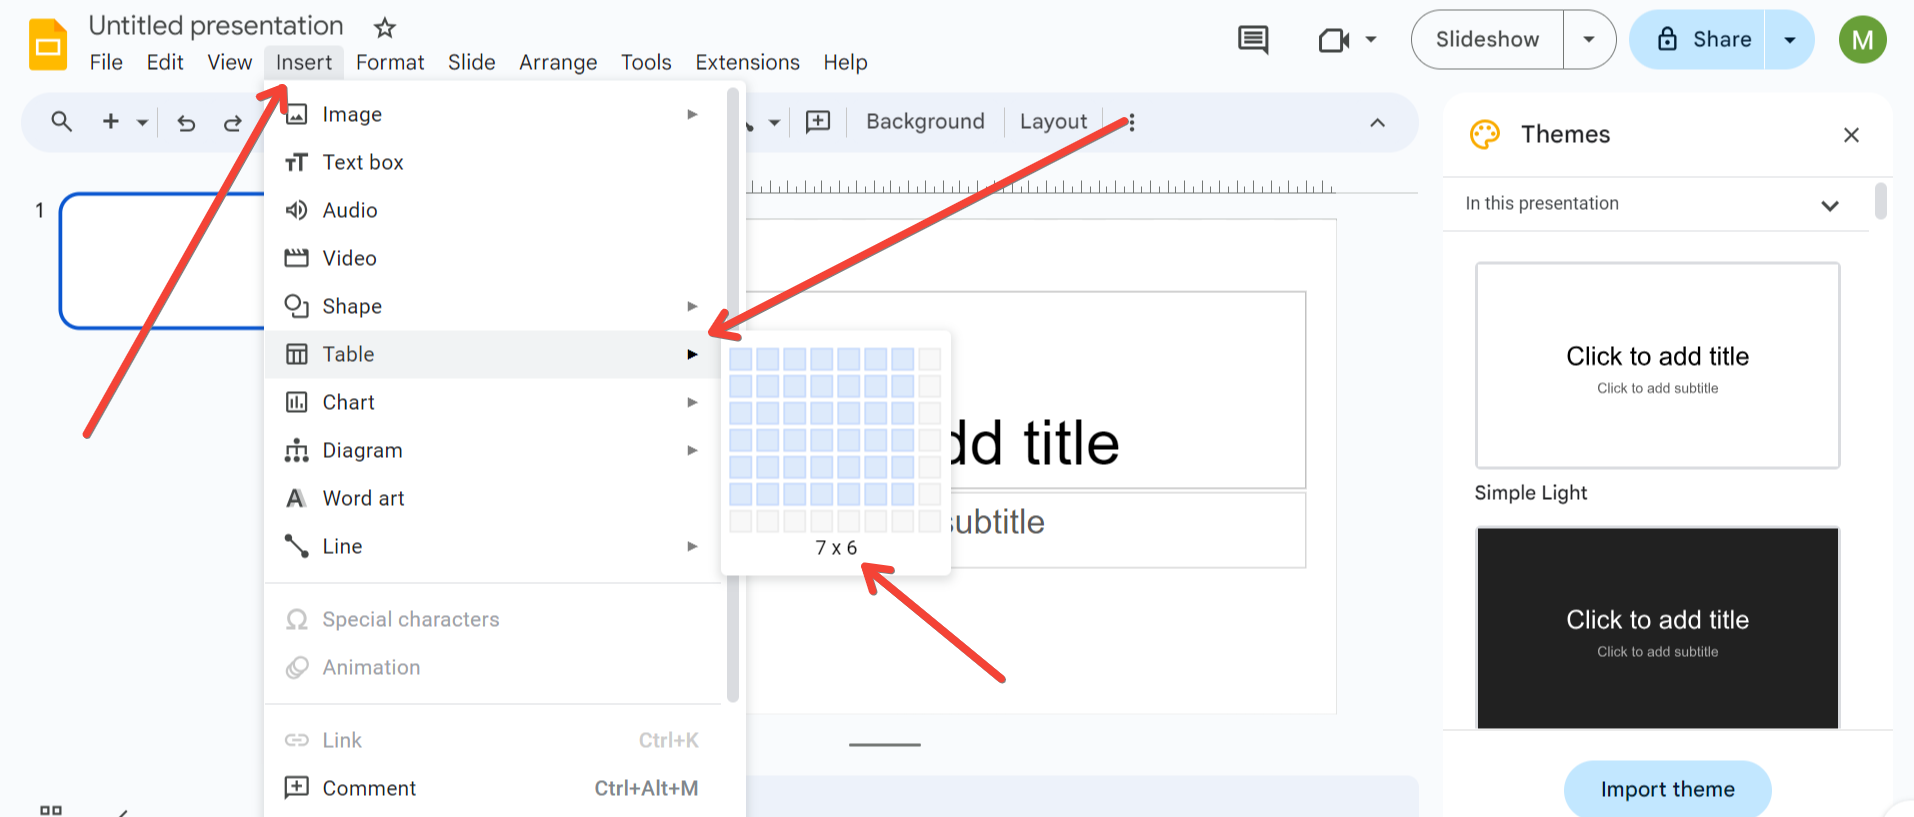
- Insert Table: Go to the top menu, click on
Insert, thenTable, and select the grid size. For a monthly calendar, a 7×6 grid (7 days a week and up to 6 rows to cover all days of the month) works well. - Adjusting Cell Size: Click and drag the edges of the table to adjust column widths and row heights so that all days have equal space.
Formatting the Table
- Borders and Lines: Adjust the thickness and color of the borders for clarity or aesthetic preference.
- Background Colors: Use different colors for weekends or important dates.
Adding Dates and Text
Inputting Dates
- Start with Sunday or Monday: Depending on your preference, fill in the dates, starting from the correct day of the week.
- Use Text Boxes: For better control over text formatting, use text boxes within each cell.
Customizing Text Style
- Fonts and Sizes: Choose fonts and sizes that are readable and fit well within the cells.
- Text Alignment: Align the text in the center or corner of the cells, based on your design.
Enhancing Your Calendar
Adding Images and Icons
- Insert Images: To highlight special dates, insert images or icons by going to
Insert > Image. - Positioning: Ensure images do not overwhelm the text. Resize and position them appropriately.
Using Themes and Backgrounds
- Themes: Apply a theme from Google Slides for a consistent look across all slides.
- Custom Backgrounds: For a more personalized touch, set custom backgrounds for each month or season.
Sharing and Collaboration
Sharing Your Calendar
- Share Directly: Click on the
Sharebutton, add emails, and set permissions (view, comment, or edit). - Publish or Embed: Publish your calendar to the web or embed it in a website for broader accessibility.
Collaborative Editing
- Invite Collaborators: Allow team members to edit the calendar, facilitating real-time updates and scheduling.
Best Practices for Calendar Management
Regular Updates
Keep your calendar updated to ensure it remains a reliable resource for you or your team.
Integrations
Consider integrating other tools or linking back to Google Calendar for automated updates and reminders.
Feedback
Regularly solicit feedback from users or collaborators to improve the functionality and design of the calendar.
Conclusion
Creating a calendar in Google Slides is more than just a way to track dates—it's a flexible tool for visual planning that supports real-time collaboration. By following this guide, you can create a personalized calendar that not only meets your scheduling needs but also enhances your productivity and communication. Whether for personal use, education, or professional settings, a well-designed Google Slides calendar is an excellent addition to your organizational tools.


