How to Remove Footer in PowerPoint (All Slides, Slide Master & Fixes)


Learn how to remove footers in PowerPoint from all slides or individual slides. Fix footers that won't disappear, remove slide numbers, and edit Slide Master settings.
PowerPoint footers can display useful information such as slide numbers, dates, company names, or custom text. However, they can also make slides look cluttered, distract your audience, or display outdated information that no longer belongs in your presentation.
Many users discover that simply unchecking the footer option doesn’t always work. In some cases, the footer is controlled by the Slide Master, embedded within a template, or added as a regular text box. This can make removing it confusing, especially when only certain slides are affected.
In this guide, you’ll learn how to remove footers from all slides, delete them from individual slides, fix footers that won’t disappear, and troubleshoot common PowerPoint template issues. Whether you’re using PowerPoint for work, school, or client presentations, these methods will help you create cleaner and more professional slides.
Why Can’t I Remove Footer in PowerPoint?
- The footer is part of the Slide Master
- The footer is added as a text box manually
- The footer is embedded in the background design
Fix:
- Open the Slide Master and remove it
- Check for locked elements
- Delete manually added text boxes
How to Remove Footer in PowerPoint (Quick Answer)
To remove a footer in PowerPoint:
- Open your presentation.
- Go to Insert → Header & Footer.
- Uncheck Footer, Date and Time, and Slide Number.
- Click Apply to All.
If the footer still appears, it is likely coming from the Slide Master, a manually added text box, or the presentation template.
Method 1: Remove Footer Using Header & Footer Settings
Step 1. Open Your Presentation
Open the PowerPoint file and select any slide.

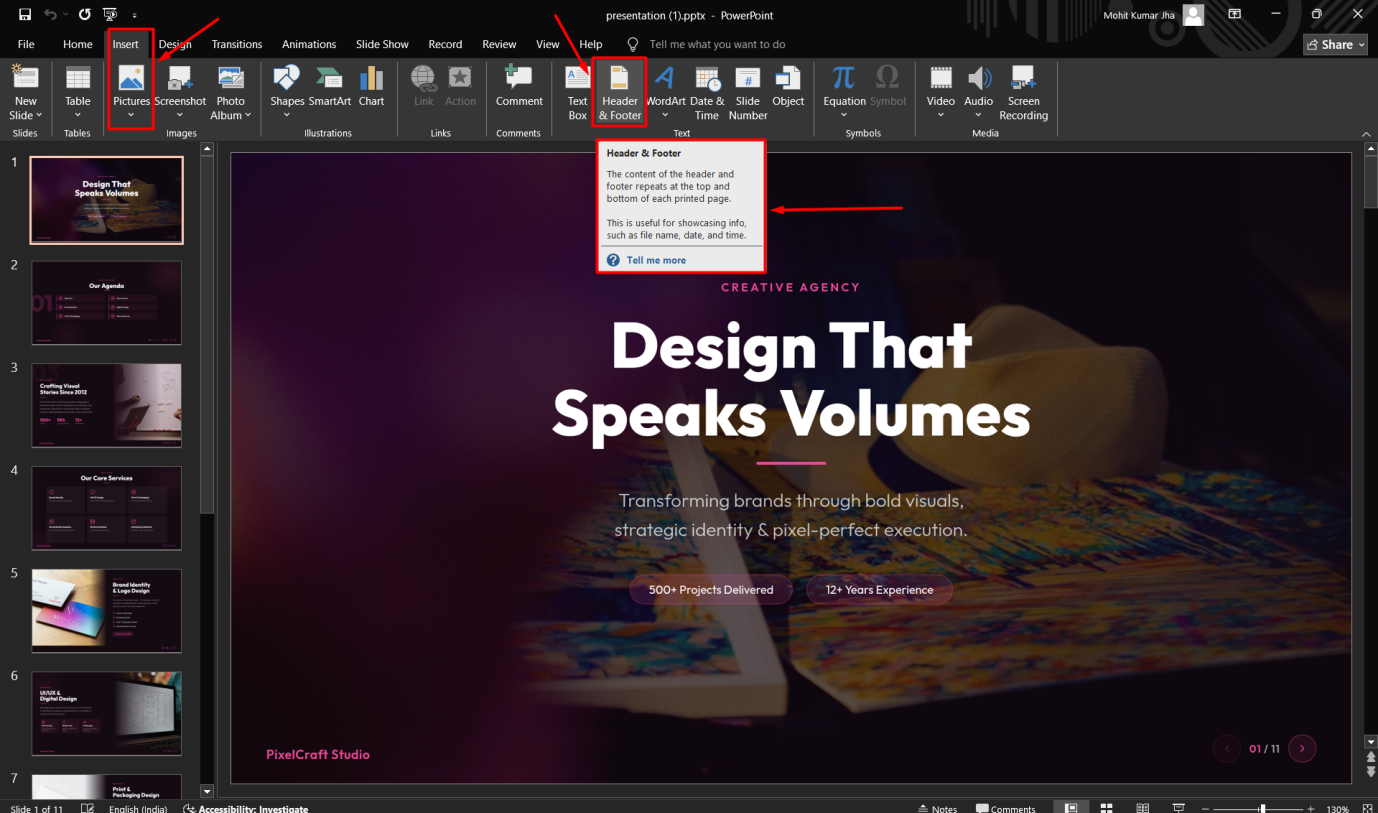
Step 2. Open Header & Footer
Go to: Insert → Header & Footer.
Step 3. Disable Footer Elements
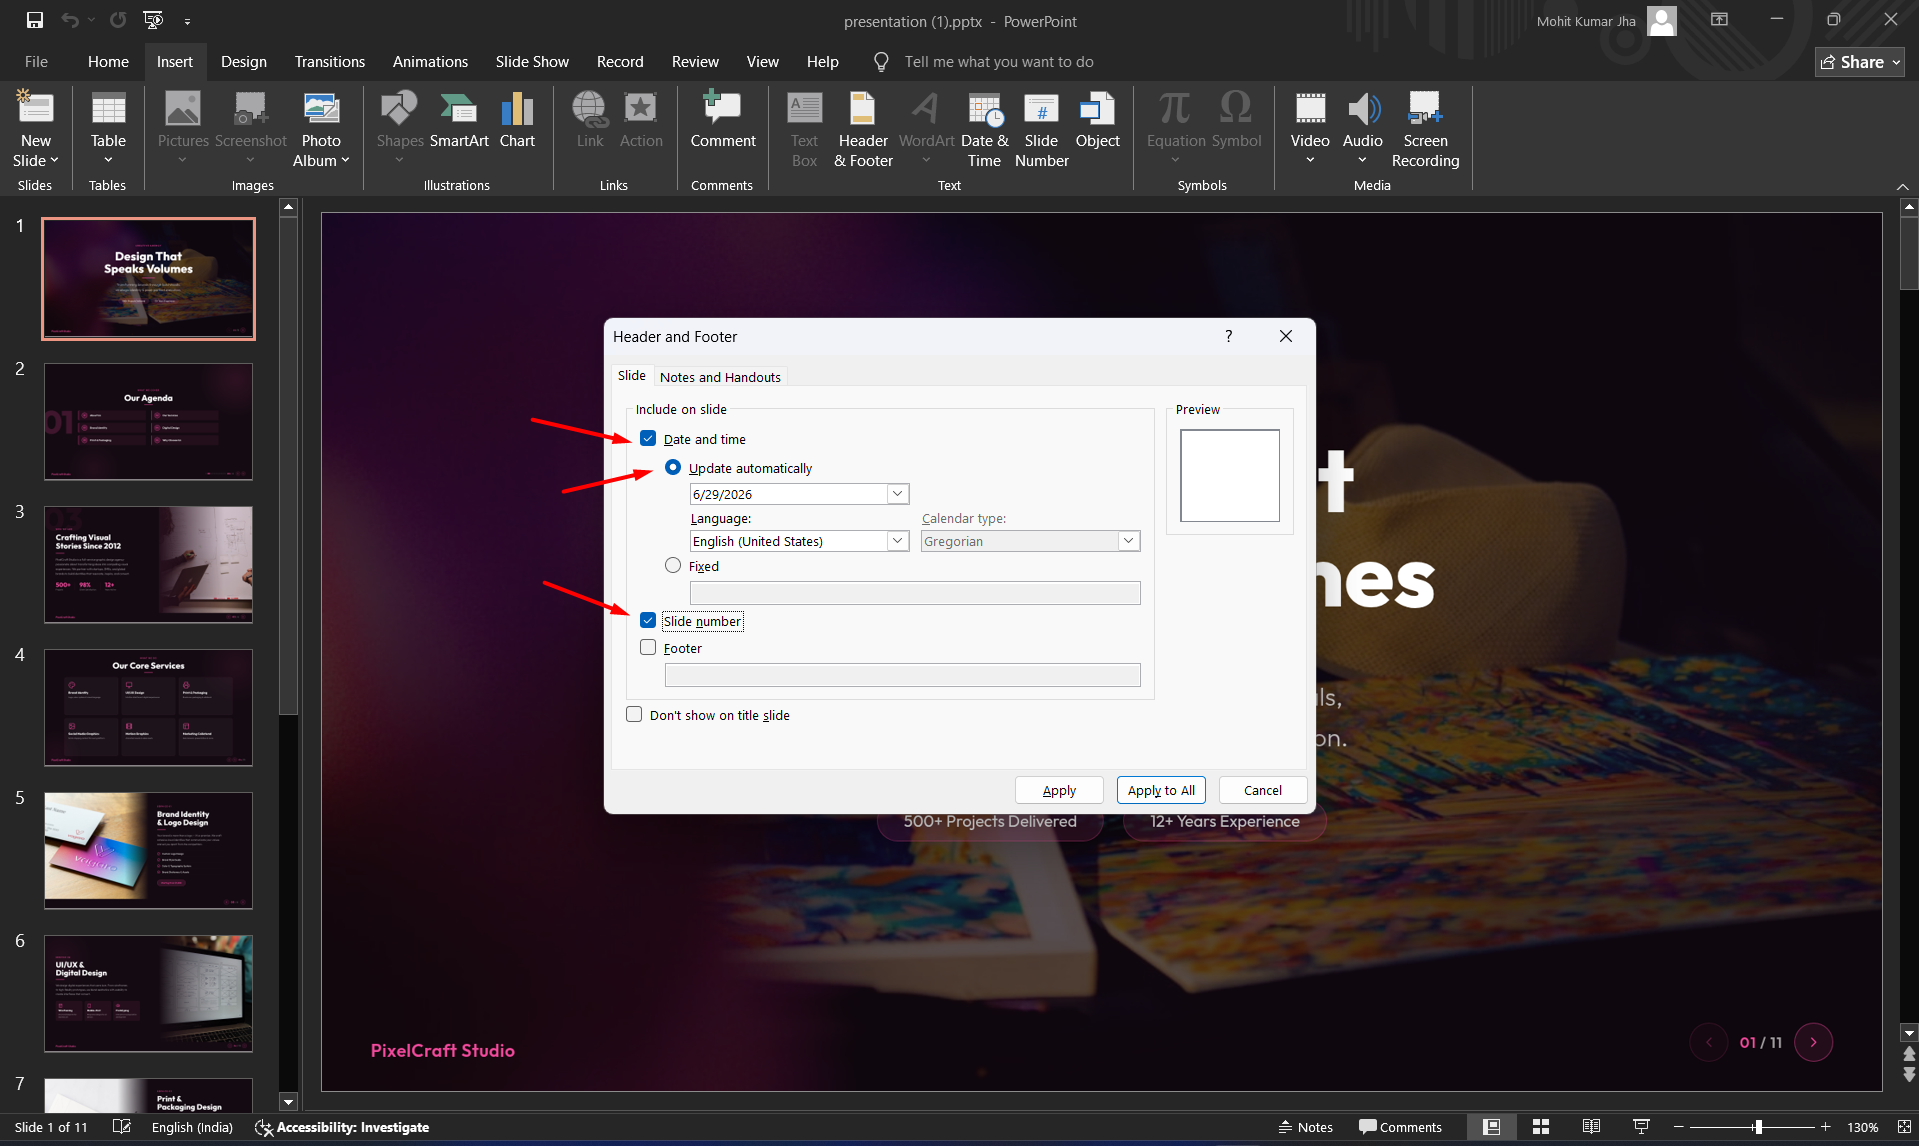
Uncheck:
- Footer
- Date and Time
- Slide Number
Step 4. Apply Changes
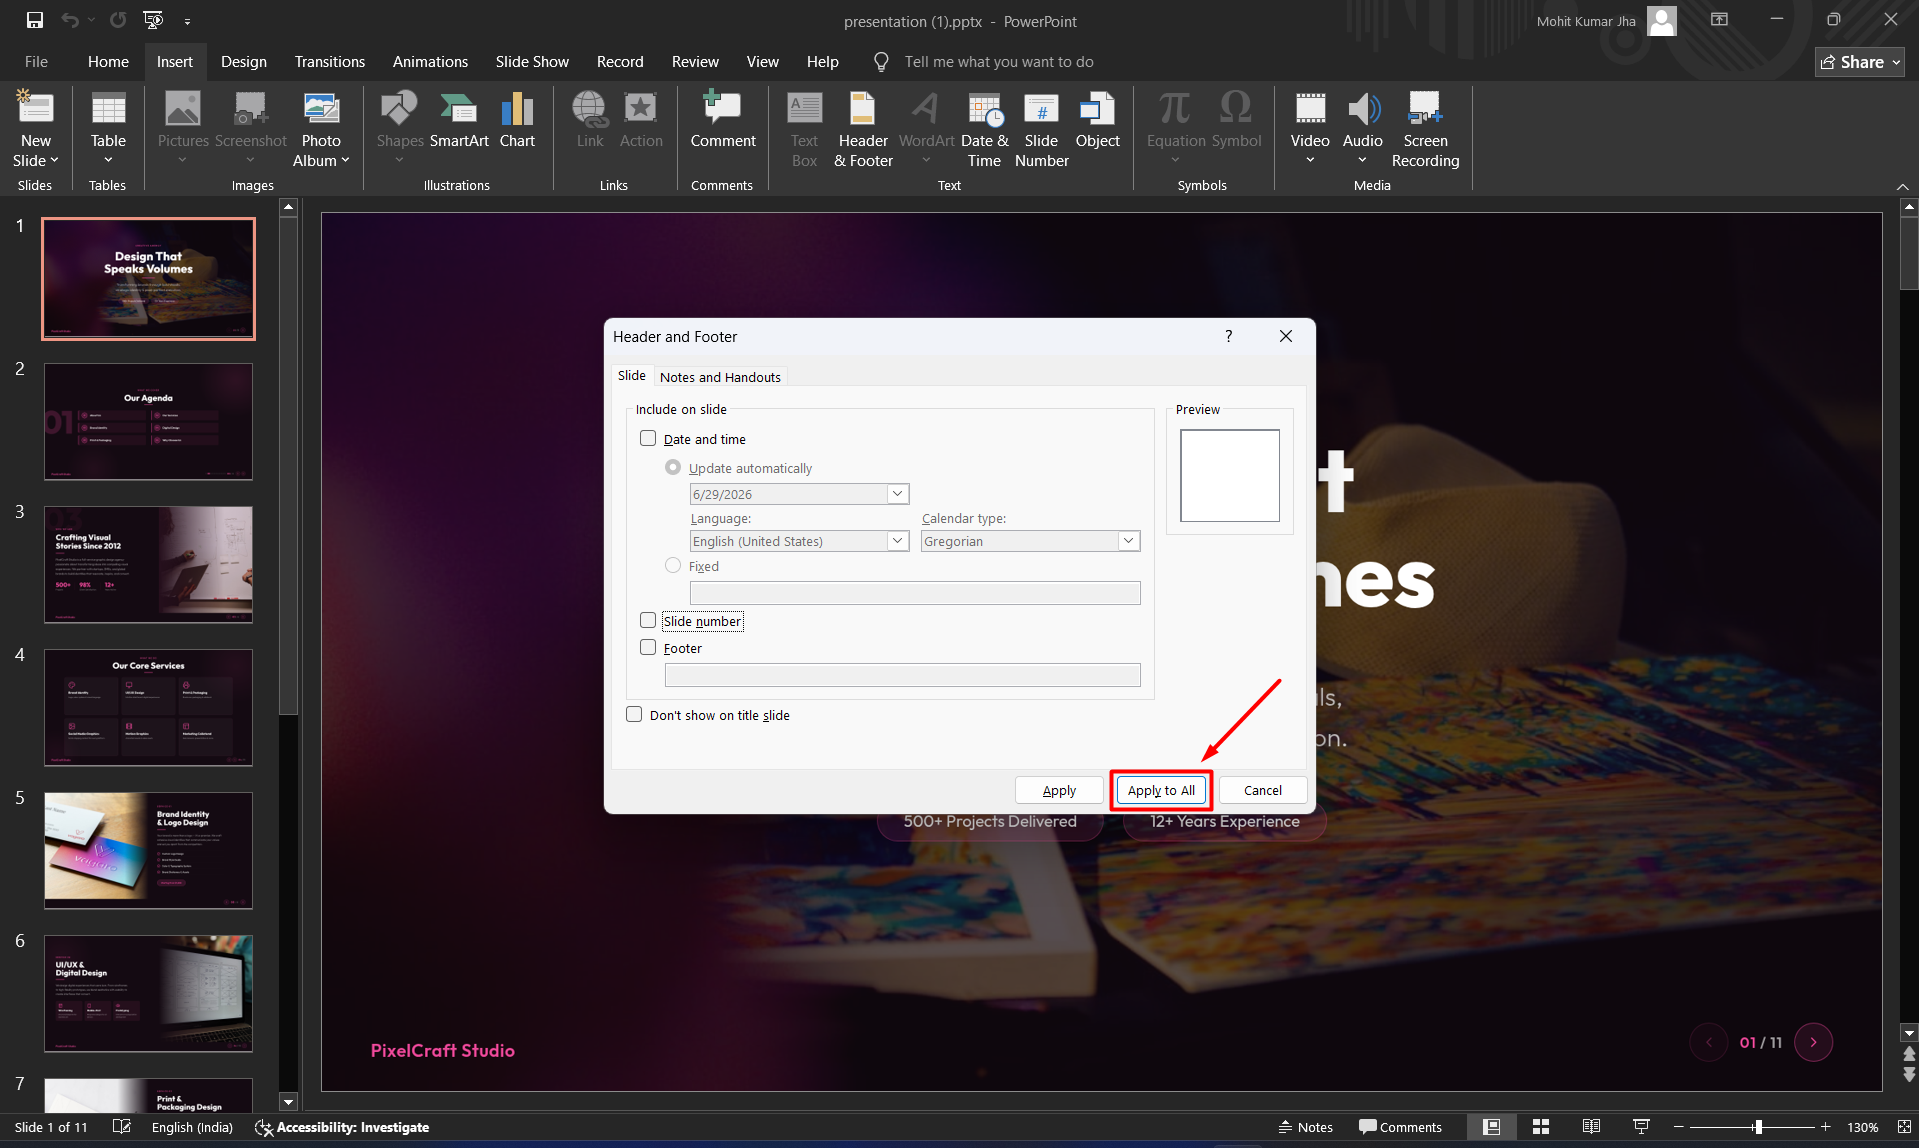
- Click Apply to remove the footer from one slide.
- Click Apply to All to remove it from every slide.
Also read: How to Edit a PowerPoint Template: Customize PPT Like a Pro?
Method 2: Remove Footer in PowerPoint Presentation Using Slide Master
Before You Start
Before editing the Slide Master, consider saving a copy of your presentation. Some PowerPoint templates contain multiple layouts, and changes made to the master slide can affect several slides at once.
If you’re working with a company or client template, check whether the footer contains branding, confidentiality notices, or required information before removing it.
Step 1. Open Your PowerPoint Presentation
Begin by opening the PowerPoint presentation from which you want to remove the footer. Navigate to the slide or slides where you want to make changes.
Step 2. Access the Slide Master View
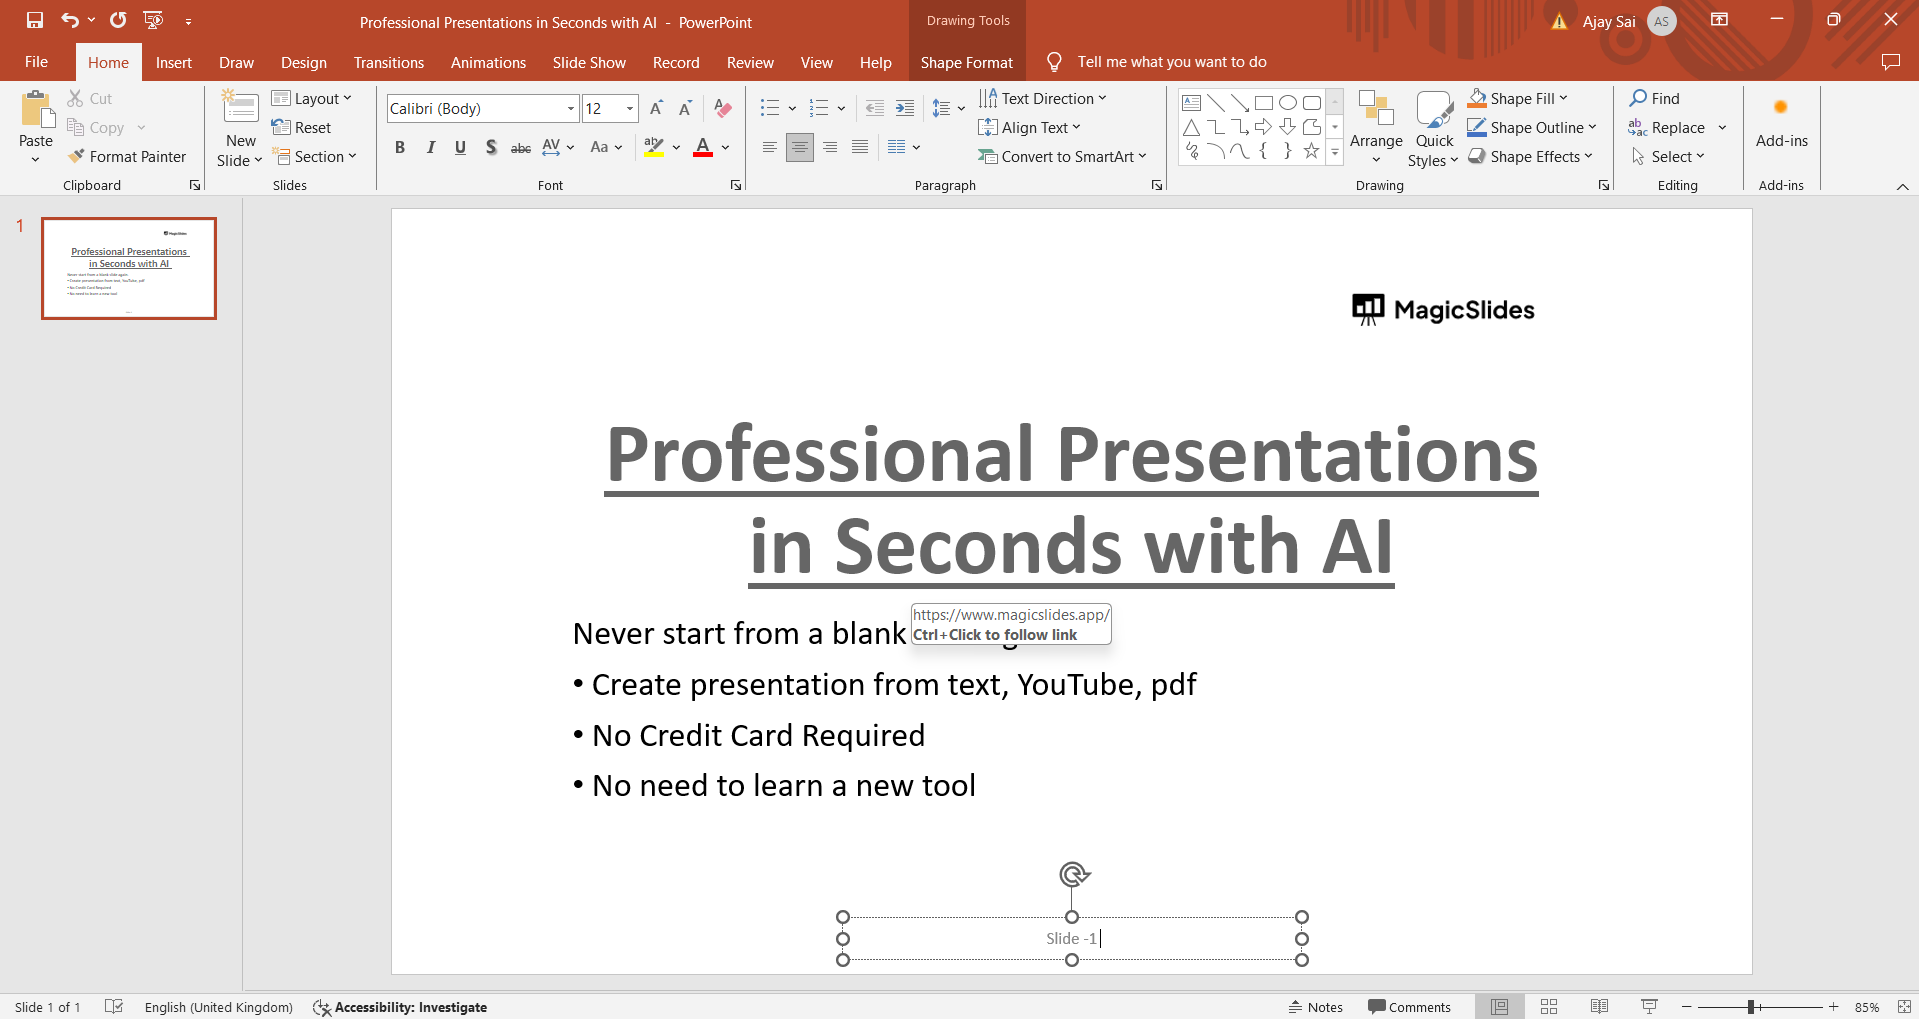
To remove the footer from multiple slides or the entire presentation, it’s best to use the Slide Master view. Go to the “View” tab on the PowerPoint ribbon and click on “Slide Master.”
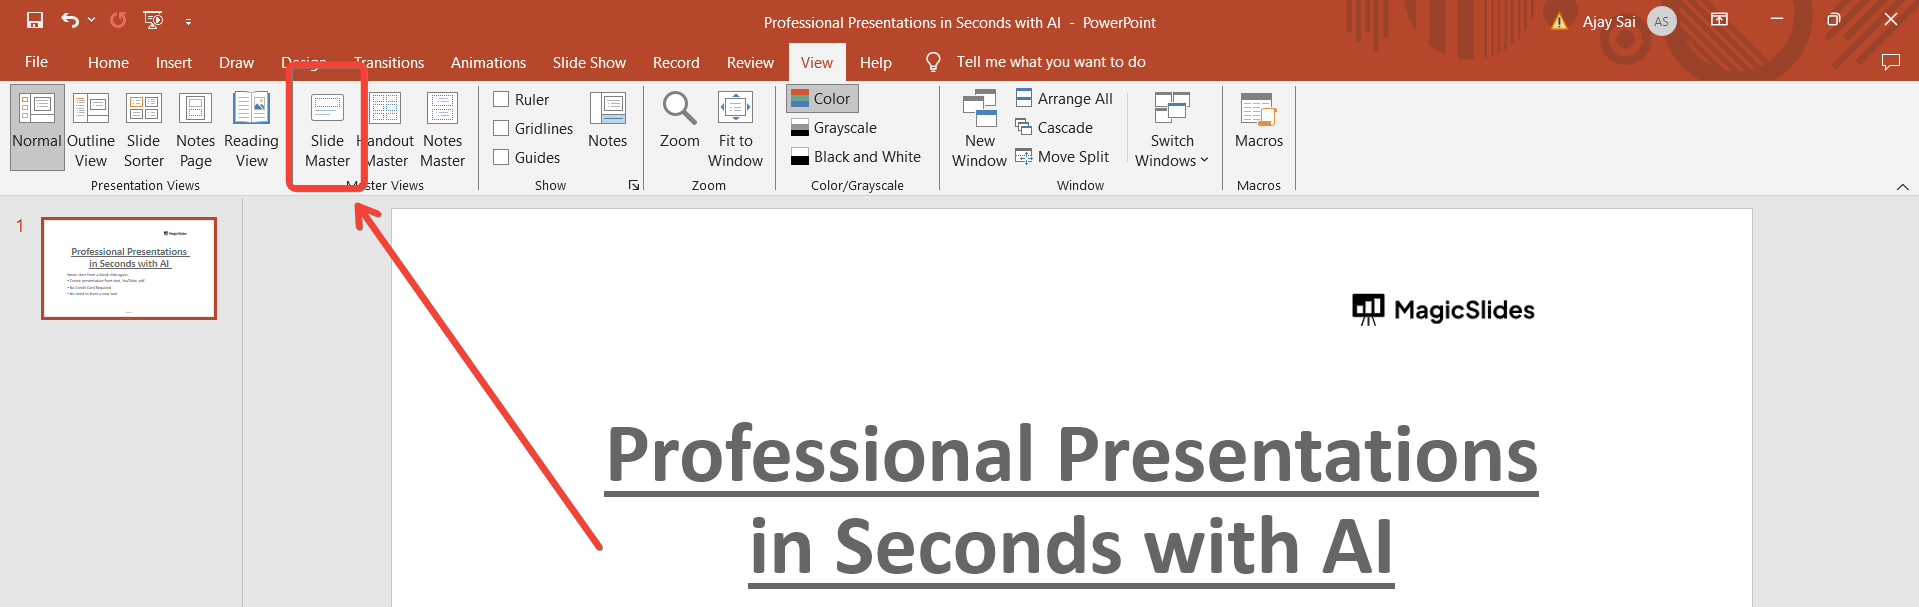
Step 3. Locate the Footer Placeholder
In the Slide Master view, you’ll see a layout that represents the master layout for all slides. Look for the footer placeholder area at the bottom of the slide. It typically contains placeholders for footer elements like slide numbers and date.
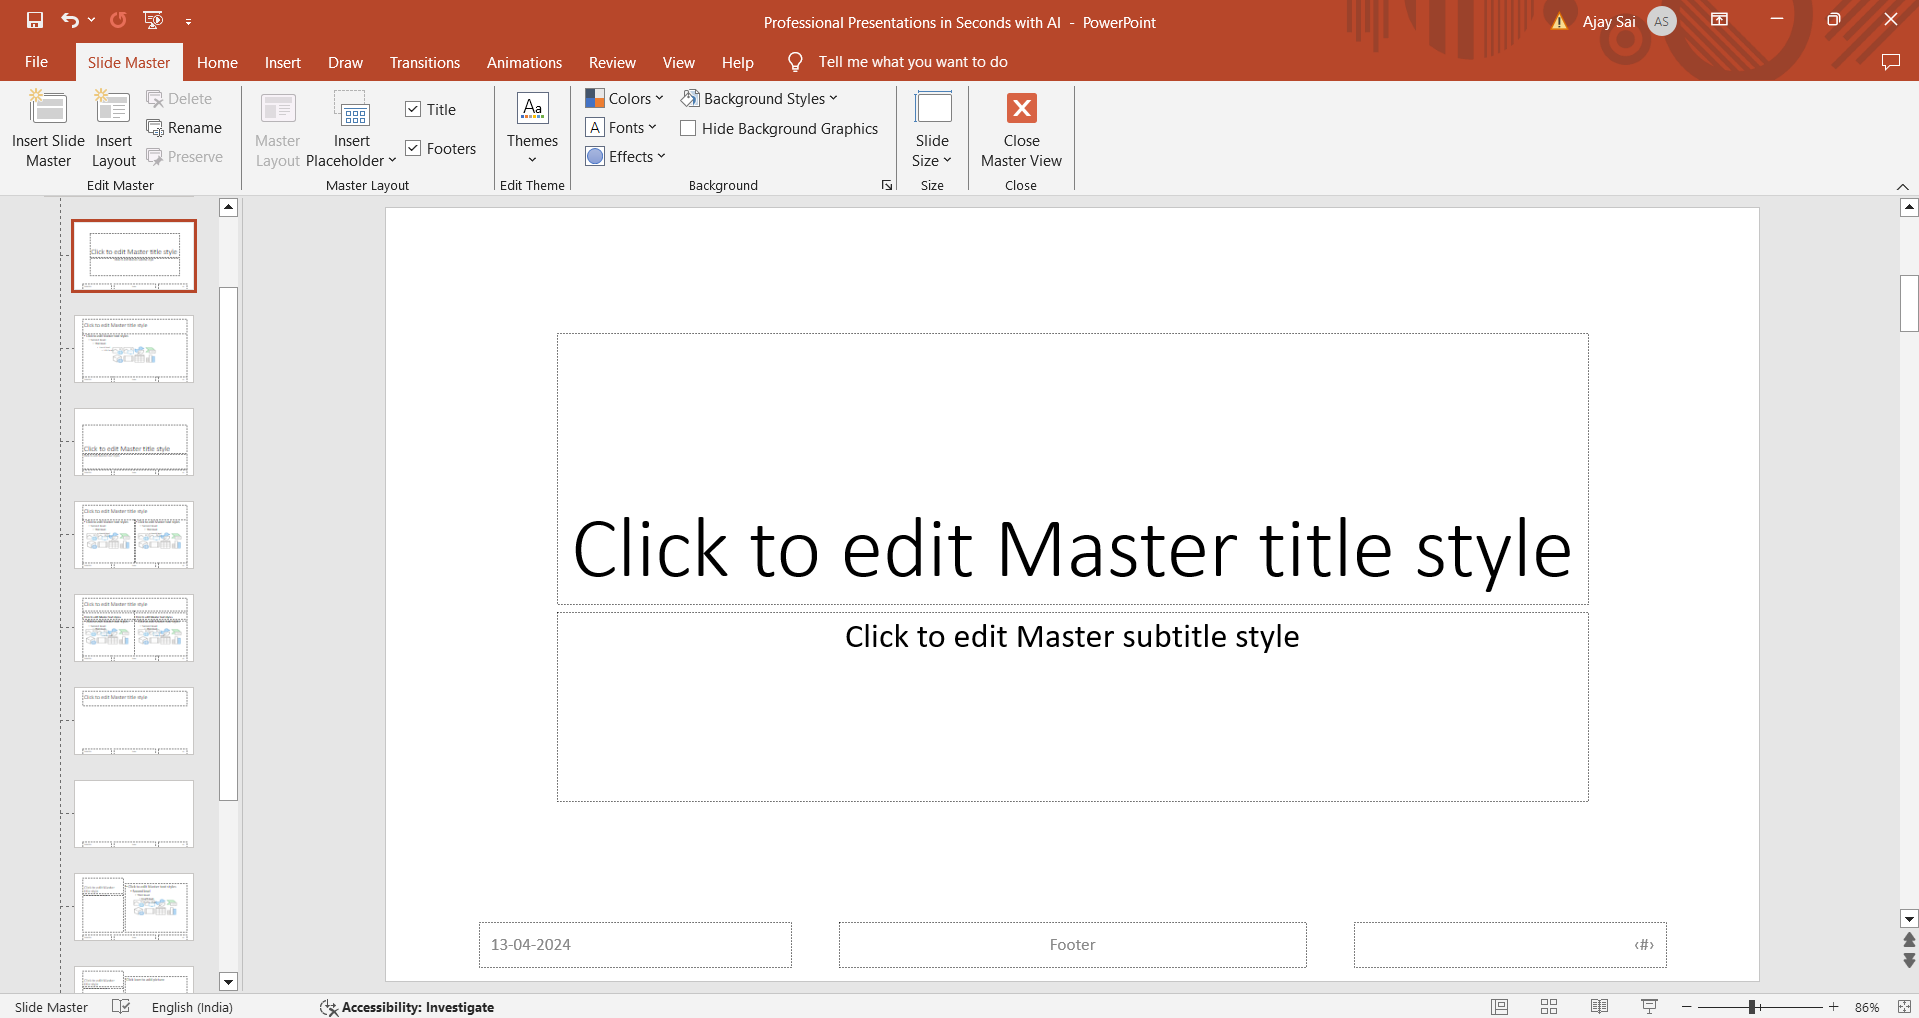
Step 4. Delete or Modify the Footer Elements
To remove the footer completely, select the footer elements (such as slide number placeholders, date placeholders, or any text boxes representing the footer) and press the Delete key on your keyboard. Alternatively, you can modify the content or format of the footer elements as needed.
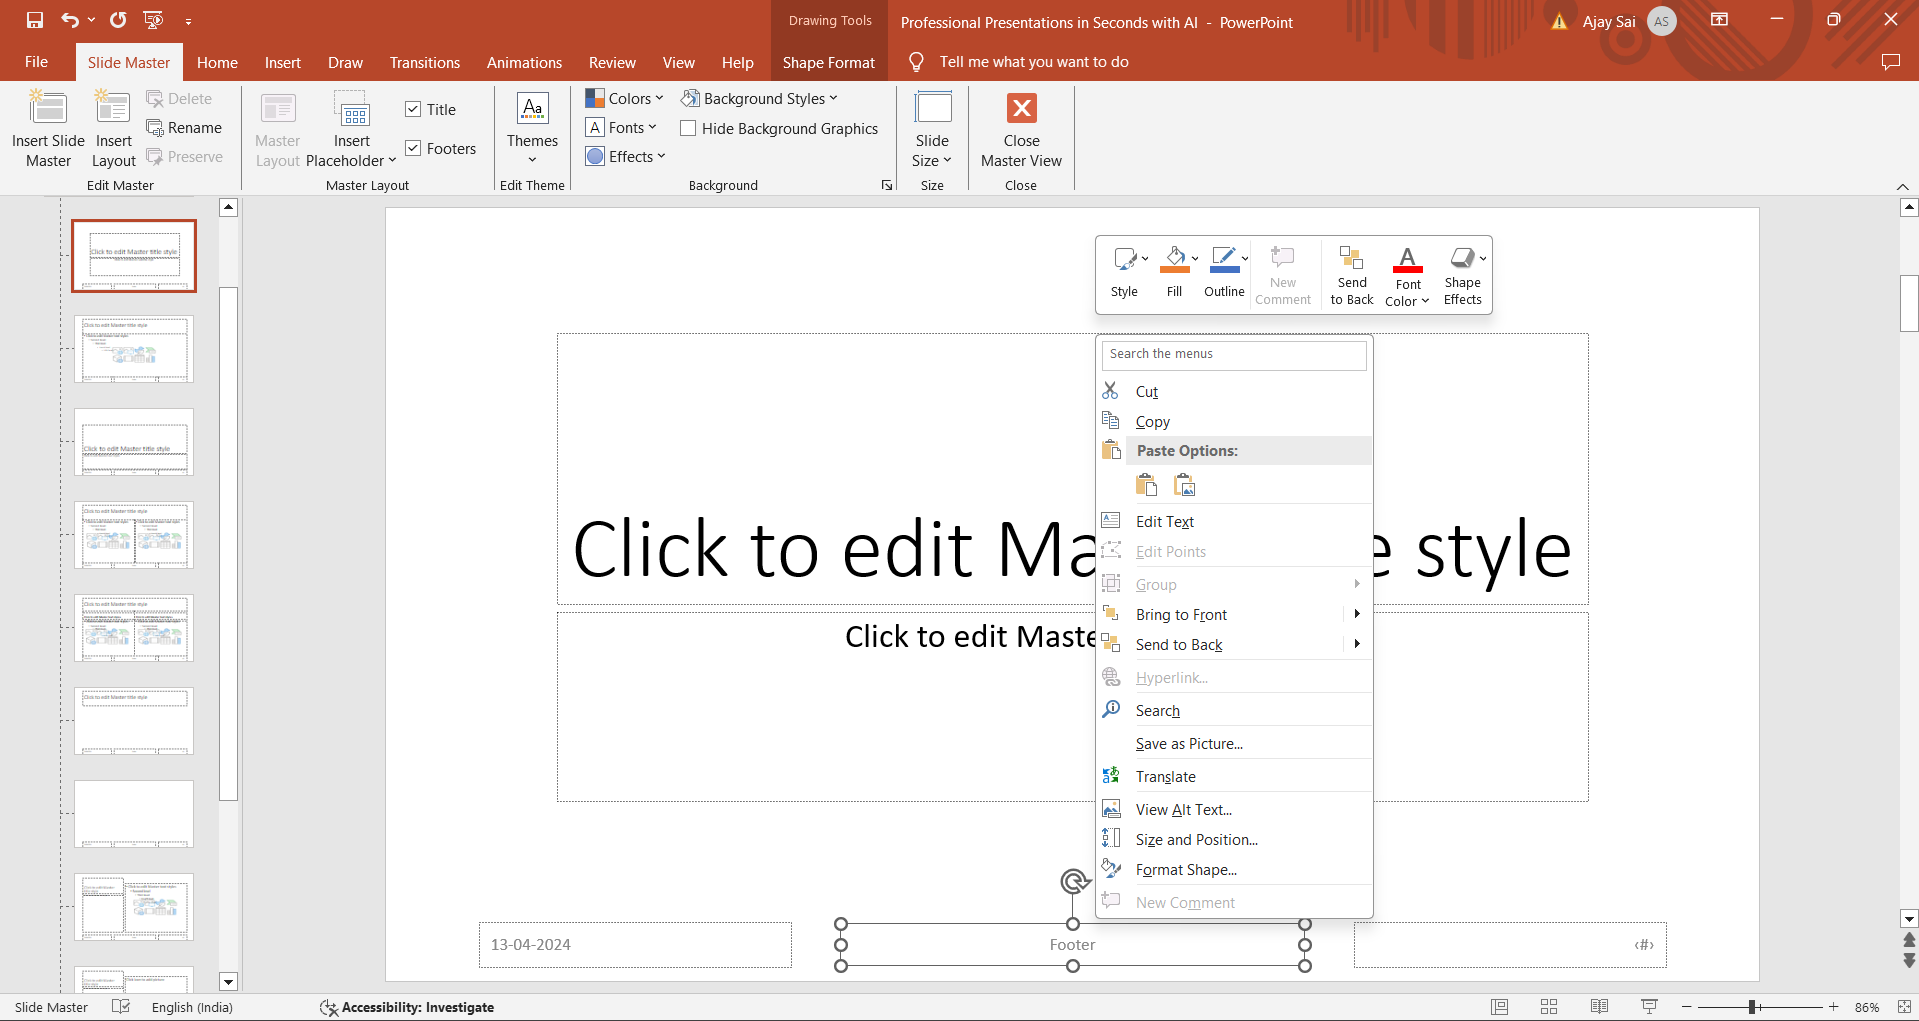
Step 5. Apply Changes and Exit Slide Master View
Once you’ve removed or modified the footer elements in the Slide Master view, click on the “Close Master View” button on the Slide Master tab. This will apply your changes to the slides in your presentation.
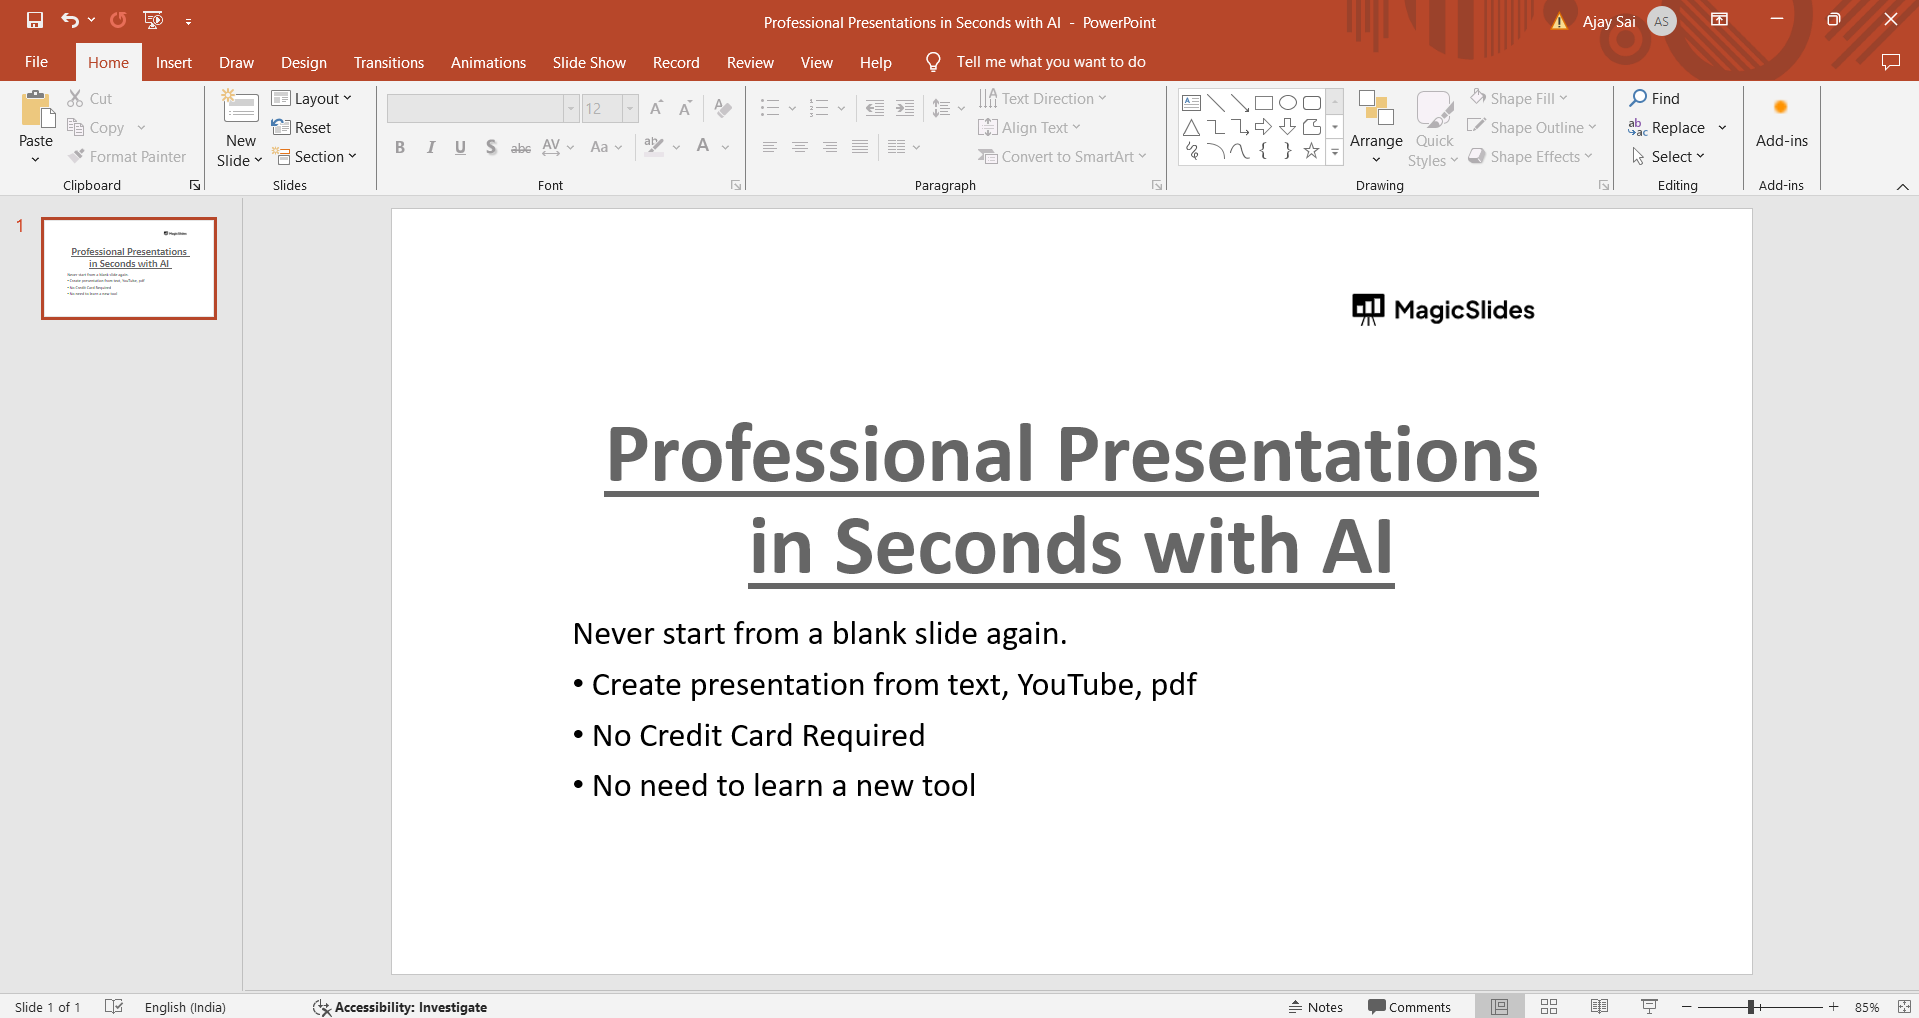
Also read: How to Make a Good PowerPoint Presentation: Step-by-Step
Create Cleaner Slides Instantly with MagicSlides
If you’re already optimising your PowerPoint by removing footers, why stop there? You can take your presentations to the next level using MagicSlides, an AI-powered PPT Maker tool designed to create professional slides in seconds.

Why Use MagicSlides?
- Generate complete presentations instantly from topics, text, or even YouTube videos
- Clean, footer-free designs with modern layouts
- Auto-formatting for consistent and polished slides
- Saves hours of manual editing in PowerPoint
How It Helps in This Context
Instead of manually removing footers and adjusting layouts slide by slide, MagicSlides:
- Creates slides without unnecessary clutter, like unwanted footers
- Ensures design consistency across all slides
- Lets you focus on content, not formatting
Try It Yourself
Simply enter your topic, and MagicSlides will generate a ready-to-use presentation no need to worry about footers, layouts, or design issues.
Perfect for students, professionals, and anyone who wants quick, clean, and impactful presentations.
Conclusion
Most PowerPoint footer issues can be solved in just a few clicks. The quickest method is using the Header & Footer settings, while more persistent footer problems can usually be fixed through the Slide Master.
Understanding how PowerPoint layouts work makes it easier to troubleshoot issues and maintain consistent slide designs. Whether you’re preparing a business presentation, academic project, or client proposal, removing unnecessary footer elements can help create cleaner and more professional slides.
If you regularly create presentations and want to avoid formatting issues altogether, tools like MagicSlides can help generate well-designed presentations with consistent layouts, saving time on manual edits and slide cleanup.
Frequently Asked Questions:
Q1. Why won’t the footer disappear in PowerPoint?
If the footer remains visible after removing it from the Header & Footer settings, it is usually being controlled by the Slide Master. In some templates, the footer may also be a manually inserted text box or part of the slide background image.
Q2. How do I remove the footer from all slides at once?
Go to Insert → Header & Footer, uncheck the footer options, and select Apply to All. If the footer still appears, edit the Slide Master to remove it from every layout.
Q3. Can I remove the footer from only one slide?
Yes. Select the specific slide, open Insert → Header & Footer, disable the footer options, and click Apply instead of Apply to All.
Q4. Why do some slides still show the footer after I removed it?
Different slides may use different layouts within the same presentation. If a footer exists on one layout but not another, only certain slides will display it. Check each layout in Slide Master view.
Q5. How do I remove slide numbers without deleting the entire footer?
Open Insert → Header & Footer, uncheck Slide Number, and click Apply to All. The footer text can remain while slide numbers are removed.
Q6. Can I remove the date and keep the footer text?
Yes. In the Header & Footer dialogue box, you can independently enable or disable the date, footer text, and slide numbers.


