How to Insert/Add a Table in PowerPoint? Full Guide


Learn how to insert a table in PowerPoint. Also, check out the rows and columns operations, such as how to add/ delete rows & columns in PowerPoint.
Inserting a table in PowerPoint is so simple, it’s just a click away: “Insert>Table”. But not knowing this helpful method makes the user frustrated when there is a need to showcase the complex data. If you are also one of those who need to open the Google Search again & again to know how to insert a table in PowerPoint, how to insert a row and column in PowerPoint, then you have landed in the right place. In this write-up, we will move from the basics of tables in PowerPoint to how to delete rows, columns, and tables in detail. So, let’s get started.
Quick-Start: How to Add a Table in PowerPoint
Here are the quick steps for inserting a table in PowerPoint.
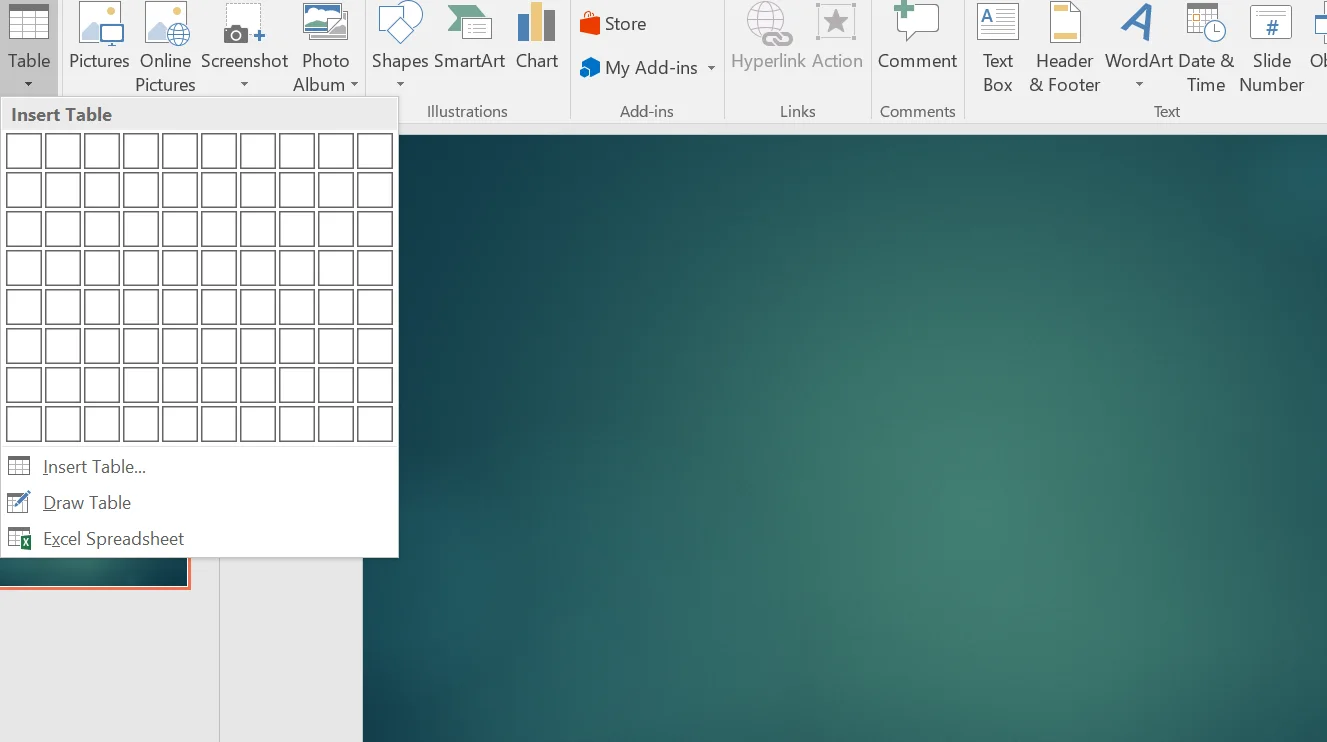
Step 1. Hit the Insert Option from the above Ribbon.
Step 2. Then click on Table Option.
Step 3. Now, you can move your mouse over the grid squares to highlight the exact number of rows and columns you need, then click. (You can also choose “Draw Table”, “Excel Spreadsheet”, or “Insert Table” option to add bulk rows and columns)
Modifying the Table: Adding Rows and Columns
There are scenarios when it is not enough to know how to insert a table in PowerPoint; we also need to expand our table by inserting rows and columns. Let’s see how it can be achieved.
How to Add/ Insert a Row in a PowerPoint Table:
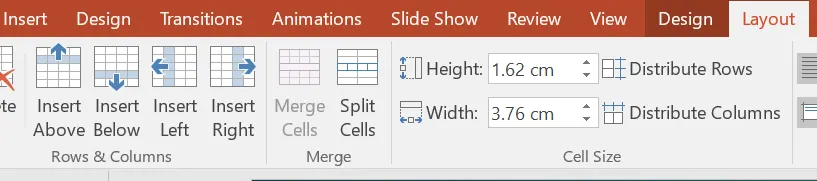
Step 1. Open the Layout option.
Step 2. Now, choose the “Insert Above or “Insert Below” option to add the rows as per the requirement.
How to Insert/ Add a Column in a PowerPoint Table:
Step 1. After opening the Layout option.
Step 2. Now, choose the “Insert Left” or “Insert Right” option wherever we need to insert the columns.
Streamlining the Data: Deleting Rows and Columns
Leaving cells empty or having duplicate values makes the PowerPoint presentation unprofessional. So, let’s remove the unwanted rows and columns.
How to delete a column in a PowerPoint table:
- Click inside any cell within the column you want to remove.
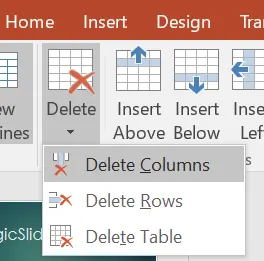
- From the Layout > Delete option.
- Choose the Delete Columns option.
How to delete a row in PowerPoint:
- Click inside the problematic row.
- Go to the Layout > Delete and then choose the Delete Rows option.
How to Delete a Table in PowerPoint
If the table doesn’t make any sense, and we do not need it. We can remove it by following the quick steps below.
Step 1. Open the Layout > Delete.
Step 2. Then click on the Delete Table option to delete the complete table along with the data in it.
Streamline Your Workflow with AI
While manual editing is key, we can now use MagicSlides AI PPT Maker to save hours. This powerful AI tool transforms text or prompts into powerful and attractive professional presentations instantly. It also handles the layout and visuals automatically, which makes the creation of PPT easy.
Final Words
Here, we explained the complete table operations in PowerPoint, including how to insert a table in PowerPoint and how to delete a table. Now, you can go through the steps to make your data more attractive for a quick comparison.
FAQ’s
Q1. How to add a table in PowerPoint slides?
A – Open the slide where you can want to add a table.
Then go to the Insert > Table and choose the rows and columns.
Q2. How to add a row above the specific row in PPT?
A – You can use the Insert Above option to add a row above the specific row from Layout > Insert Above option.
Q3. How to delete a complete table in PowerPoint?
A- You can go to the Layout > Delete > Delete Table to delete the complete table.
Also Read:


