How to stop screen recording started in PowerPoint


Stopping screen recording in PowerPoint is simple and ensures seamless video integration into your presentation
PowerPoint’s built-in screen recording feature is a useful tool for capturing on-screen activity directly into your presentation.
Whether you're recording a tutorial, demonstration, or lecture, knowing how to start and stop the recording efficiently is essential.
In this guide, we’ll walk you through the steps to stop a screen recording in PowerPoint once you've captured what you need.
How to Stop Screen Recording in PowerPoint: A Step-by-Step Guide
Step 1: Start Screen Recording in PowerPoint
To begin, you’ll need to start the screen recording. Navigate to the "Insert" tab at the top of PowerPoint and click on "Screen Recording."
Select the area of your screen you want to record, and once ready, hit the “Record” button. Your recording will now start.
Step 2: Stop the Screen Recording
Once you’ve captured everything you need, hover your mouse to the top of your screen to reveal the control dock.
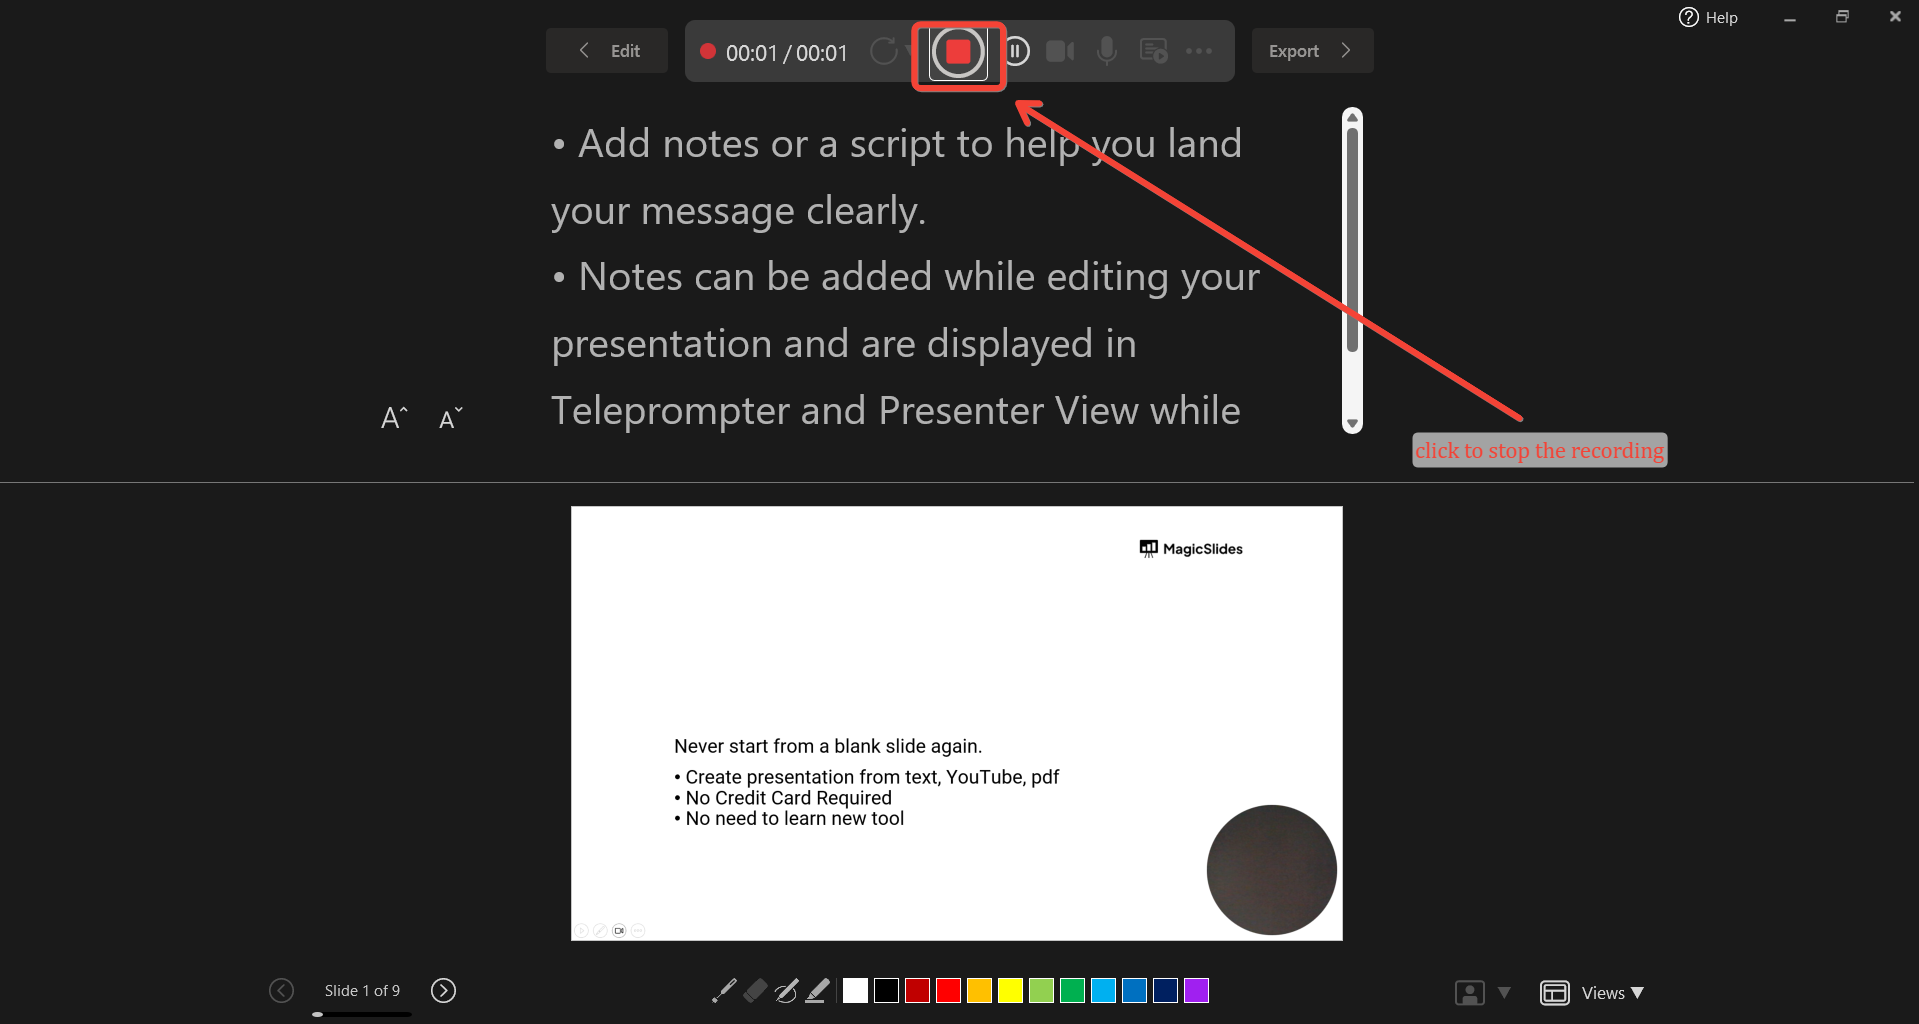
On this dock, click the "Stop" button (a square icon) to end the recording.
If the dock isn’t visible, move your mouse to the top center of the screen, and it should appear automatically.
Step 3: Save Your Recording
After stopping the recording, PowerPoint automatically inserts the captured video onto your slide.
You can then resize, move, or edit the video within the presentation.
To save the recording as a separate file, right-click on the video, choose "Save Media As," and select a destination folder to store the video in a format like MP4 or WMV.
Step 4: Continue Your Presentation
After completing and saving your screen recording, you can proceed with adding more slides or finishing your presentation.
The recording will be stored within the PowerPoint file unless saved separately, and you can easily move or format it like any other object on the slide.
Now that you know how to stop screen recording in PowerPoint, explore how to change background graphics in PowerPoint to create visually appealing slides.
Conclusion
Stopping a screen recording in PowerPoint is a straightforward process that ensures you can efficiently capture and embed video content directly into your presentations.
With just a few simple steps, you can start and stop recordings, save them, and even edit them within PowerPoint.
By following this guide, you'll be able to create informative and engaging presentations with ease.
FAQs are here to guide!
Can I stop and resume screen recording in PowerPoint?
No, PowerPoint does not allow pausing and resuming during a screen recording. You would need to stop and start a new recording.
How do I access the recording toolbar if it disappears during recording?
Move your mouse to the top center of the screen, and the toolbar should automatically reappear for you to stop the recording.
Can I record audio along with the screen in PowerPoint?
Yes, when you start screen recording in PowerPoint, the microphone is automatically enabled. You can toggle this setting on or off before starting the recording.


