How to Do Hanging Indent on Canva in 3 Simple Methods?


Learn how to do hanging indent on Canva with easy step-by-step methods using the ruler, spaces, or text boxes. Perfect for APA, MLA, and bibliography formatting.
To learn how to do hanging indent on Canva, add your text to a Canva text box, keep the first line aligned to the left margin, and manually indent the remaining lines using the ruler (if available), spacing adjustments, or separate text boxes. Although Canva doesn’t offer a built-in hanging indent feature, these simple methods create the same professional result.
If you are looking for a way for how to do hanging indent on Canva you are probably working on a reference page or a bibliography or maybe a resume or a presentation that needs to look professional.
If you’re also exploring how to create a presentation in Canva, knowing proper text formatting techniques like hanging indents can help your slides look more polished.The good news is that creating a hanging indent on Canva is easier than it looks. While Canva doesn’t offer a one-click option, there are several simple workarounds that deliver clean results.When you are making a list of references it is really helpful to know how to make a hanging indent on Canva.
This is true if you are doing an APA reference list or an MLA Works Cited page or a Chicago bibliography.In this guide, you’ll learn how to do hanging indent on Canva using three proven methods. We’ll also cover how to do a hanging indent on Canva for different projects, common formatting mistakes, and tips to make your text look polished and professional. If you regularly design documents in Canva, you may also find how to use Canva Magic write useful for generating and refining text before formatting it.
What Is a Hanging Indent?
A hanging indent is a paragraph format where the first line stays at the left margin, while all following lines are indented. It’s commonly used for APA references, MLA Works Cited pages, and Chicago bibliographies.If you’re learning how to do hanging indent on Canva, remember that a hanging indent is different from a first-line indent. Since Canva doesn’t offer built-in paragraph formatting, you’ll need to create a hanging indent on Canva manually using simple workarounds.
Can You Do a Hanging Indent on Canva?
Yes, you can make a hanging indent on Canva. There is no special button for it. If you want to know how to make a hanging indent on Canva you have to do a trick to get it to look the same.People usually do this by using the ruler on Canva or by changing the space between the lines of text or by putting the text in boxes.
Each way works well it just depends on what your project looks like and what kind of document you are making.If you are making a list of references for a paper like APA references or MLA citations or if you are making a bibliography learning how to make a hanging indent on Canva will make your paper look nicer and more professional.
Canva is a tool for this. Making a hanging indent on Canva is really useful. In the part we will show you the easiest way to do it one step, at a time.
Method 1. How to Do Hanging Indent on Canva Using the Ruler
If you’re looking for the easiest way to learn how to do hanging indent on Canva, the ruler method is your best option. It gives you better control over paragraph formatting and creates a clean, professional-looking Canva hanging indent.
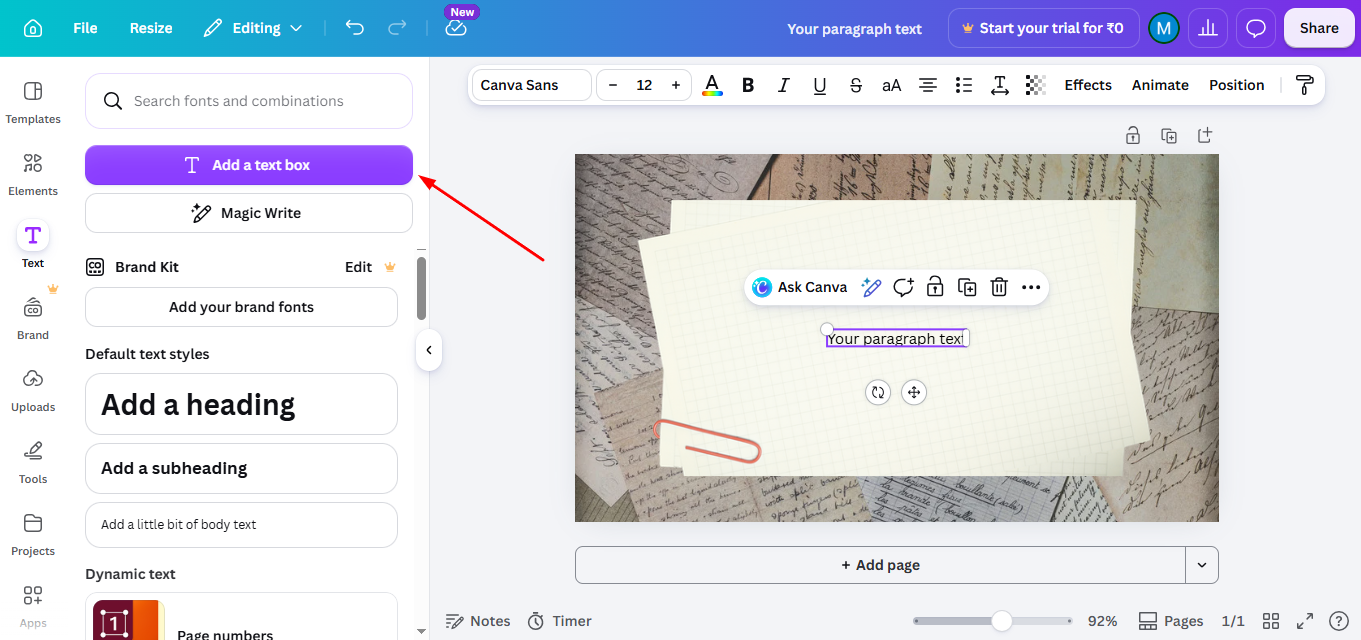
Step 1. Open your Canva document, presentation, or Canva Docs file. Add a text box or select the text you want to format.
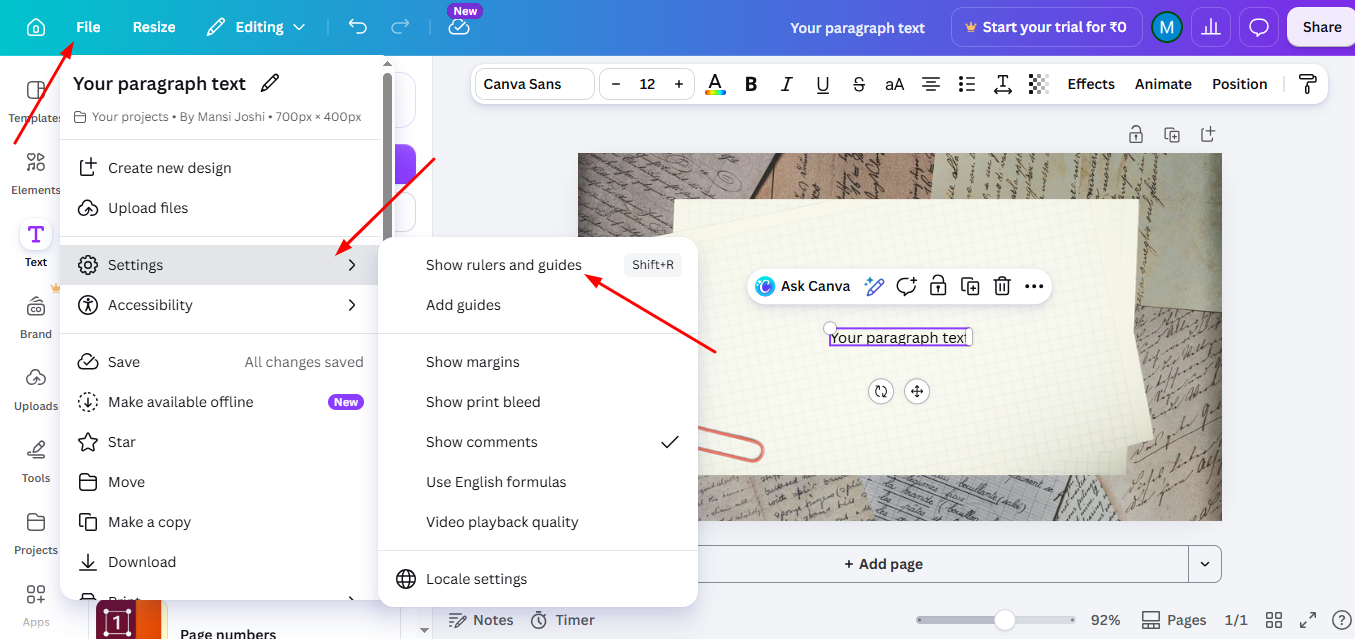
Step 2. Go to File > View Settings and enable the Rulers and Guides option if it’s available. This makes it easier to align your text accurately.
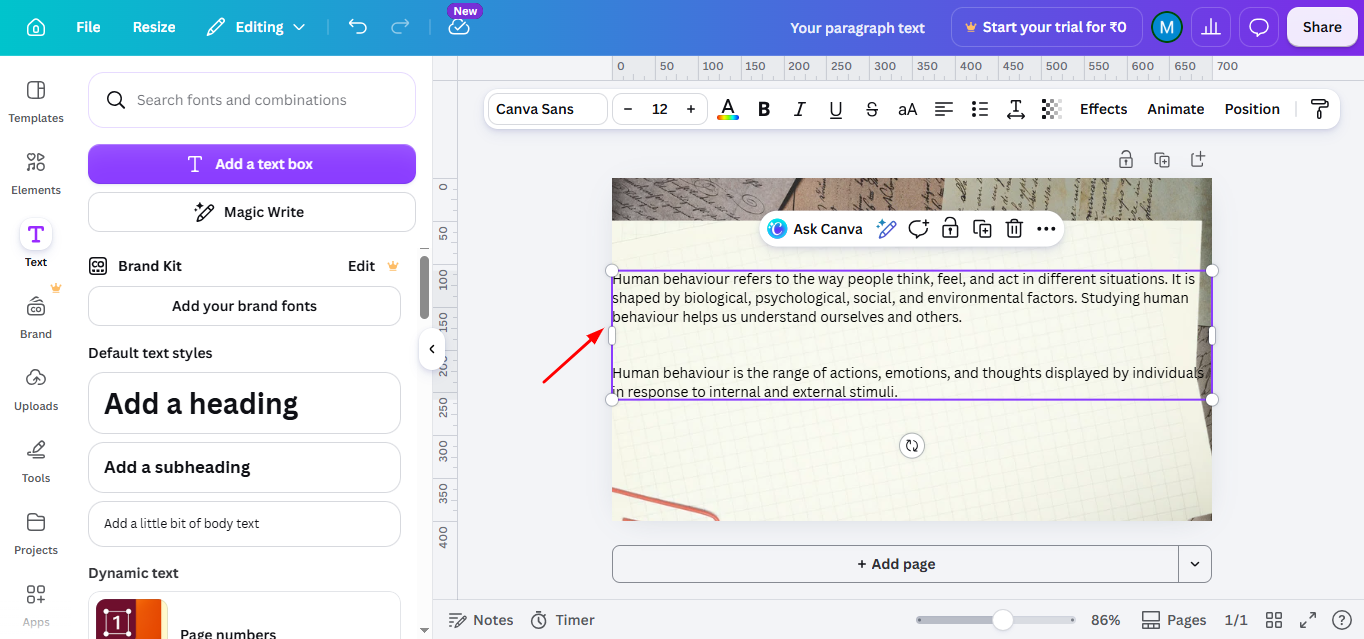
Step 3. Keep the first line at the left margin. Then move the second line and all following lines slightly to the right using the ruler or text spacing until you get the desired hanging indent on Canva.
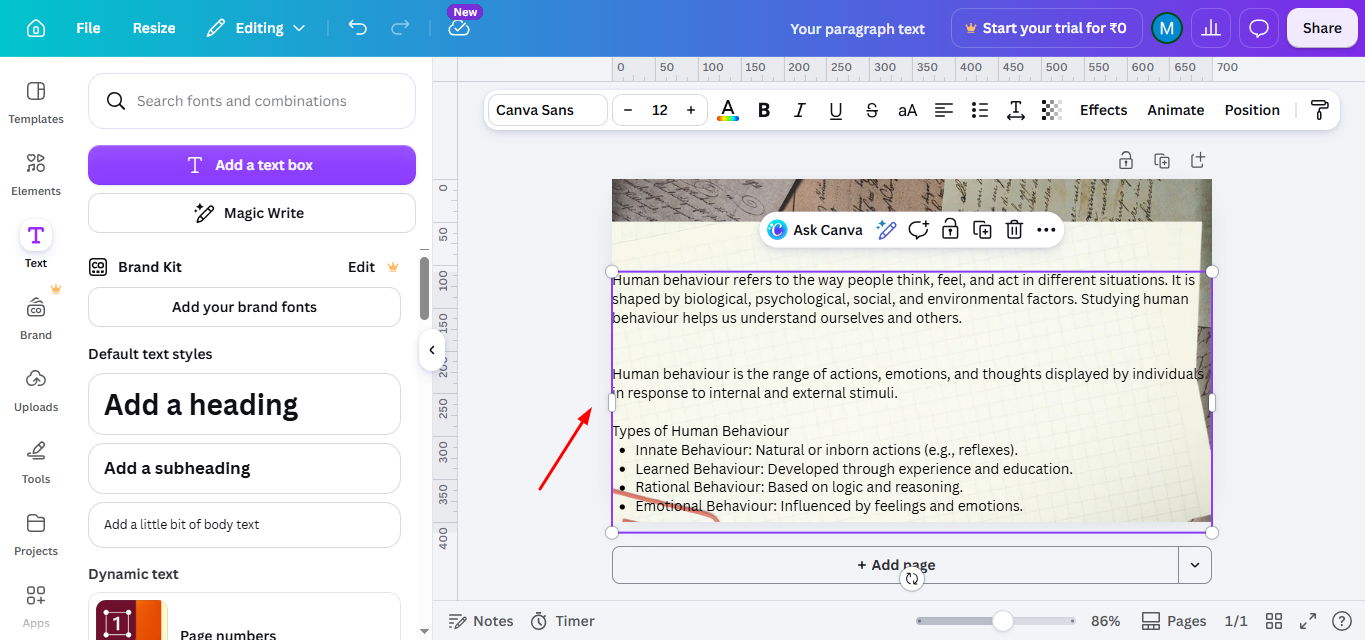
Step 4. Review your paragraph to make sure all lines are evenly aligned. This is especially important when formatting APA references, MLA Works Cited, or a bibliography.
Method 2. How to Do Hanging Indent on Canva Manually Using Spaces
If the ruler isn’t available, you can still learn how to do hanging indent on Canva by using manual spacing. This method works in most Canva designs.
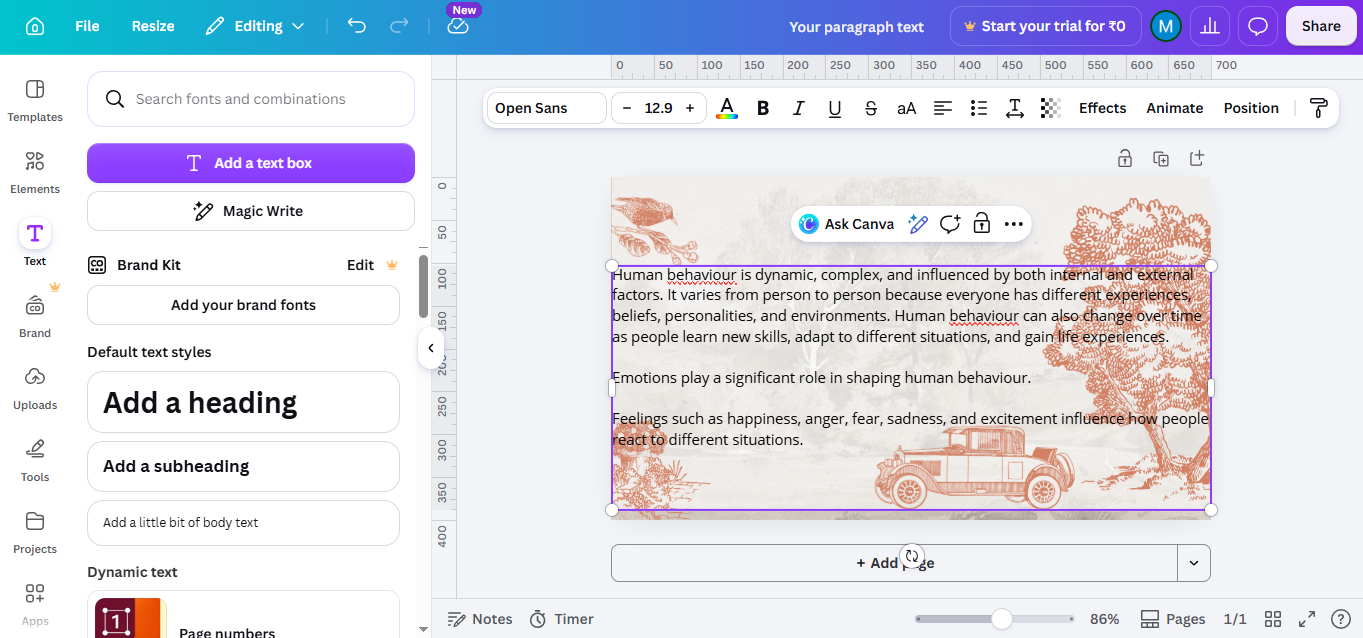
Step 1. Paste or type your paragraph into a Canva text box. Press Enter where you want the second line to begin.
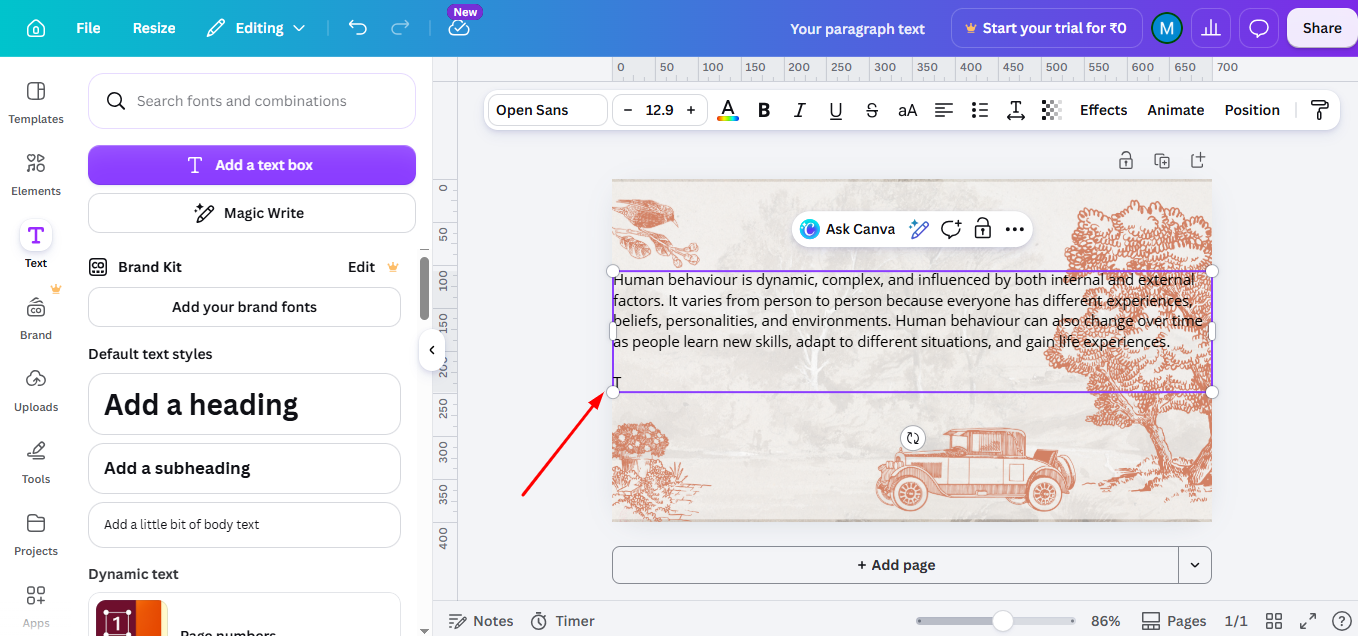
Step 2. Place your cursor before the second line and press the Spacebar several times until the line is indented. Repeat this for each new line to create a hanging indent on Canva.
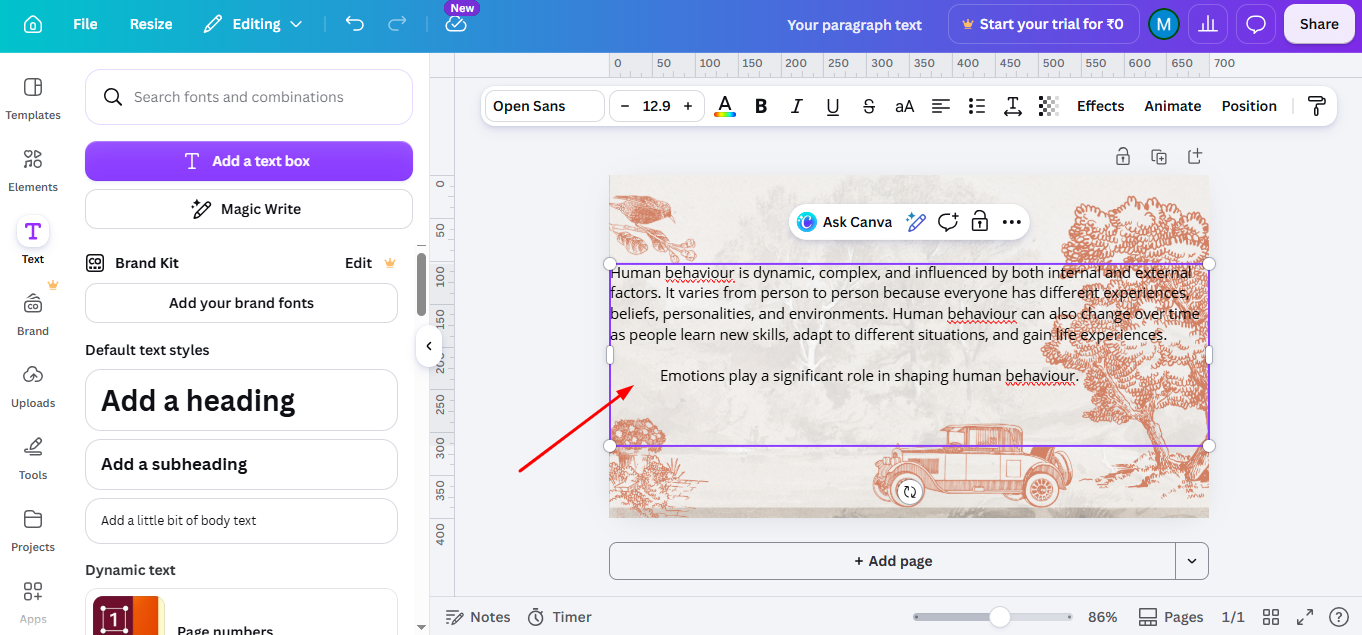
Step 3. Check that all subsequent lines line up evenly beneath the first line. This Canva hanging indent method is ideal for short reference lists, resumes, and simple documents.
After achieving the hanging indent, review your design to make sure the formatting looks right. Once you’re satisfied, click “Share” to either download your design in your preferred format (PNG, PDF, JPG) or share it directly via social media or email.Once you’ve mastered hanging indents, take your design to the next level by learning how to change the size of a Canva template for more customization.
Build Better Presentations While Canva Handles the Design
If you are learning to do hanging indent on Canva for presentations, reports or academic projects then formatting is one part of it. Creating a presentation, from the start can take a lot of time.
MagicSlides AI presentation Tool helps you make presentations in just a few minutes. You can make them from text, PDFs, Word documents, URLs or even YouTube videos. Once your slides are ready you can change them in Canva. You can add a Canva hanging indent for reference lists, bibliographies or citations.
It is a way to save time.
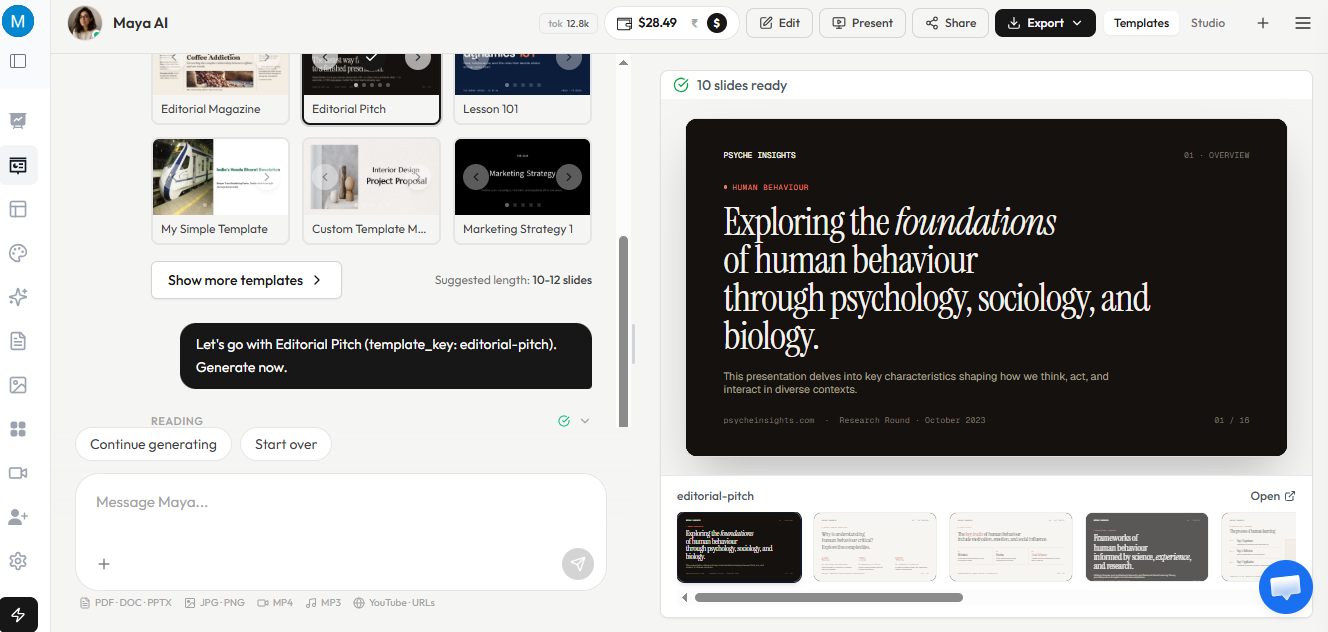
Let’s have look at its easy to use AI powered interface

You still get to make presentations that look good and professional. MagicSlides and Canva make it easy.
Simply chat with our AI Bot Maya and ask for whatever you need in your presentation.
You can use MagicSlides to generate slides and Canva to customize them.
Conclusion
Although Canva doesn’t have a direct hanging indent feature, following these simple steps will allow you to manually create one and format your text the way you need.With a bit of manual adjustment, your text will look professional and well-organized, whether it’s for citations, bibliographies, or formatted lists.
FAQs
Can I use the tab key for hanging indents in Canva?
Unfortunately, Canva doesn’t support the tab key for indenting. You need to use spaces to create the indent manually.
Is there an automatic hanging indent feature in Canva?
No, Canva doesn’t have an automatic hanging indent feature, but the effect can be achieved manually as described in the steps above.
Can I create hanging indents in the Canva mobile app?
Yes, the process is similar on the Canva mobile app. You can manually space the second line to create the hanging indent.


