Addon google slides iconPPT with AISlide TemplatesPPT TemplatesPricingBlog
    PPT with AISlide TemplatesPPT TemplatesPricingBlog
    1. Home
    2. Blog
    3. How to Group Items in PowerPoint

    How to Group Items in PowerPoint

    Ajay Sai

    Published By

    Ajay Sai

    Approved By

    Admin

    Published On

    November 12th, 2025

    Reading Time

    2 min read

    Easily manage and organize your PowerPoint designs by grouping items for seamless movement and editing

    Grouping items in PowerPoint is a useful technique that allows you to combine multiple objects into one.
    This makes it easier to move, resize, or format them as a single unit, saving you time and ensuring consistency in your designs.
    Follow this step-by-step guide to learn how to group items effectively in PowerPoint.

    How to Group Items in PowerPoint | Steps to Group Items in PowerPoint

    Step 1: Open Your PowerPoint Presentation

    Launch PowerPoint and open the presentation where you want to group items.
    notion image
    Navigate to the slide that contains the objects you wish to group.

    Step 2: Select the Items You Want to Group

    Hold down the Shift key on your keyboard.
    notion image
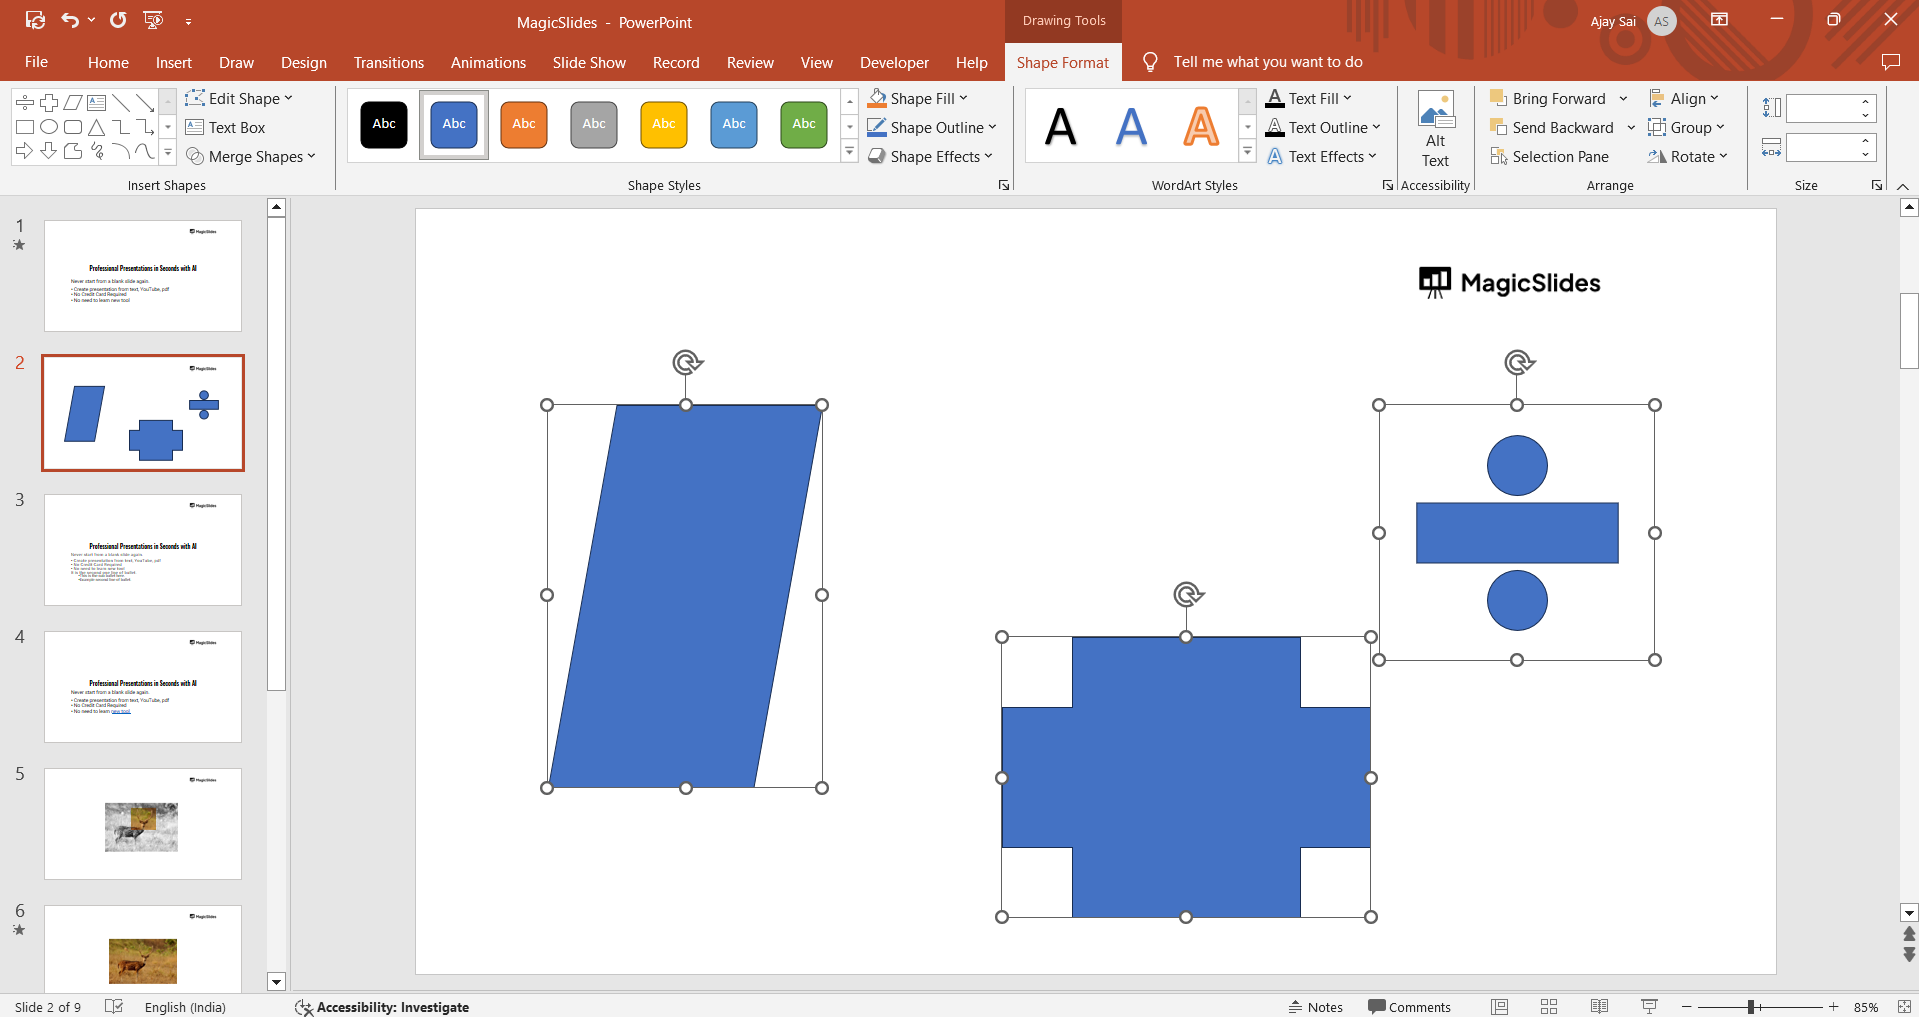
    Click each object you want to include in the group. Selected items will show bounding boxes.

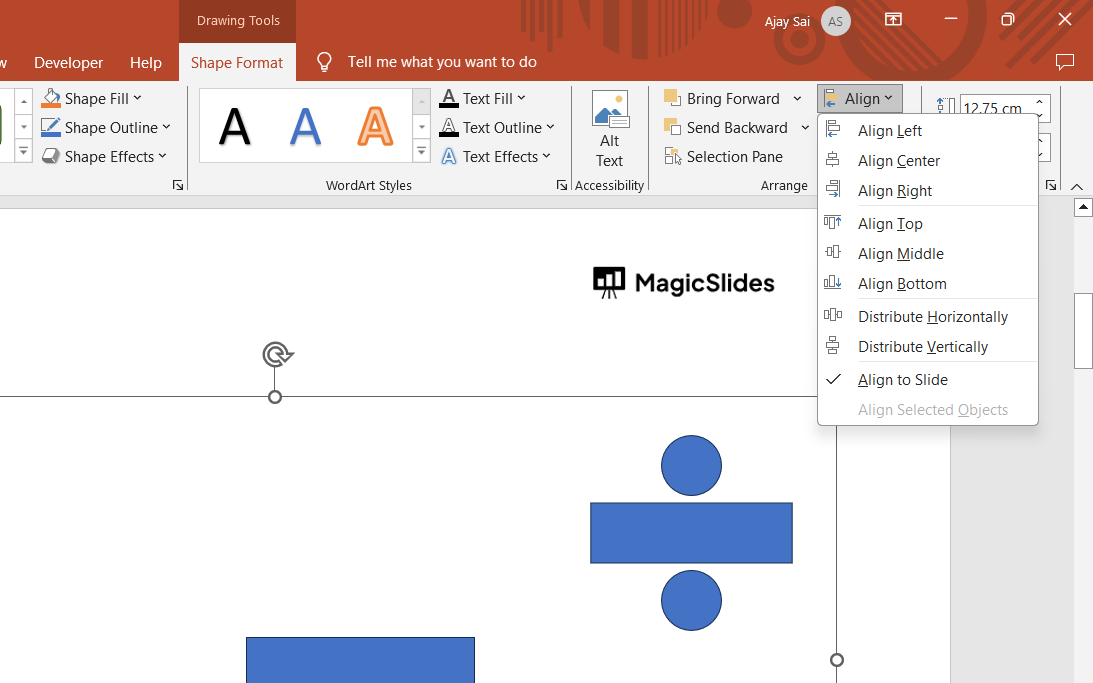
    Step 3: Group the Selected Items

    With the objects selected, right-click anywhere within the selection.
    notion image
    From the context menu, click on “Group” > “Group.” Alternatively, you can use the Ctrl + G (Windows) or Command + G (Mac) shortcut.
    The items will now be combined into a single group.

    Step 4: Adjust the Group as Needed

    Move the grouped items by clicking and dragging. Resize the group by dragging the handles on the bounding box.
    notion image
    Format the group as a whole by applying effects, colors, or animations.

    Step 5: Ungroup Items (Optional)

    If you need to make individual changes to an object within the group, right-click the group.
    notion image
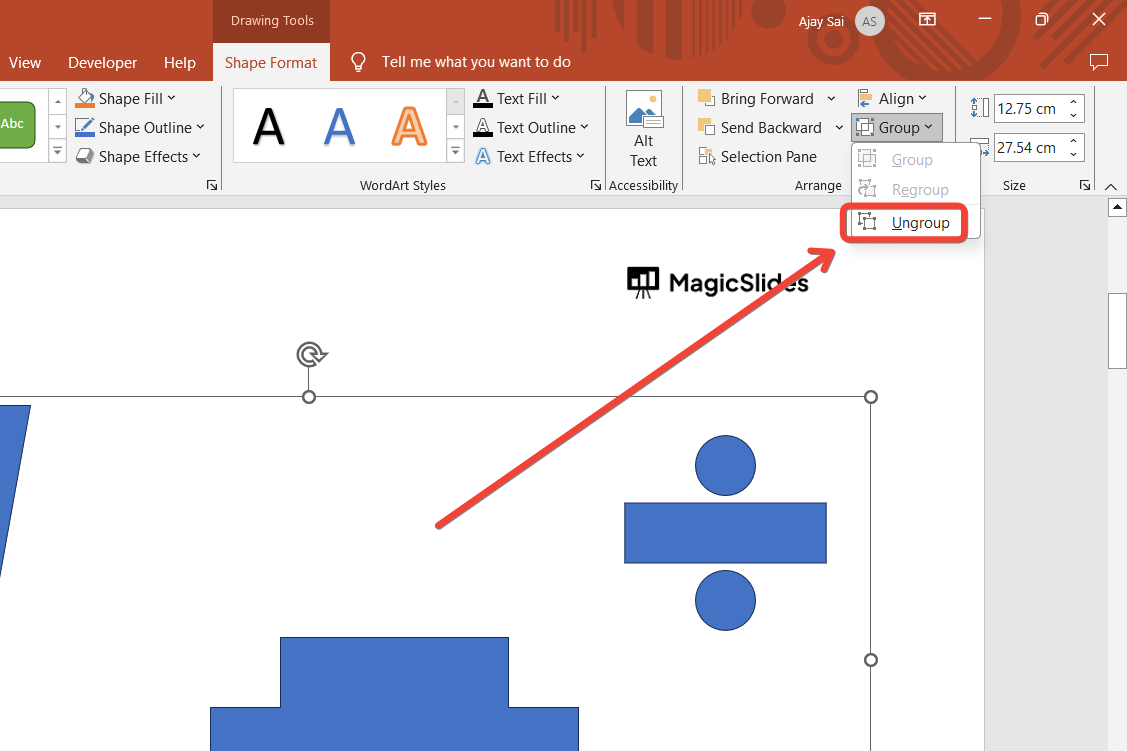
    Select “Group” > “Ungroup” or use the shortcut Ctrl + Shift + G (Windows) or Command + Shift + G (Mac).
    Make the required adjustments, then regroup the items if needed.

    Conclusion

    Grouping items in PowerPoint is a simple yet powerful feature that streamlines your workflow and ensures precise alignment of objects.
    By following these steps, you can easily manage complex designs and create professional-looking presentations.
    Mastering this technique will save you time and enhance the visual appeal of your slides.

    FAQs on Grouping Items in PowerPoint

    Can I group different types of objects together?

    Yes, PowerPoint allows you to group text boxes, shapes, images, and other objects regardless of their type.

    How do I group items across multiple slides?

    Grouping only works on objects within the same slide. You can duplicate grouped objects to other slides for consistency.

    Why is the Group option greyed out?

    Ensure you have selected at least two objects. The Group option is unavailable if only one item is selected.
    By using the grouping feature effectively, you can simplify your design process and create polished presentations with ease.

    Share on socials

    About the author

    Ajay Sai profile photo
    Ajay Sai— writer at MagicSlides.app

    Ajay have been a techincal writer for more than 2+ years. from coding tutorials to using day to day apps he have helped 100k+ visitors with their various queries

    More from Ajay

    More from the blog

      250+ Good Morning Messages for Her (Romantic, Deep, Cute & Sweet)

      30 January 2026

      200+ Heart Touching Birthday Wishes for Sister (Short, Funny and More)

      29 January 2026

      50+ History Presentation Topics For 2026

      28 January 2026

      How to Add Music to Your Canva Presentation: A Step-by-Step Guide

      27 January 2026

      15 Quick Tips To Use ChatGpt At Work

      22 January 2026

      11 Best AI Tools for Business in 2025

      22 January 2026

      How to Create an Infographic That Clearly Communicates Your Message

      20 January 2026

      How to Create a Sales Presentation Template in Google Sheets

      20 January 2026

      How to Make a Pie Chart on Google Slides in Simple Steps

      19 January 2026

    Table of Contents

    Create Presentations in Seconds

    Transform your ideas into professional presentations with AI. No design skills needed.

    Try MagicSlides Free

    Create Stunning Presentations with AI in Seconds ✨

    Transform any topic, text, YouTube video, PDF or URL into beautiful presentations instantly with MagicSlides AI.

    Try MagicSlides AI Presentation Maker
    MagicSlides AI Presentation

    Footer

    Solutions

    • MagicSlides App
    • Google Slides Add-on
    • MagicSlides in Chrome
    • MagicSlides in Figma
    • MagicSlides in ChatGPT
    • MagicSlides in Telegram
    • MagicSlides in Zapier
    • MagicSlides in Figma Slides

    Tools

    • AI PPT Tools
    • QR Code Generator
    • Design Tools
    • PPT Templates
    • Slide Templates
    • PDF Tools

    Examples

    • AI Presentations
    • PPT by MagicSlides
    • Quizzes
    • Charts
    • Coloring Pages

    Resources

    • Changelog
    • Documentation
    • API Docs

    Top Blogs

    • How to Create Presentation Using ChatGPT
    • 100+ Best Seminar Topics for Students in 2025

    Company

    • Help
    • MCP
    • Blog
    • Pricing
    • Affiliate Program
    • Manage Subscription
    • Privacy Policy
    • Contact Us
    • Terms & Conditions
    • Refund & Cancellation Policy

    We also built

    • SheetAI - GPT For Sheets
    • MagicForm - GPT For Google Forms
    • SecondBrain.fyi
    • BlogBee - Free Blogging Platform

    © 2026 IndianAppGuy Tech Pvt Ltd. All rights reserved.