Addon google slides iconPPT with AISlide TemplatesPPT TemplatesPricingBlog
PPT with AISlide TemplatesPPT TemplatesPricingBlog
  1. Home
  2. Blog
  3. How to circle something in powerpoint in few simple steps

How to circle something in powerpoint in few simple steps

magicslides app

Published By

magicslides app
Mohit Kumar Jha

Approved By

Mohit Kumar Jha

Published On

July 23th, 2024

Reading Time

2 min read

to highlight a word or a sentence or an object we might consider circling it or highlight here is a simple guide to do so.

To circle something in Microsoft PowerPoint, you can use shapes and drawing tools to create a circular shape around the object you want to highlight. Here's how you can do it:
Step 1: Open the Presentation:
  • Launch Microsoft PowerPoint and open the presentation that contains the object you want to circle.
notion image
Step 2: Insert a Shape:
  • Go to the slide where you want to add the circular highlighting.
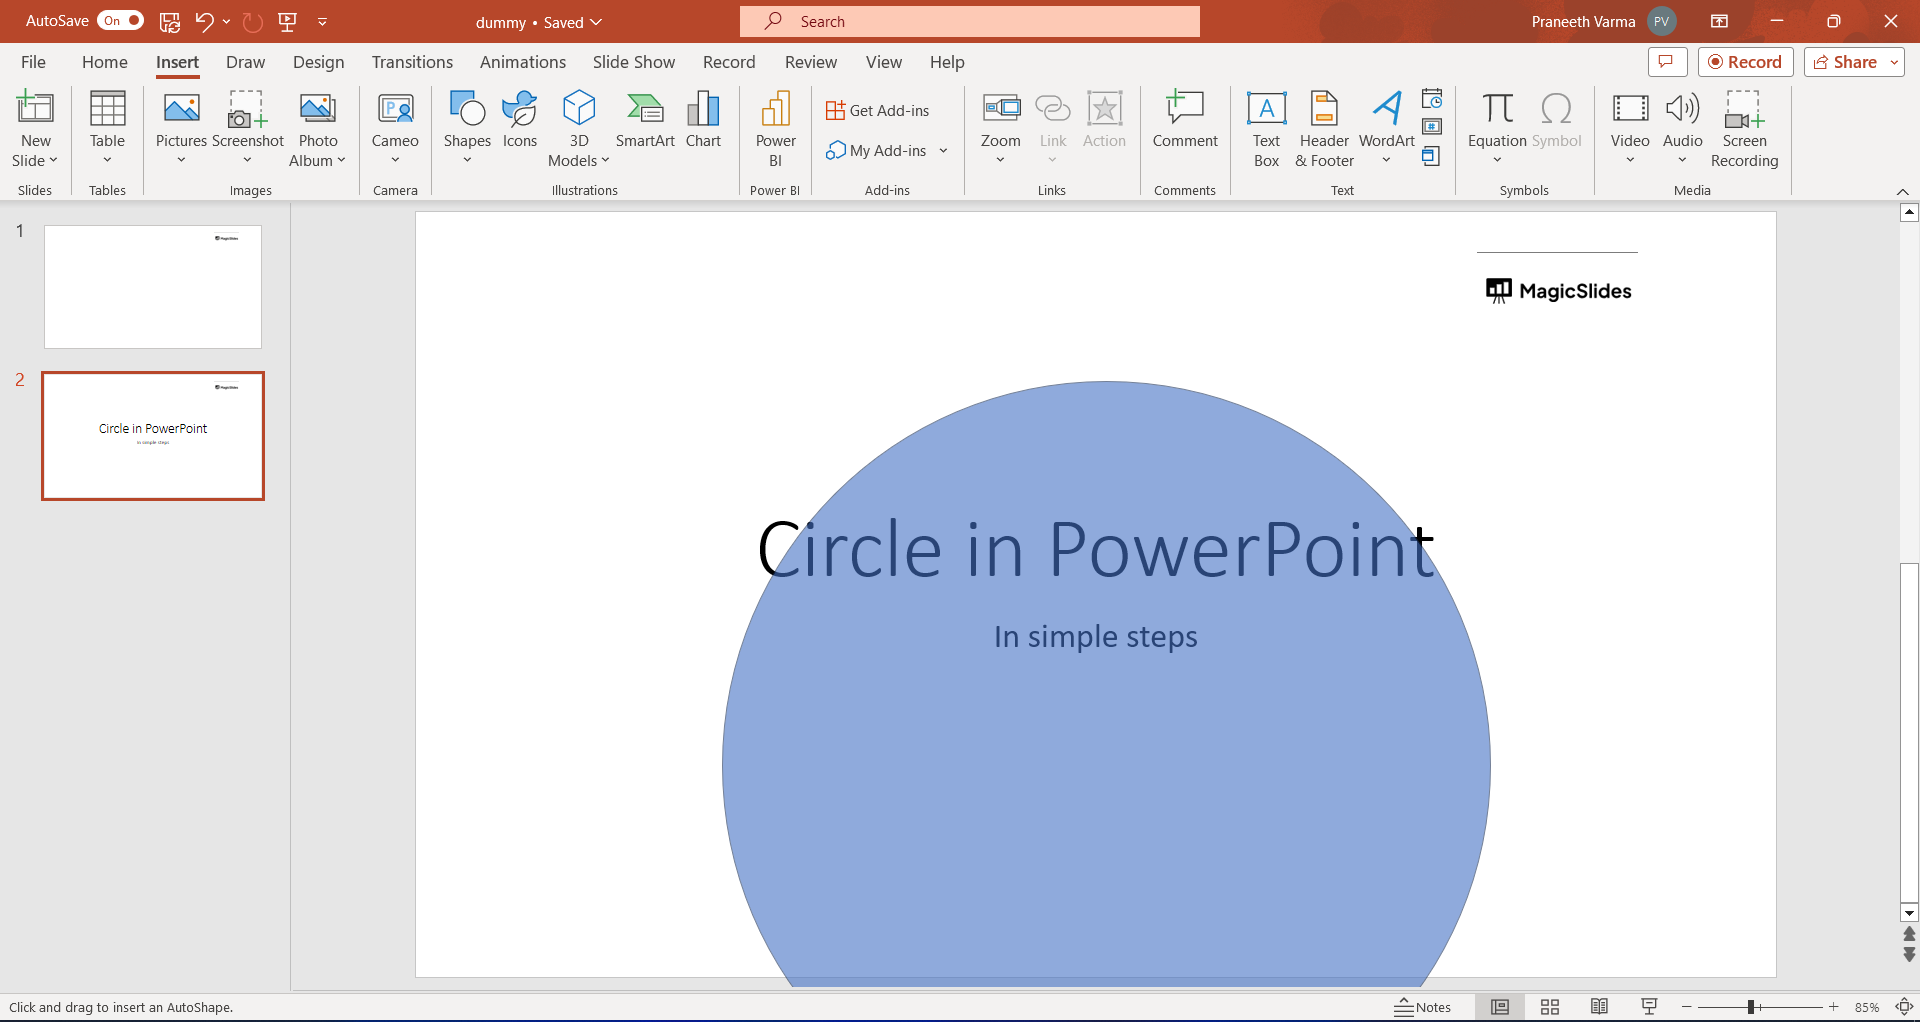
  • Click on the "Insert" tab in the ribbon at the top of the PowerPoint window.
Step 3: Choose a Circle Shape:
  • Click on the "Shapes" button in the "Illustrations" group.
  • From the dropdown menu, select the "Oval" shape (which is used to draw circles).
Step 4: Draw the Circle:
  • Click and drag on the slide to draw the oval shape. While dragging, hold down the "Shift" key to ensure you create a perfect circle instead of an ellipse.
notion image
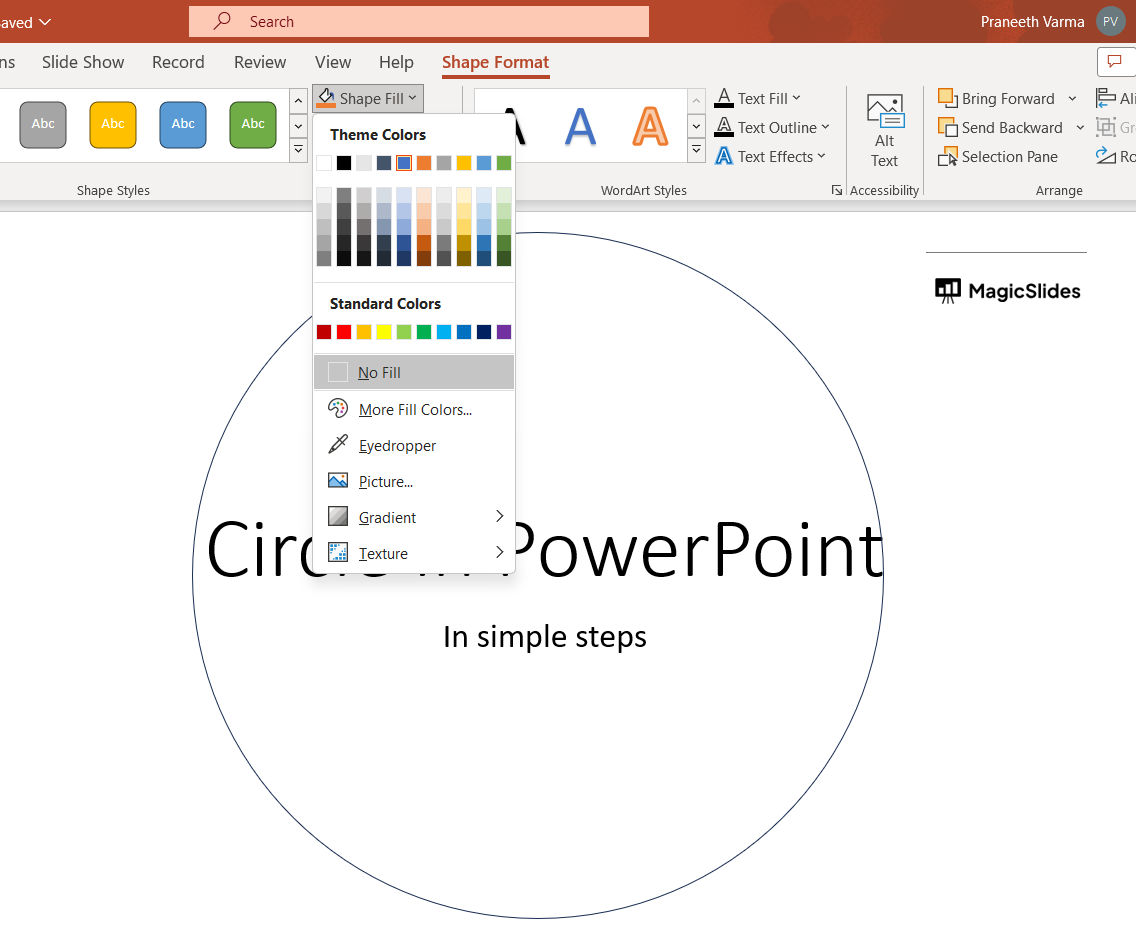
Step 5: Format the Circle:
  • With the circle shape selected, you can customize its appearance:
    • Right-click on the circle and choose "Format Shape" from the context menu to open the "Format Shape" pane.
    • In the pane, you can adjust the line color, line style, fill color, and other properties to match your preferences.
notion image
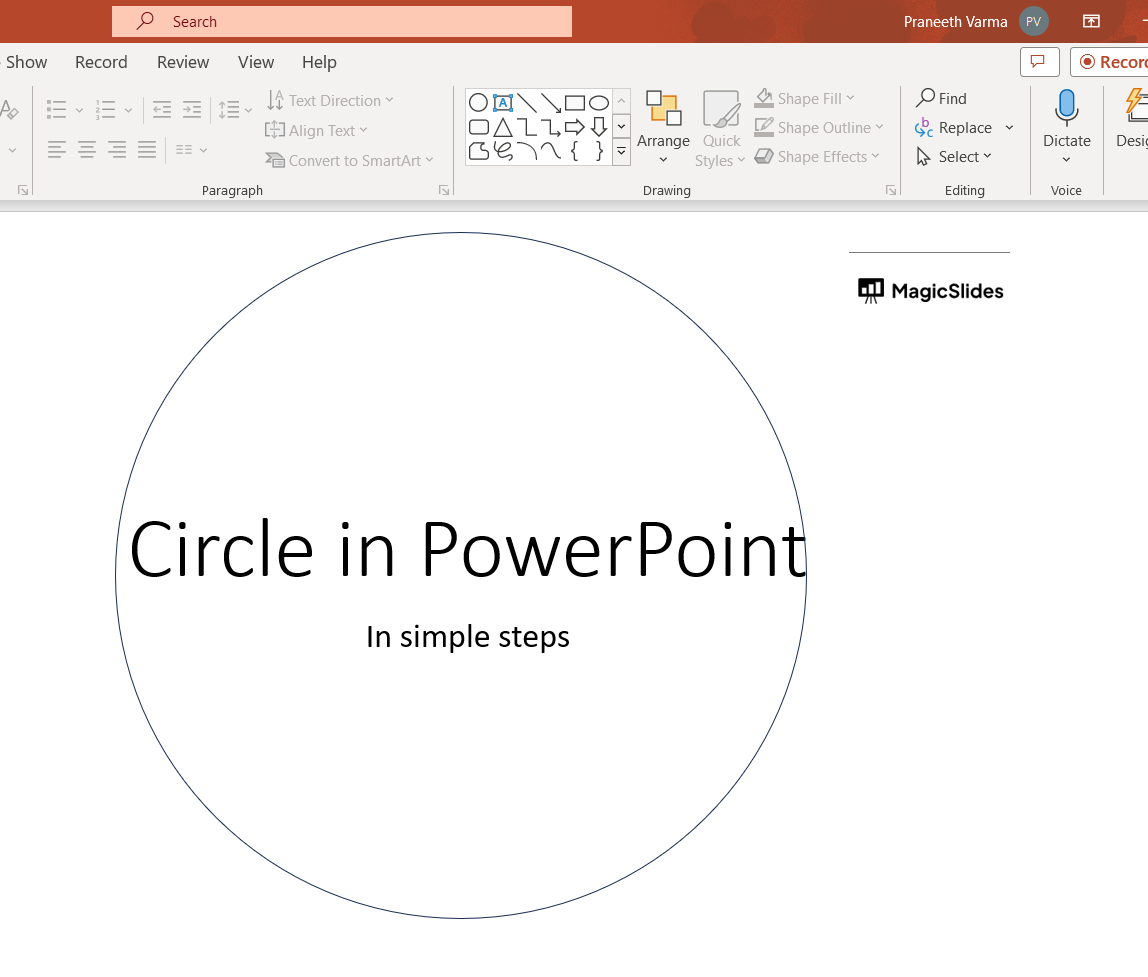
Step 6: Position and Resize:
  • Move and resize the circle to encompass the object you want to highlight. To make it transparent you can choose to not fill any color to the shape which is added.
notion image
Step 6: Adjust Layering:
  • If the circle is covering the object you want to highlight, you can right-click on the circle, go to "Order," and choose "Send to Back" to move it behind the object.
Step 7: Save Your Presentation:
  • After you've added the circle to highlight the object, remember to save your presentation.

Share on socials

About the author

Sanskar Tiwari profile photo
Sanskar Tiwari— Founder at MagicSlides

Sanskar is Founder at IAG Tech, For the past 3 years sanskar have build more than 24+ products, taught 100k students how to code.

More from Sanskar

More from the blog

    Table of Contents

    Create Presentations in Seconds

    Transform your ideas into professional presentations with AI. No design skills needed.

    Try MagicSlides Free

    Create Stunning Presentations with AI in Seconds ✨

    Transform any topic, text, YouTube video, PDF or URL into beautiful presentations instantly with MagicSlides AI.

    Try MagicSlides AI Presentation Maker
    MagicSlides AI Presentation

    Footer

    Solutions

    • MagicSlides App
    • Google Slides Add-on
    • MagicSlides in Chrome
    • MagicSlides in Figma
    • MagicSlides in ChatGPT
    • MagicSlides in Telegram
    • MagicSlides in Zapier
    • MagicSlides in Figma Slides

    Tools

    • AI PPT Tools
    • QR Code Generator
    • Design Tools
    • PPT Templates
    • Slide Templates
    • PDF Tools

    Examples

    • AI Presentations
    • PPT by MagicSlides
    • Quizzes
    • Charts
    • Coloring Pages

    Resources

    • Changelog
    • Documentation
    • API Docs

    Top Blogs

    • How to Create Presentation Using ChatGPT
    • 100+ Best Seminar Topics for Students in 2025

    Company

    • Help
    • MCP
    • Blog
    • Pricing
    • Affiliate Program
    • Manage Subscription
    • Privacy Policy
    • Contact Us
    • Terms & Conditions
    • Refund & Cancellation Policy

    We also built

    • SheetAI - GPT For Sheets
    • MagicForm - GPT For Google Forms
    • SecondBrain.fyi
    • BlogBee - Free Blogging Platform

    © 2026 IndianAppGuy Tech Pvt Ltd. All rights reserved.