How to time google slides for 20 seconds


Enhance your presentation flow effortlessly: Set each Google Slides transition to a perfect 20 seconds.
Unlock the potential of dynamic presentations by mastering the art of timing in Google Slides. In this step-by-step guide, we'll walk you through the process of setting each slide to a precise 20-second interval, ensuring your audience stays engaged. Let's dive in!
How to time google slides for 20 seconds
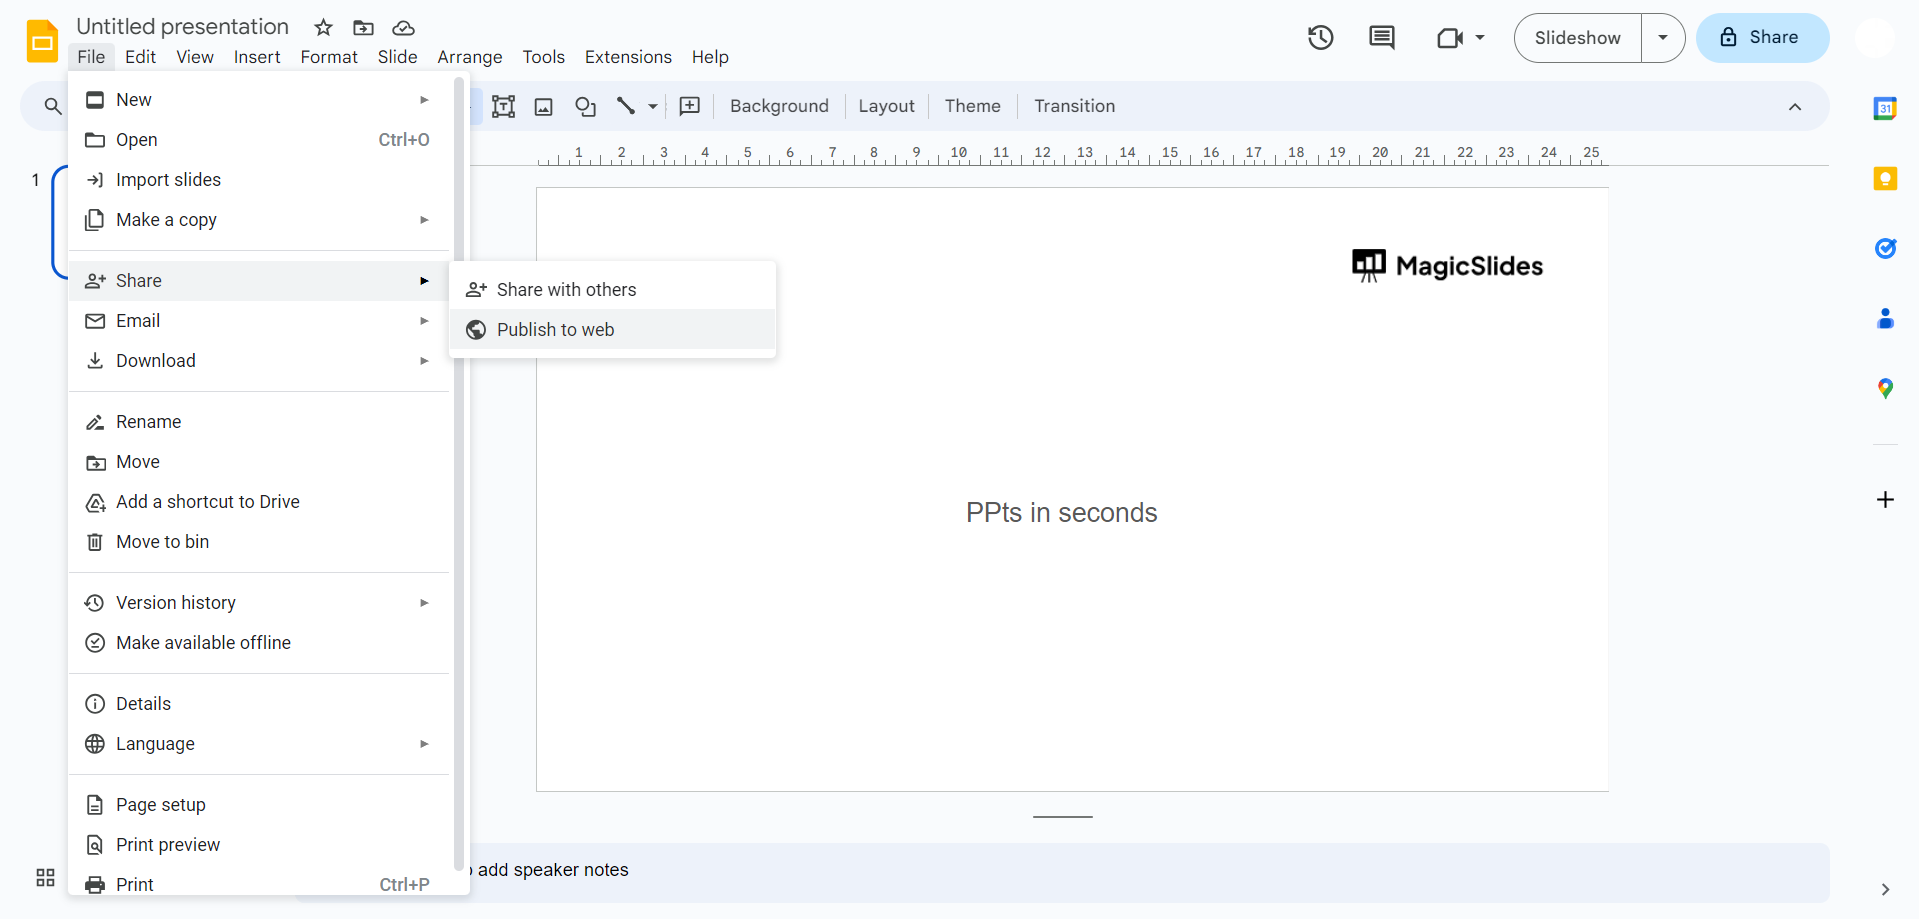
Step 1: Navigate to the "Publish to web" Option Begin by accessing the desired Google Slides presentation. Click on "File" in the top menu, hover over "Share," and select "Publish to web" from the dropdown menu.
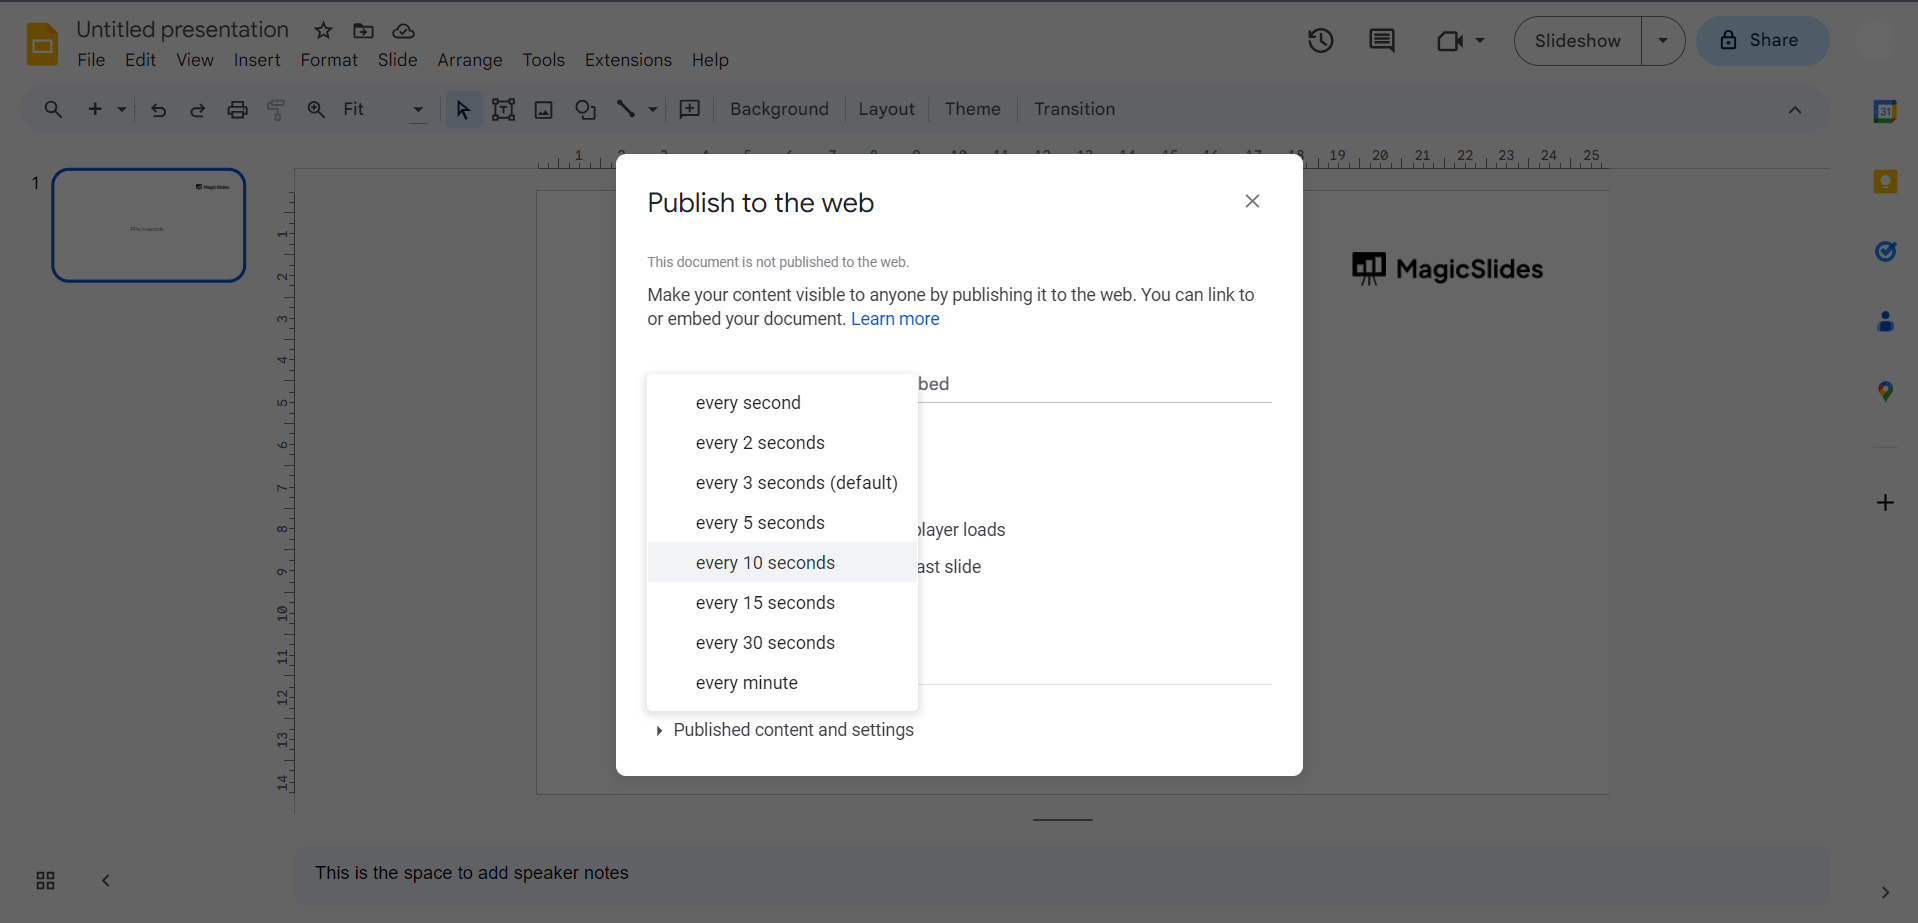
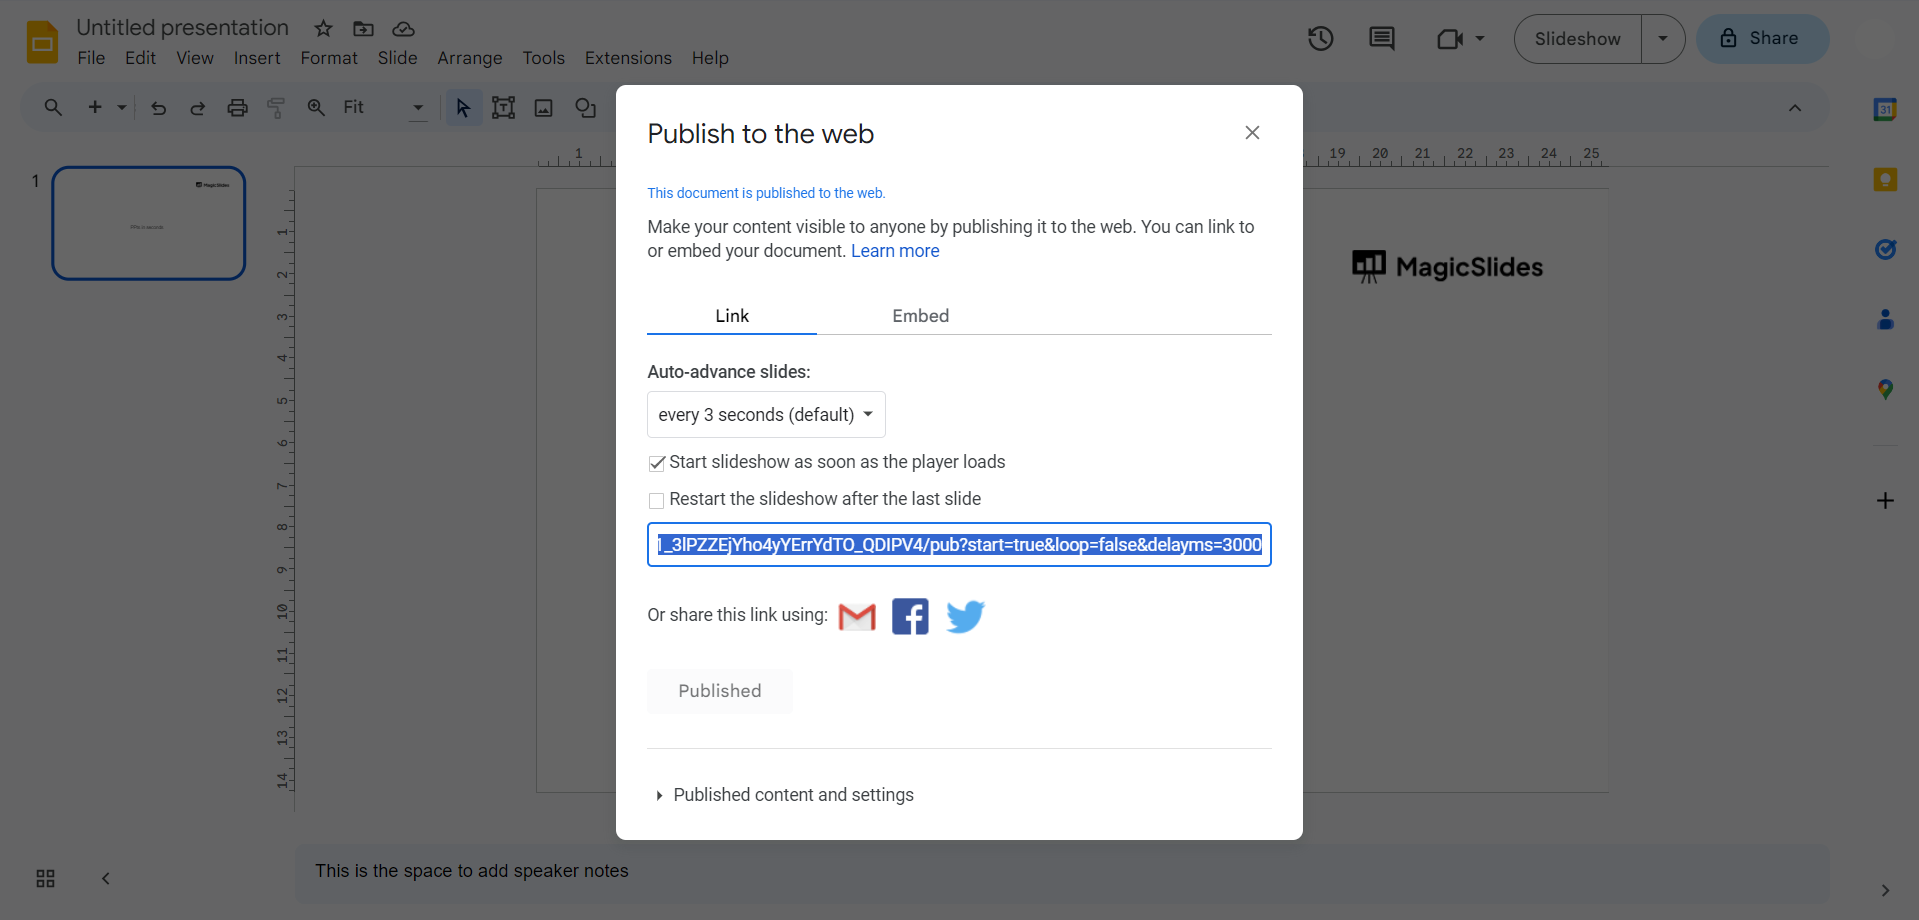
Step 2: Select the Timing Interval In the "Publish to web" pop-up window, choose the "Link" tab. Under "Auto-advance slides," select "every 10 seconds" from the drop-down menu. While there isn't a direct option for 20 seconds, we'll make the necessary adjustment in the next step.
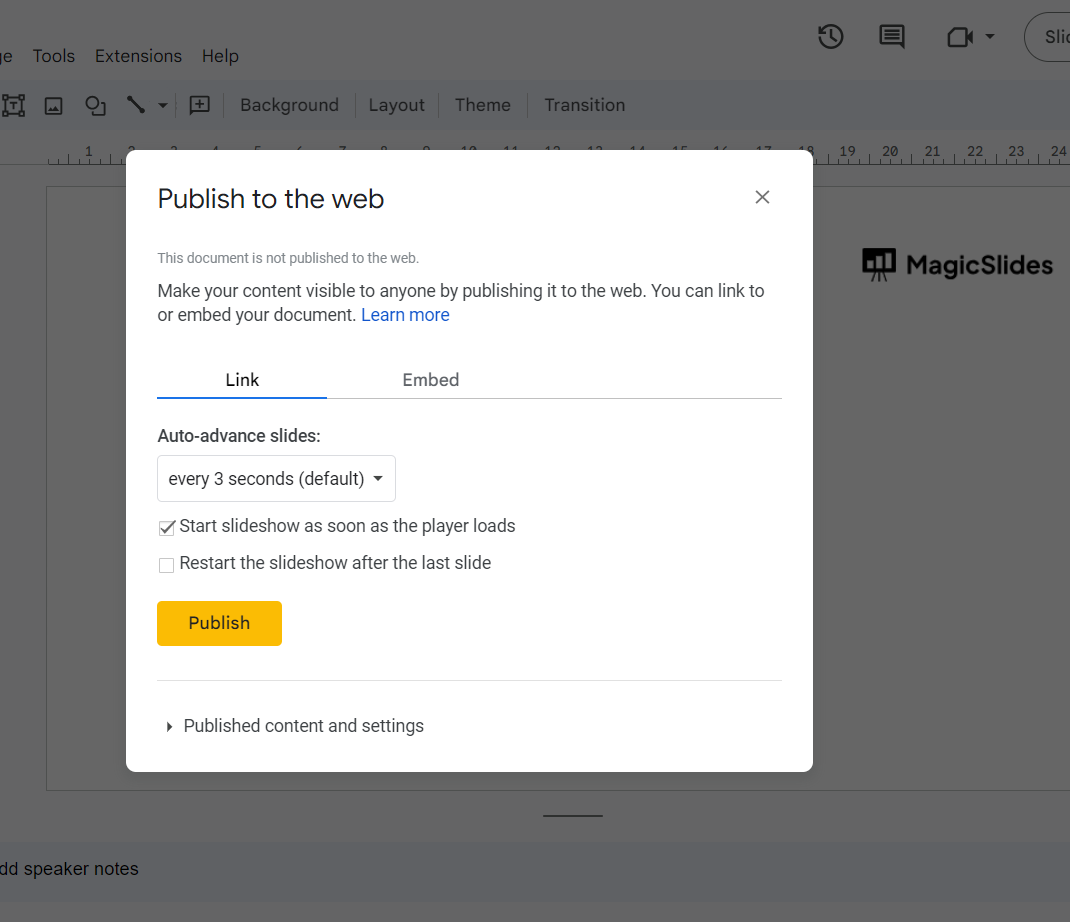
Step 3: Enable Immediate Slideshow Start Check the "Start slideshow as soon as the player loads" checkbox to ensure the presentation begins immediately upon opening.
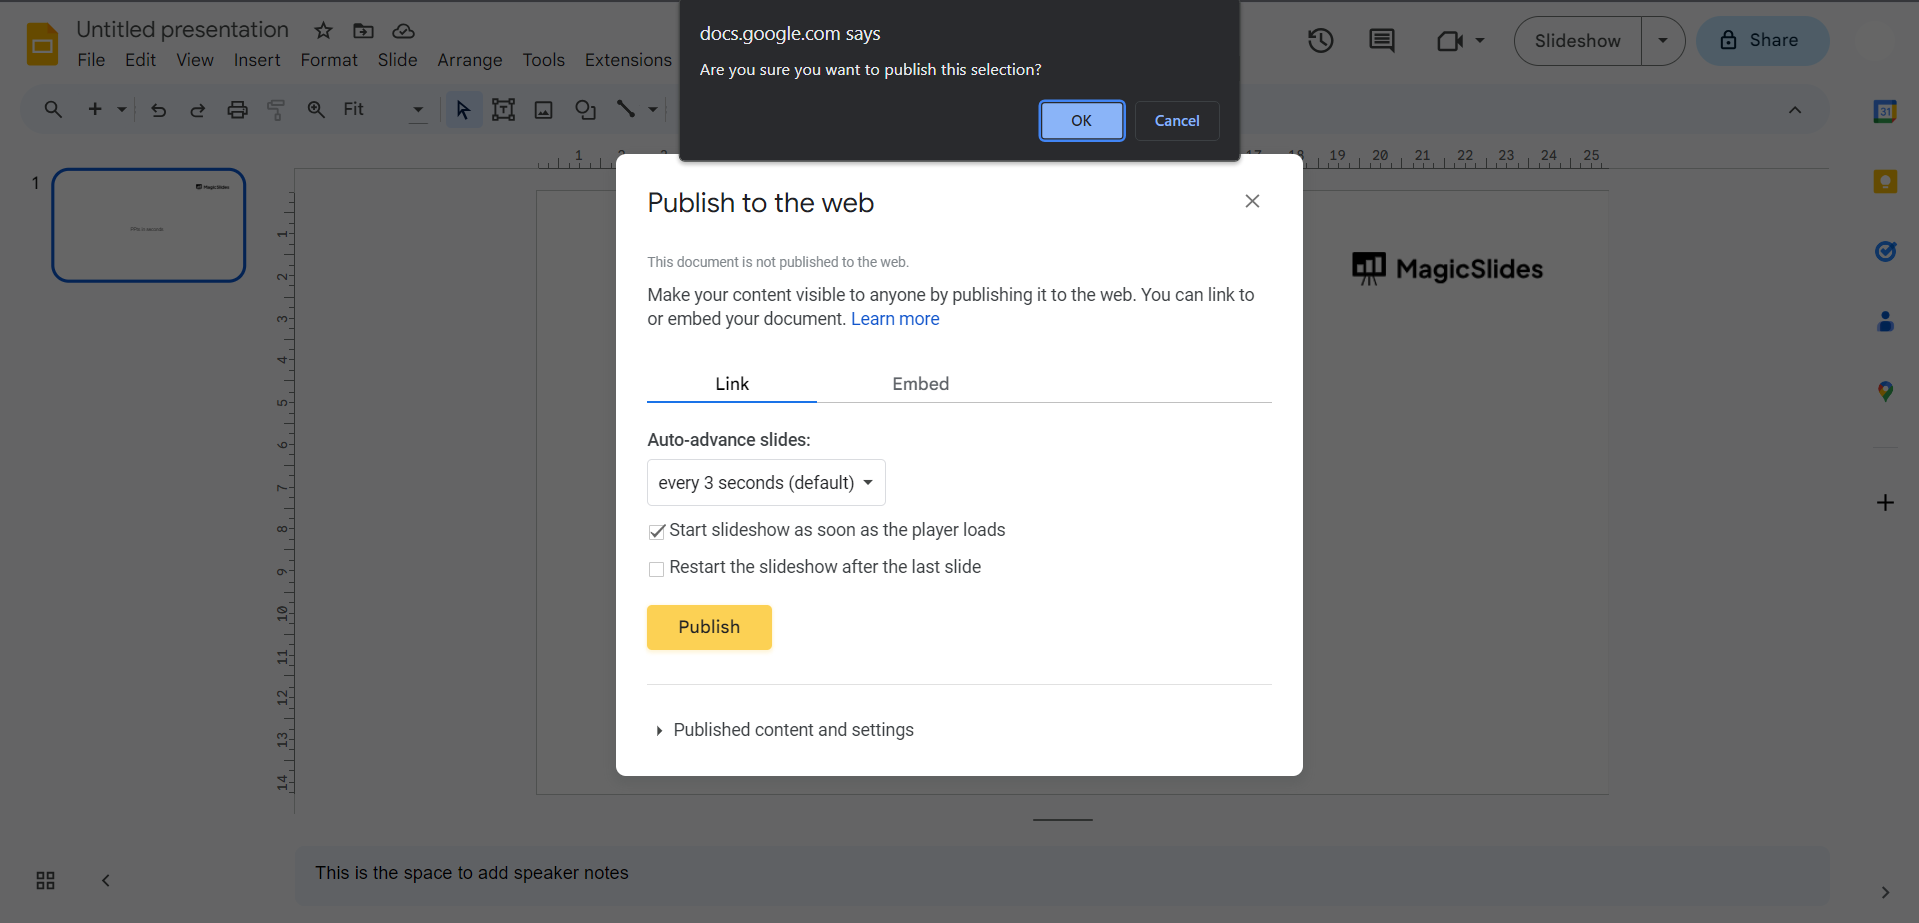
Step 4: Publish and Confirm Click the "Publish" button, then confirm by clicking "OK" in the pop-up message. This step finalizes the publication of your presentation to the web.
Step 5: Copy the Presentation Link Copy the provided presentation link from the "Publish to web" pop-up. This link will be modified in the next step to achieve the 20-second interval.
Step 6: Adjust the Timing in the Link Paste the link into a new browser tab or text editor. Locate the numerical value at the end of the link (e.g., "10000") and replace it with "20000." Copy the modified link.
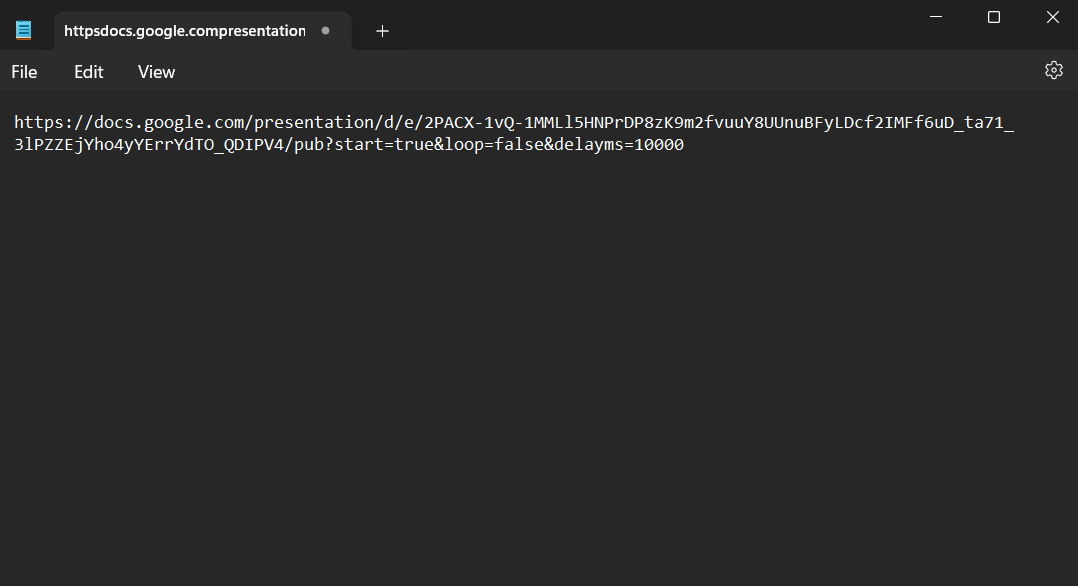
Step 7: Confirm 20-Second Intervals Paste the adjusted link into a new browser tab and press enter. Verify that each slide now transitions every 20 seconds, ensuring a seamless and timed presentation.

Conclusion:
By following these steps, you've successfully elevated your Google Slides presentation, giving each slide the perfect amount of time to captivate your audience. This newfound mastery of timing adds a professional touch to your presentations, making them more engaging and impactful. Explore the possibilities and tailor your timing to suit your unique storytelling needs.
Frequently Asked Questions:
Q: Why should I bother with timing my Google Slides?
Timing is essential for a polished presentation, keeping your audience engaged and ensuring a smooth flow of information.
Q: Is it possible to set a specific time interval for each slide in Google Slides?Absolutely! By using the "Publish to web" feature, you can customize the timing for each slide, even if there's no direct option for 20 seconds.
Q: Can I still edit my presentation after publishing it to the web?
Yes, you can continue editing your Google Slides presentation. The timing adjustments only affect the published version.
Q: What if I want a different timing interval, not 20 seconds?
While the guide focuses on 20 seconds, you can tailor the timing to your preference by adjusting the numerical value in the link during.
Check out these blogs:
How To Conclude A Presentation: https://www.magicslides.app/blog/how-to-end-your-presentation
What is a presentation deck?: https://www.magicslides.app/blog/what-is-a-presentation-deck
How To Make Presentations Interactive: Top 10 Tips: https://www.magicslides.app/blog/How-to-Make-Presentations-Interactive-Top-10-tips
Animating Your Google Slides: A Step-by-Step Guide: https://www.magicslides.app/blog/Animating-Your-Google-Slides-A Step-by-Step-Guide


