How to edit master slide in PowerPoint


Unlock the power of PowerPoint’s master slide editing to effortlessly customize your presentation’s design
Master slides in PowerPoint serve as templates for your presentation, providing consistent formatting across all slides. Editing the master slide allows you to make global changes to elements like fonts, colors, and placeholders, ensuring a cohesive look and feel throughout your presentation. In this step-by-step guide, we'll walk you through the process of editing the master slide in PowerPoint, empowering you to customize your presentations with ease.
How to edit master slide in PowerPoint
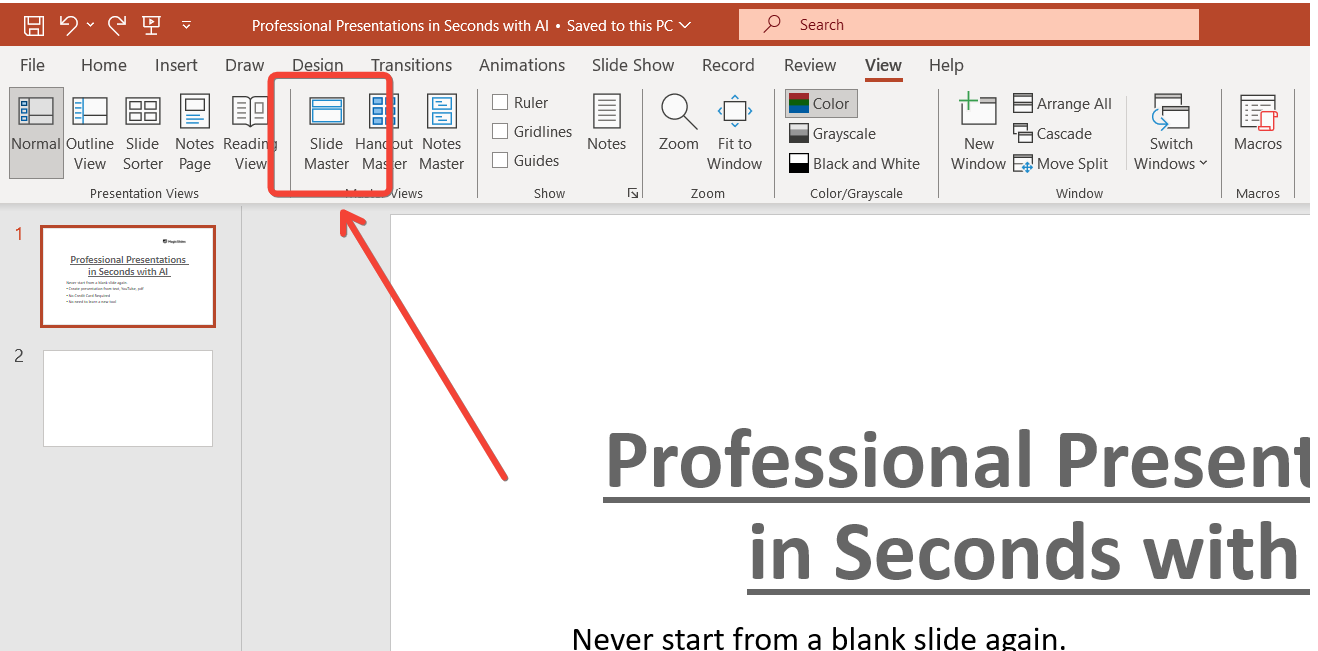
Step 1: Access the View Tab
Open your PowerPoint presentation and navigate to the "View" tab in the PowerPoint ribbon at the top of the screen.
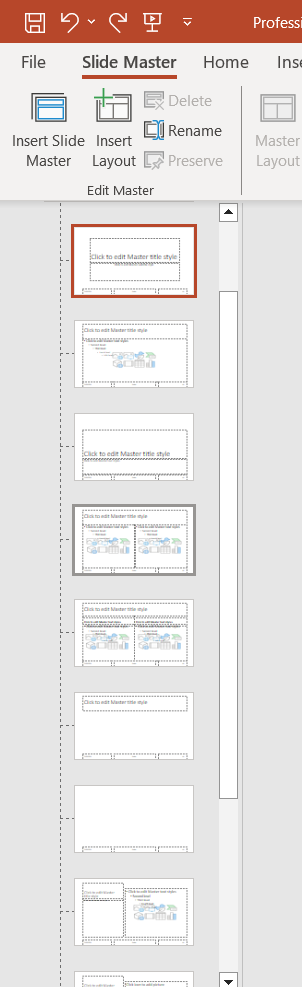
Step 2: Select Slide Master
Within the View tab, locate the "Master Views" group and click on "Slide Master." This will switch your view to the Slide Master mode.
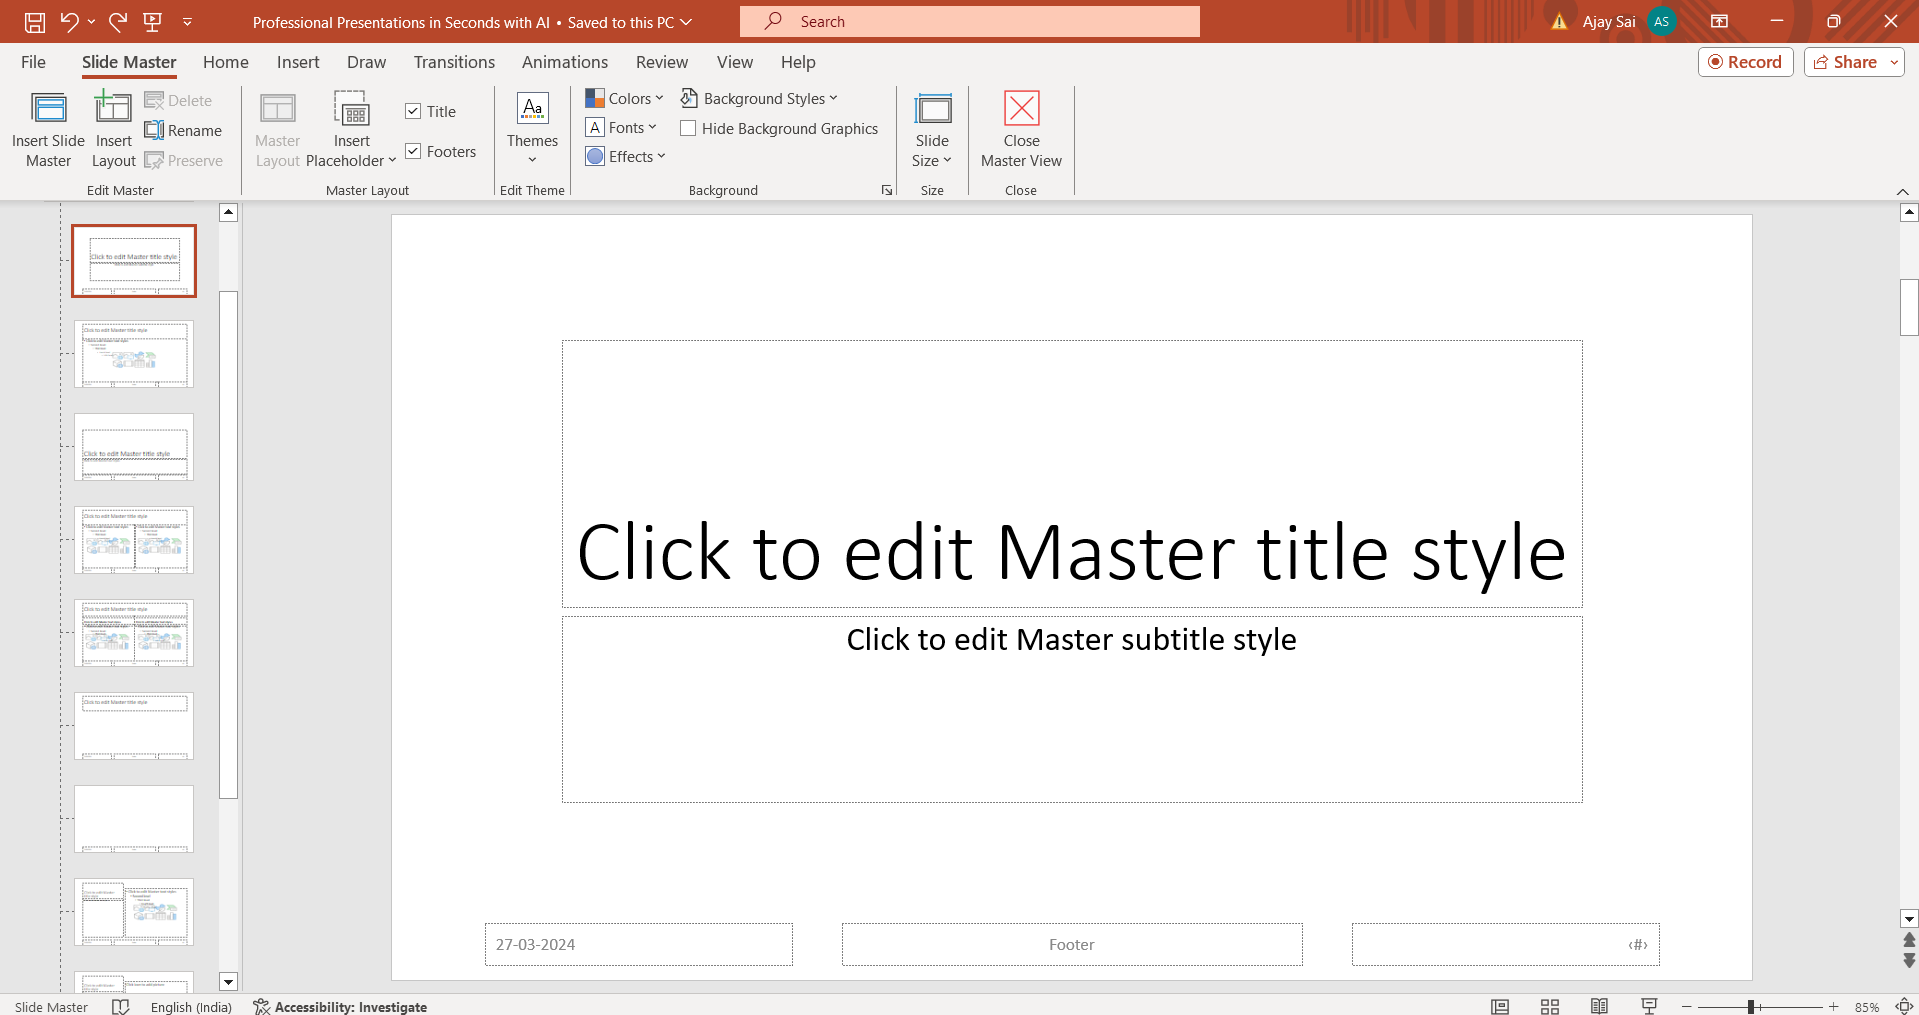
Step 3: Edit Master Slide Layout
In Slide Master view, you'll see a larger thumbnail representing the master slide layout. Here, you can make changes to the overall design, such as adding logos, adjusting background colors, or modifying placeholders.
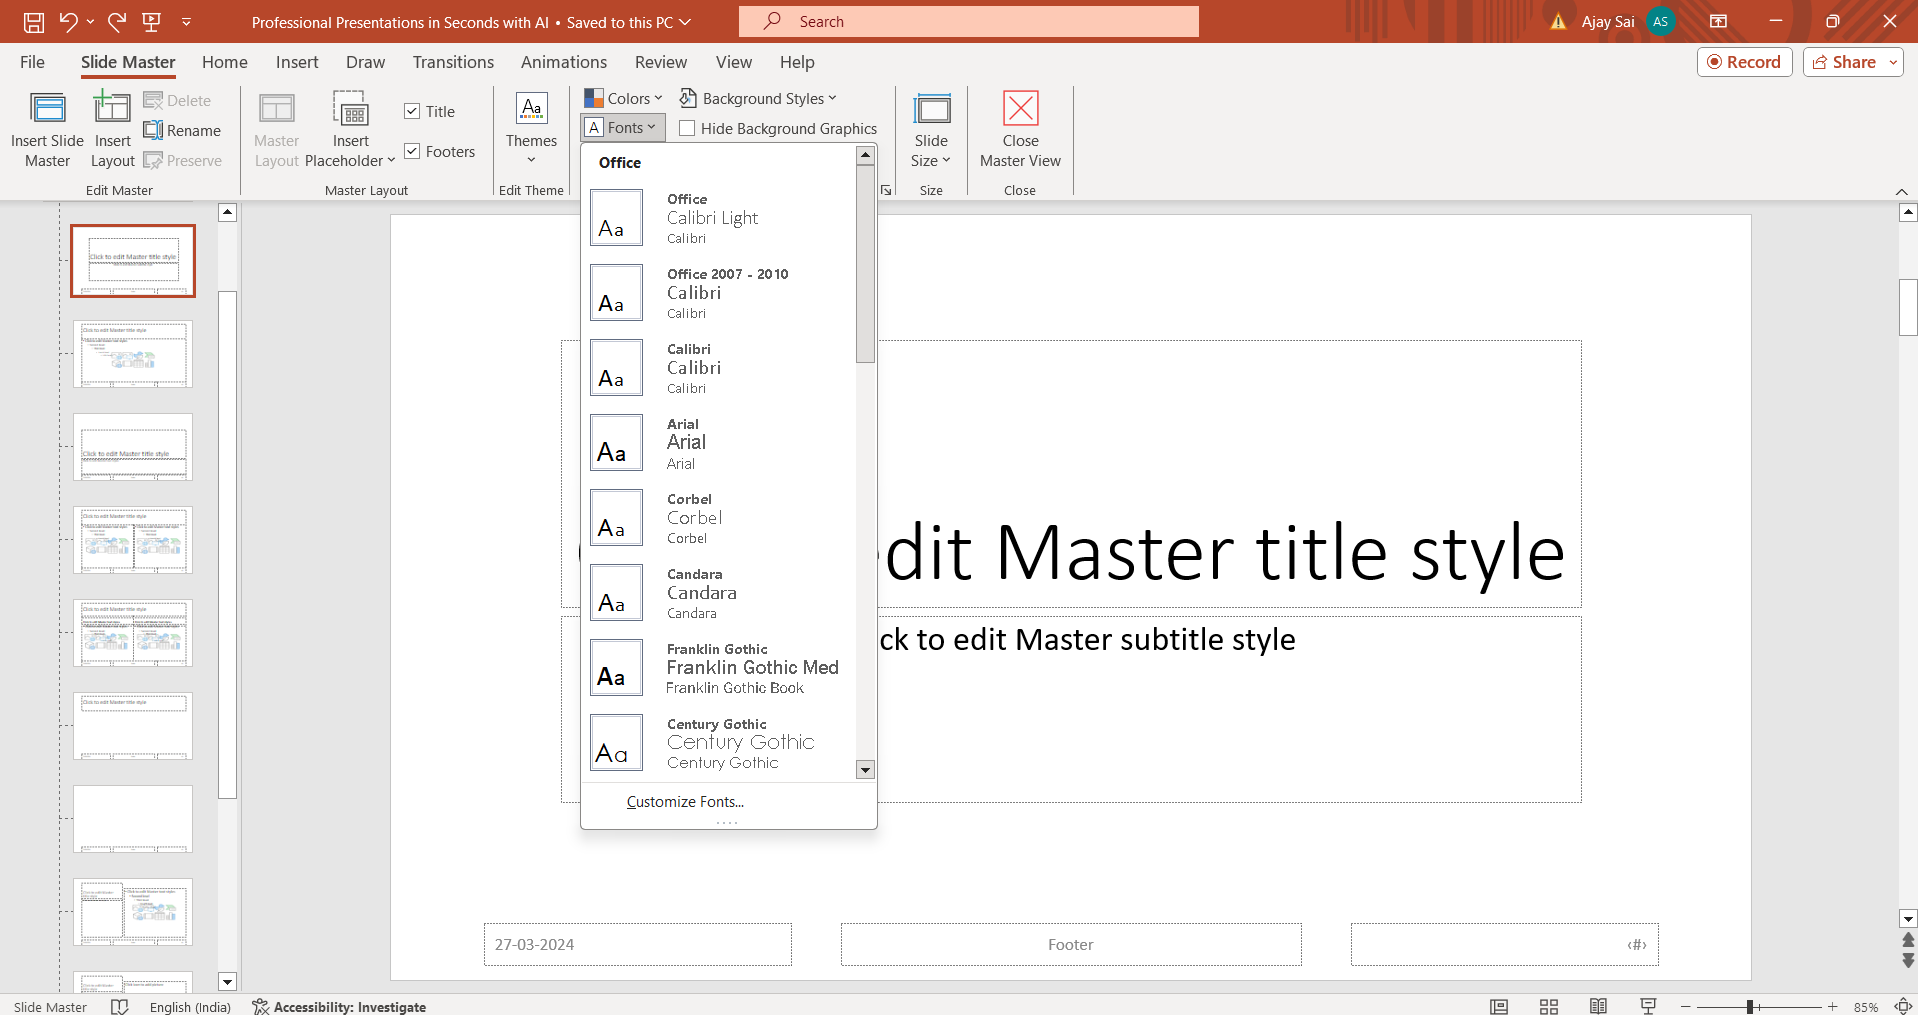
Step 4: Customize Fonts and Colors
To change the fonts or colors used in the master slide, click on the "Fonts" or "Colors" dropdown menu in the Edit Theme group. Select the desired font or color scheme to apply it to your presentation.
Step 5: Modify Individual Slide Layouts (Optional)
You can also customize individual slide layouts within the master slide view. Click on the thumbnail of the specific layout you want to edit, then make changes as needed, such as rearranging placeholders or adding graphical elements.
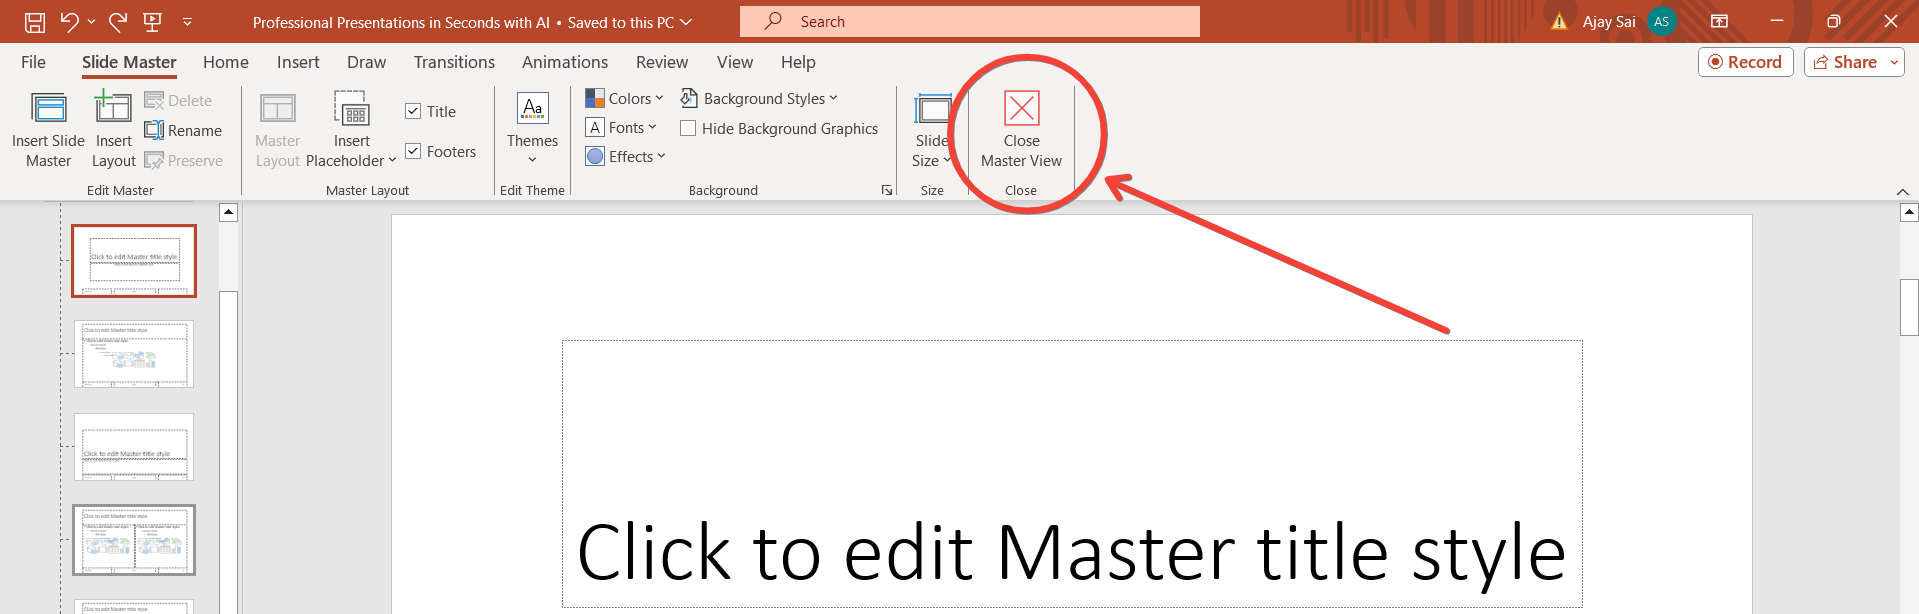
Step 6: Save Changes
Once you've finished editing the master slide, click on the "Close Master View" button in the Slide Master tab to return to normal editing mode. Your changes will be applied to all slides based on the master slide layout.
Conclusion:
Editing the master slide in PowerPoint gives you the power to create consistent and professional-looking presentations with ease. By following this step-by-step guide, you can customize fonts, colors, and layouts across all slides, ensuring a cohesive visual identity for your presentation. Master slide editing is a valuable tool for streamlining the design process and maintaining consistency, allowing you to focus on delivering impactful content to your audience.
Frequently Asked Questions:
What is a master slide, and why should I edit it?
Master slides are templates that dictate the overall design of your presentation. Editing them ensures consistent formatting.
Can I edit individual slides after modifying the master slide?
Yes, you can customize individual slides without affecting the changes made to the master slide.
Will editing the master slide affect existing content?
No, editing the master slide won't alter existing content on your slides, only the formatting and layout.
How can I revert changes made to the master slide?
Simply revisit the master slide view and adjust or reset elements as needed to revert changes.


