How to make Wavy Text in Canva


Learn to create wavy text in Canva and enhance your designs with this creative text effect
Wavy text adds a dynamic and eye-catching element to your designs. Canva makes it easy to create this effect with its intuitive features.
Whether you’re designing for social media, marketing materials, or personal projects, this step-by-step guide will help you create wavy text in Canva with ease.
How to Make Wavy Text in Canva | Steps to Make Wavy Text in Canva
Step 1: Open Canva and Select a Design Template
Log in to your Canva account and click on "Create a Design."
Choose a blank canvas or a template that matches your project’s dimensions.
Step 2: Add Text to Your Design
From the left menu, click on "Text" and select "Add a Heading" (or choose Subheading or Body Text based on your needs).
Type the text you want to make wavy.
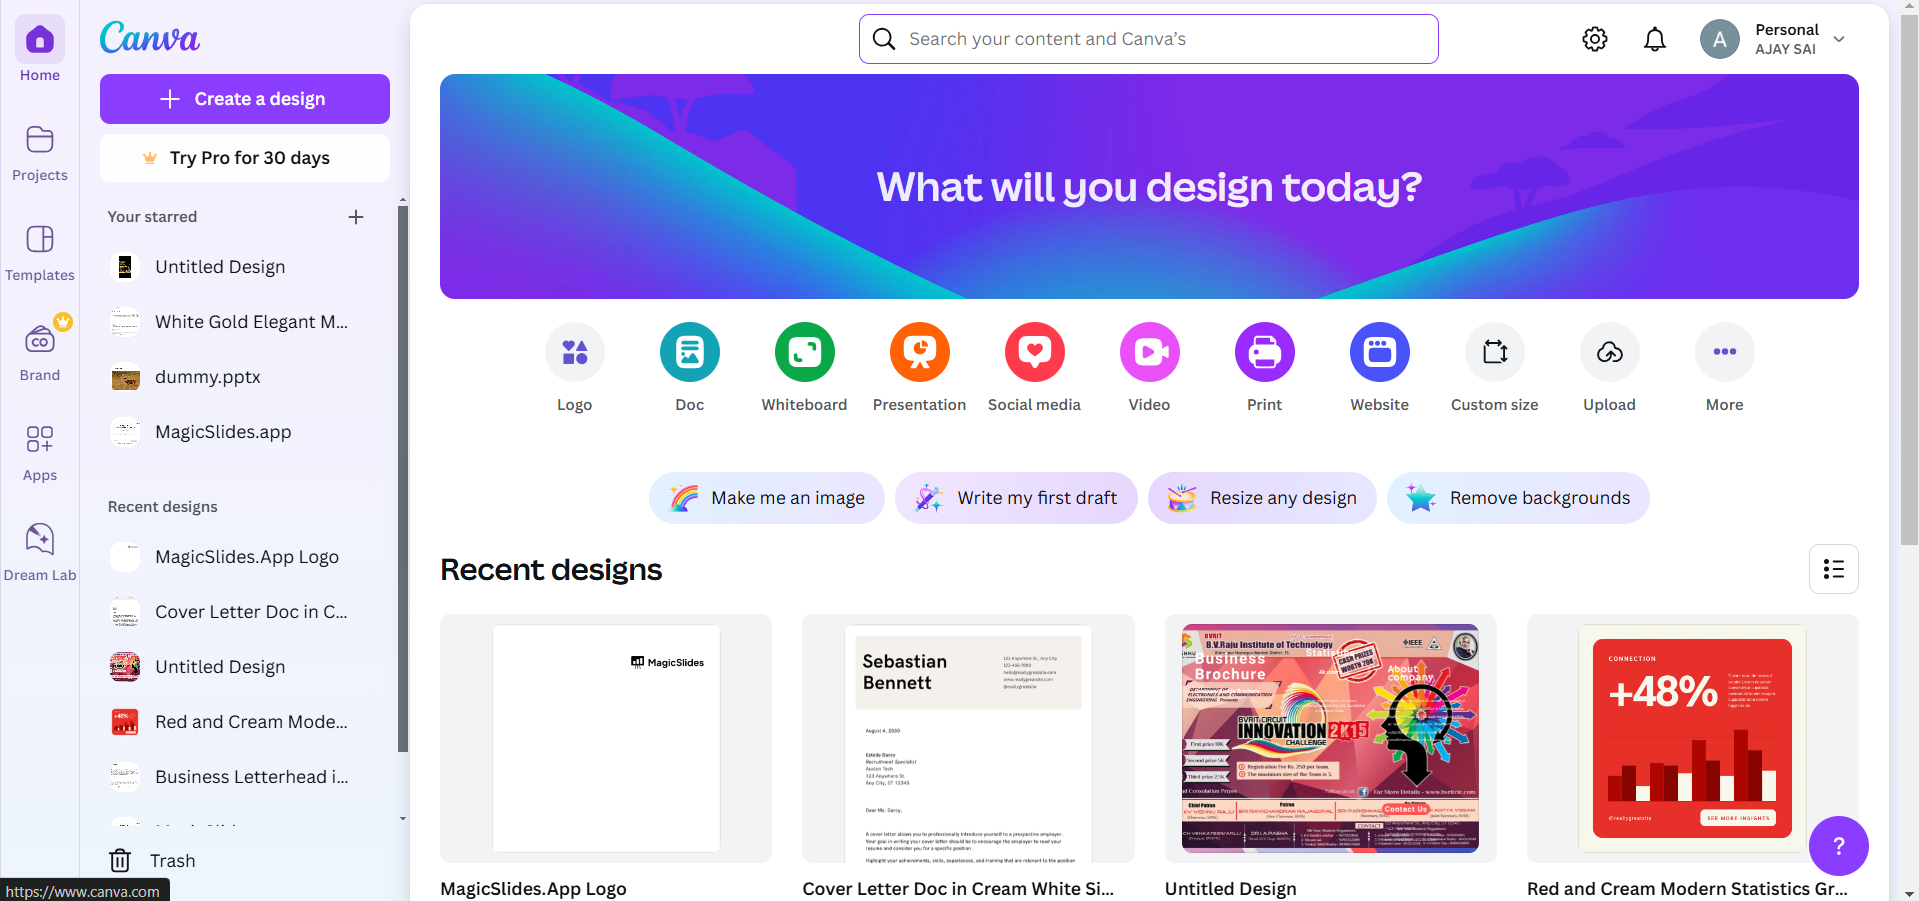
Step 3: Access the Effects Menu
Select the text box by clicking on it.
At the top toolbar, click on "Effects" to open the text effect options.
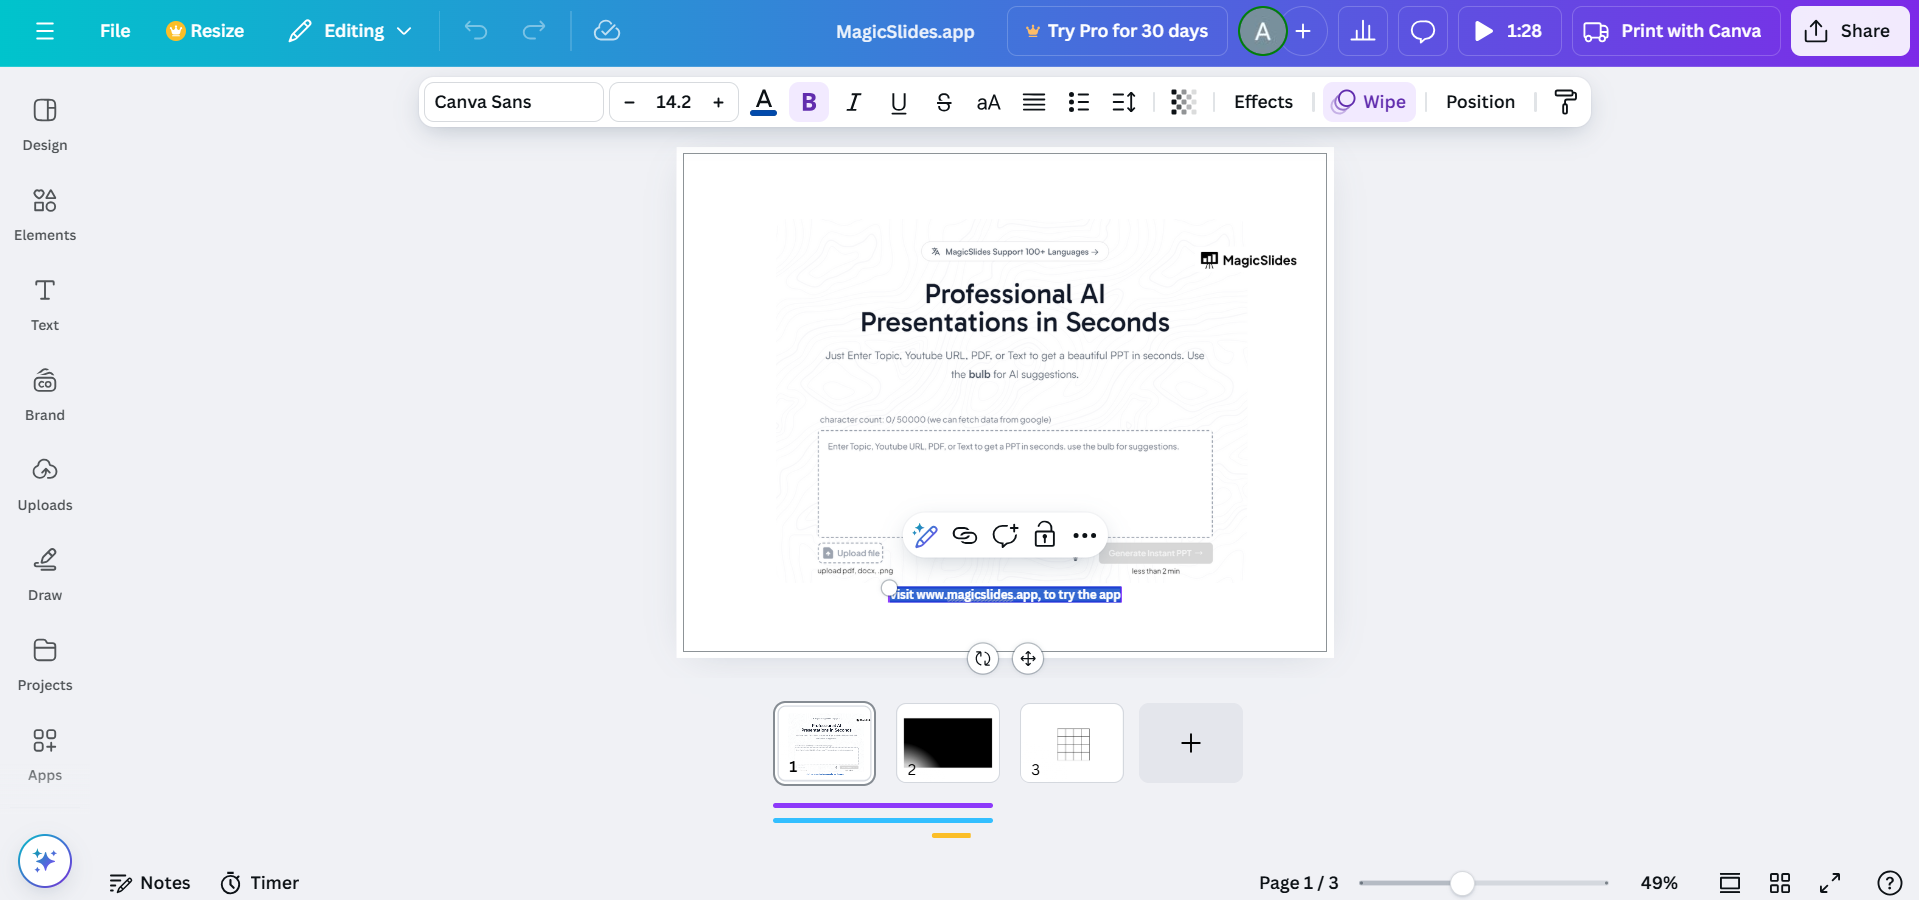
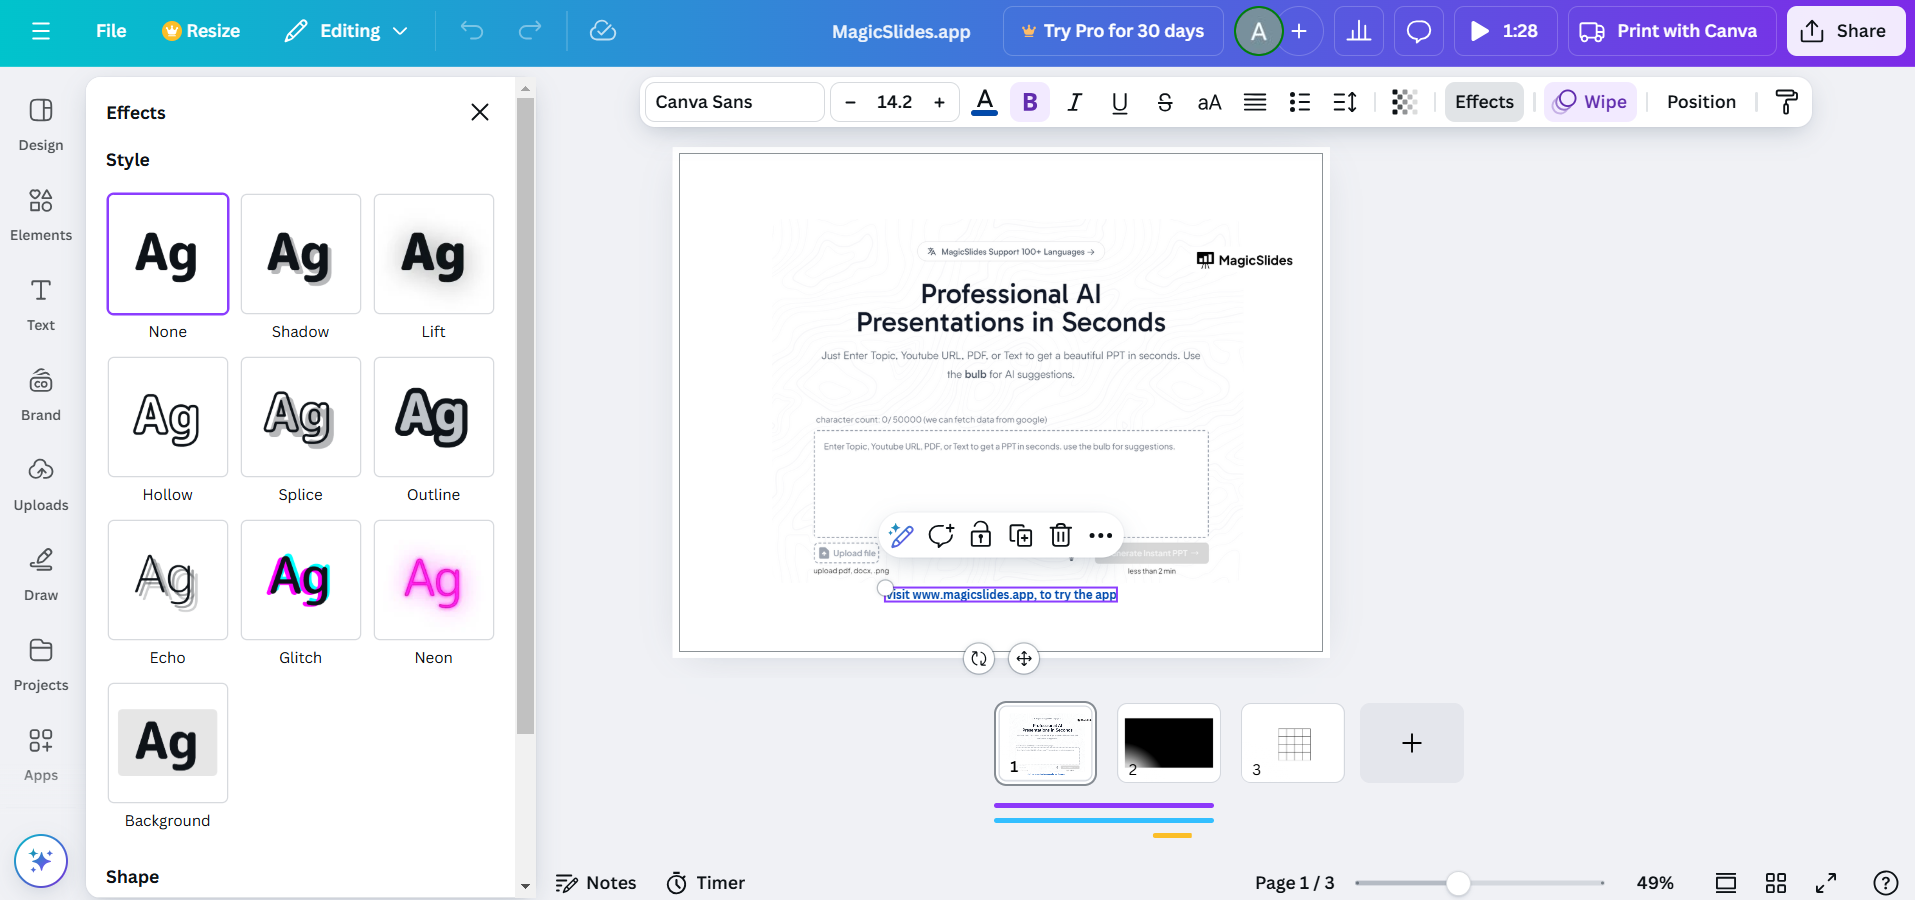
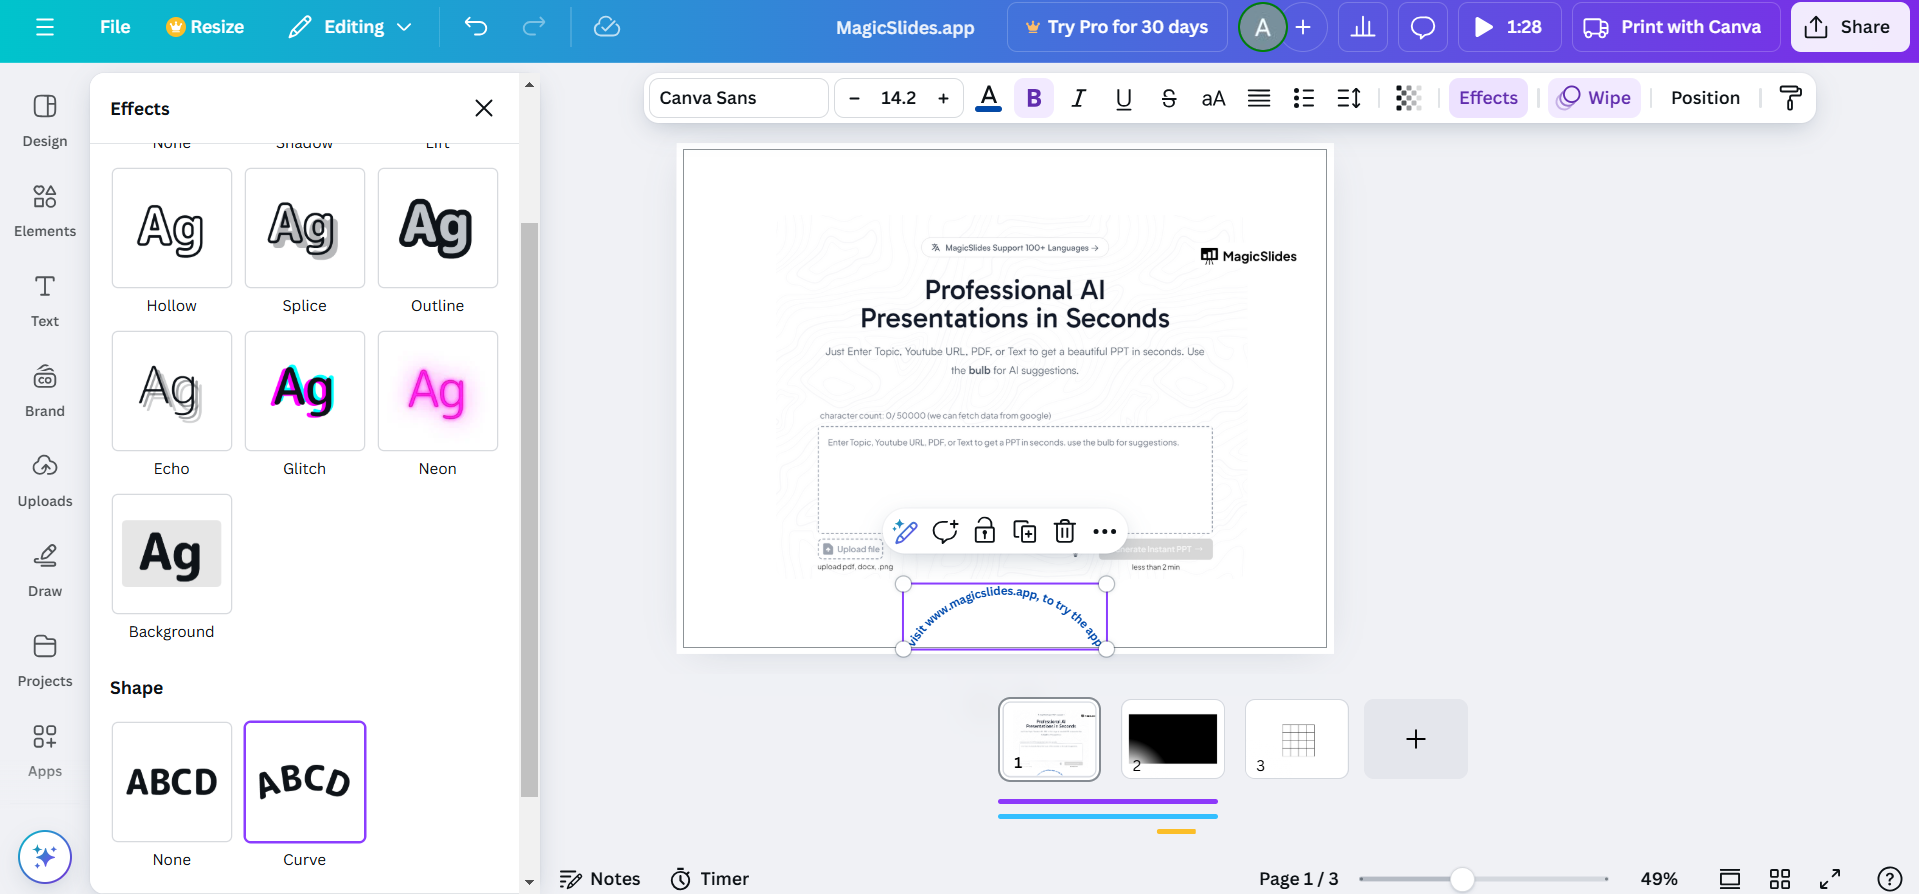
Step 4: Apply the Curve Effect
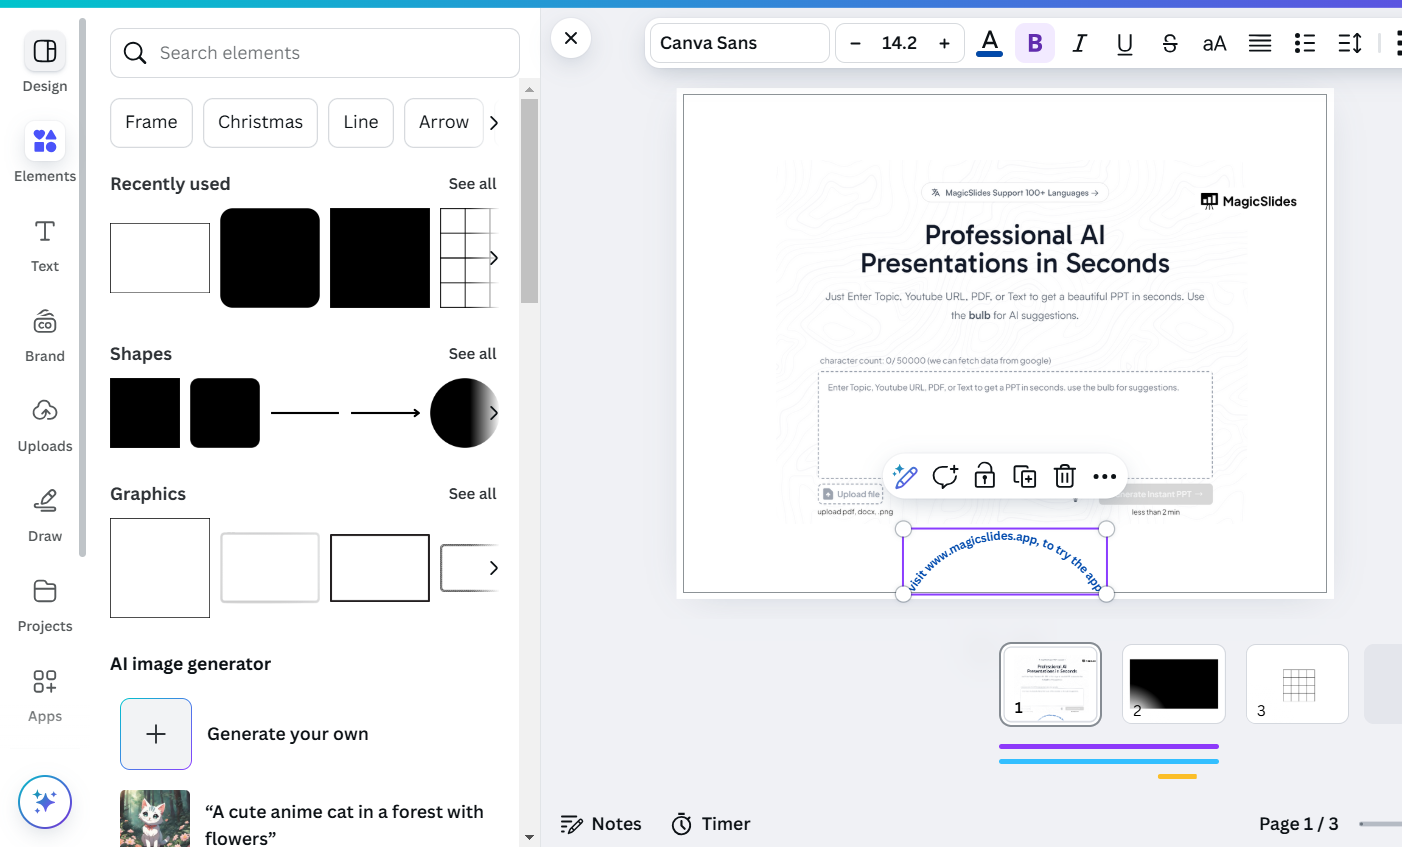
In the "Effects" menu, scroll down and select the "Curve" effect.

Your text will instantly curve. Adjust the curvature using the slider below the Curve option.
- Move the slider to the right for a more pronounced curve.
- Move it to the left to create an inverse (upward) wave.
Step 5: Customize Your Wavy Text
Change the font style, size, or color to match your design theme using the toolbar at the top.
Experiment with spacing:
- Adjust "Letter Spacing" for evenly spaced letters.
- Use "Line Spacing" if your wavy text spans multiple lines.
Step 6: Combine Wavy Text with Design Elements
Position the wavy text on your canvas, aligning it with other design elements.
Add complementary graphics or shapes to enhance the overall design.
Step 7: Save Your Design
Once satisfied, click on "Share" > "Download" and choose your preferred file format.
Use your design for digital or print purposes as needed.
Conclusion
Creating wavy text in Canva is a fun and creative way to add personality to your designs.
By following these steps, you can easily make text stand out and align it with your project’s aesthetic.
Canva’s customization tools allow you to experiment with various styles and effects, ensuring your designs are both professional and visually appealing.
FAQs on Making Wavy Text in Canva
Can I make multiple layers of wavy text in Canva?
Yes, simply duplicate your text box, apply the Curve effect to each layer, and adjust their positions.
Can I edit wavy text after applying the curve effect?
Absolutely! You can adjust the curvature, font, and color anytime by reselecting the text and opening the Effects menu.
Is the Curve effect available in Canva’s free version?
Yes, the Curve effect is available in both Canva’s free and Pro versions.
With these steps, your designs will take on a creative edge that grabs attention and elevates your projects.


