How to Minimize PowerPoint File Size


Large PowerPoint files can be difficult to share. Learn how to minimize file size efficiently
How to Minimize PowerPoint File Size
Large PowerPoint files can be difficult to share, slow to load, and take up unnecessary storage space.
Reducing the file size improves performance and makes it easier to email or upload presentations.
This guide provides step-by-step methods to optimize and minimize your PowerPoint file size without compromising quality.
Step-by-Step Guide to Reducing PowerPoint File Size
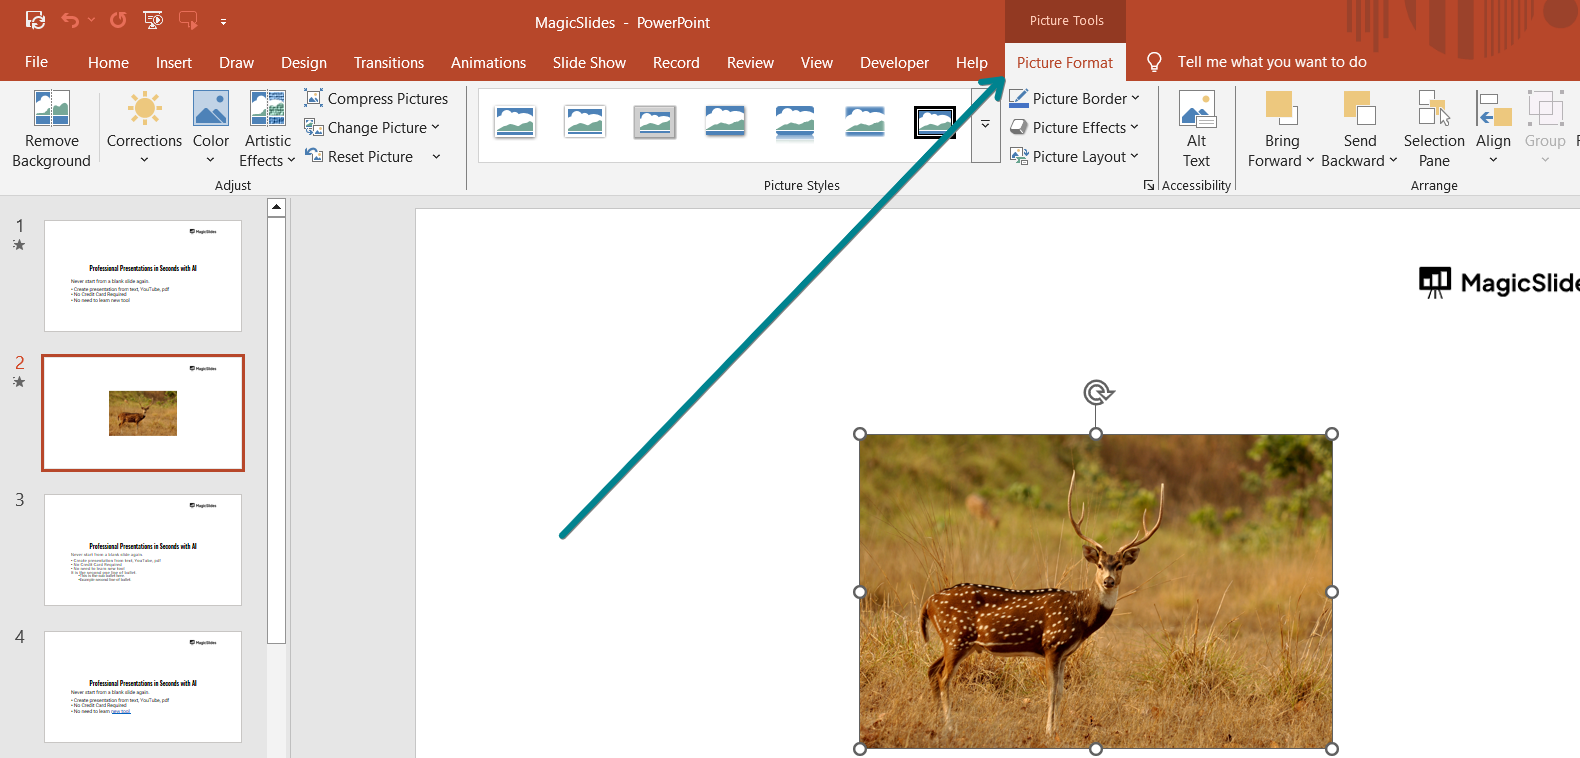
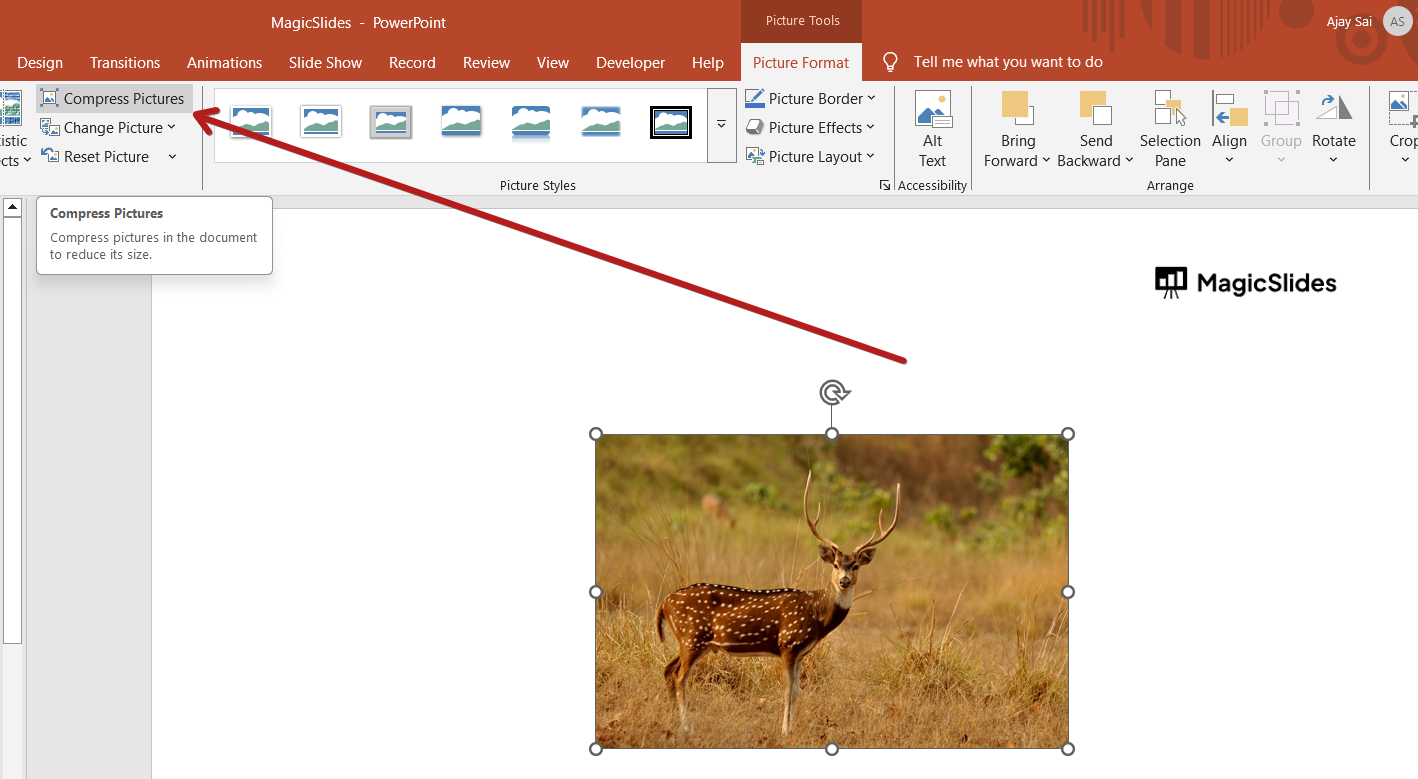
Step 1: Compress Images in PowerPoint
Open your PowerPoint presentation. Click on any image in the slide.
Go to the Picture Format tab. Click Compress Pictures in the Adjust group.
In the pop-up window:
- Uncheck "Apply only to this picture" (to compress all images).
- Select a lower resolution (e.g., "Web" or "Email" for smaller files).
Click OK to apply the compression.
Step 2: Convert Images to a More Efficient Format
If your images are in PNG, consider converting them to JPEG to reduce size.
To do this:
- Open the image in an editor (e.g., Paint, Photoshop).
- Save it as JPEG with optimized quality.
- Replace the original image in PowerPoint with the optimized one.
Step 3: Remove Unused or Hidden Slides
Scroll through your PowerPoint and delete any unnecessary or hidden slides.
To check hidden slides:
- Click View > Slide Sorter to see all slides at once.
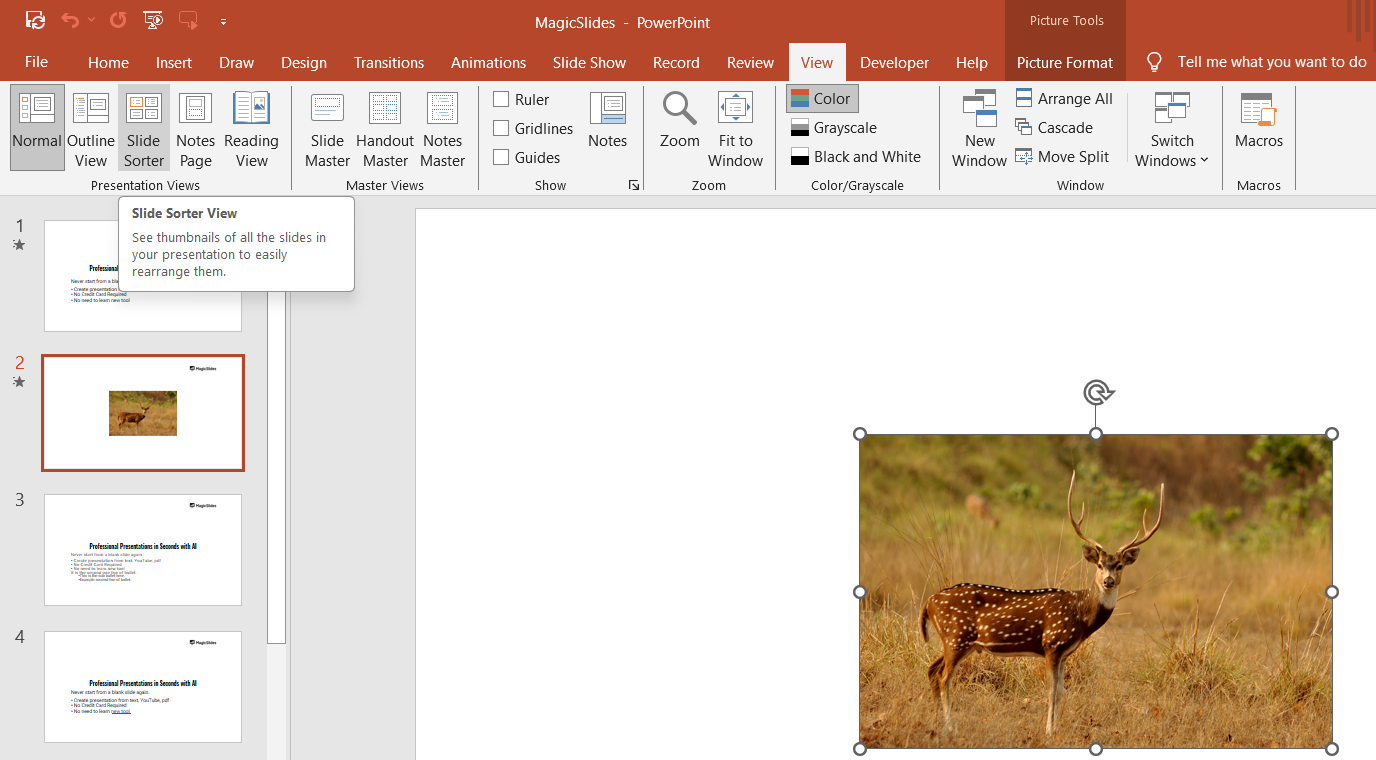
- Right-click on any hidden slide and choose Delete Slide if it's unnecessary.
Step 4: Compress Embedded Videos and Audio
Click on the File tab. Select Info and then Compress Media under the Multimedia section.
Choose one of the compression options:
- Presentation Quality (best balance of quality and size).
- Internet Quality (reduces size significantly, maintains decent quality).
- Low Quality (smallest size, but noticeable drop in quality).
Wait for PowerPoint to process the compression and save your presentation.
Step 5: Avoid Embedding Fonts
Click on File > Options. Go to Save settings. Scroll down to Preserve fidelity when sharing this presentation.
Uncheck "Embed fonts in the file" or choose "Embed only the characters used" to save space.
Click OK and save your presentation.
Step 6: Save the File in a Compressed Format
Click on File > Save As. Choose PowerPoint Show (.ppsx) instead of .pptx to reduce file size.
Alternatively, you can Save As PDF if animation and transitions aren’t needed.
Step 7: Use PowerPoint’s Built-in Optimization Feature
Click File > Save As. Click Tools (next to Save button) > Compress Pictures.
Choose the lowest suitable resolution for your needs. Click OK and then Save.
Reducing PowerPoint file size is great for easy sharing, but why not create optimized, AI-powered slides from the start? With MagicSlides.app, generate lightweight, professional presentations instantly!
Conclusion
Reducing PowerPoint file size improves performance, making it easier to share and present your slides.
By compressing images, optimizing media files, and avoiding unnecessary elements, you can significantly minimize your file size without losing quality.
FAQs are here to help!
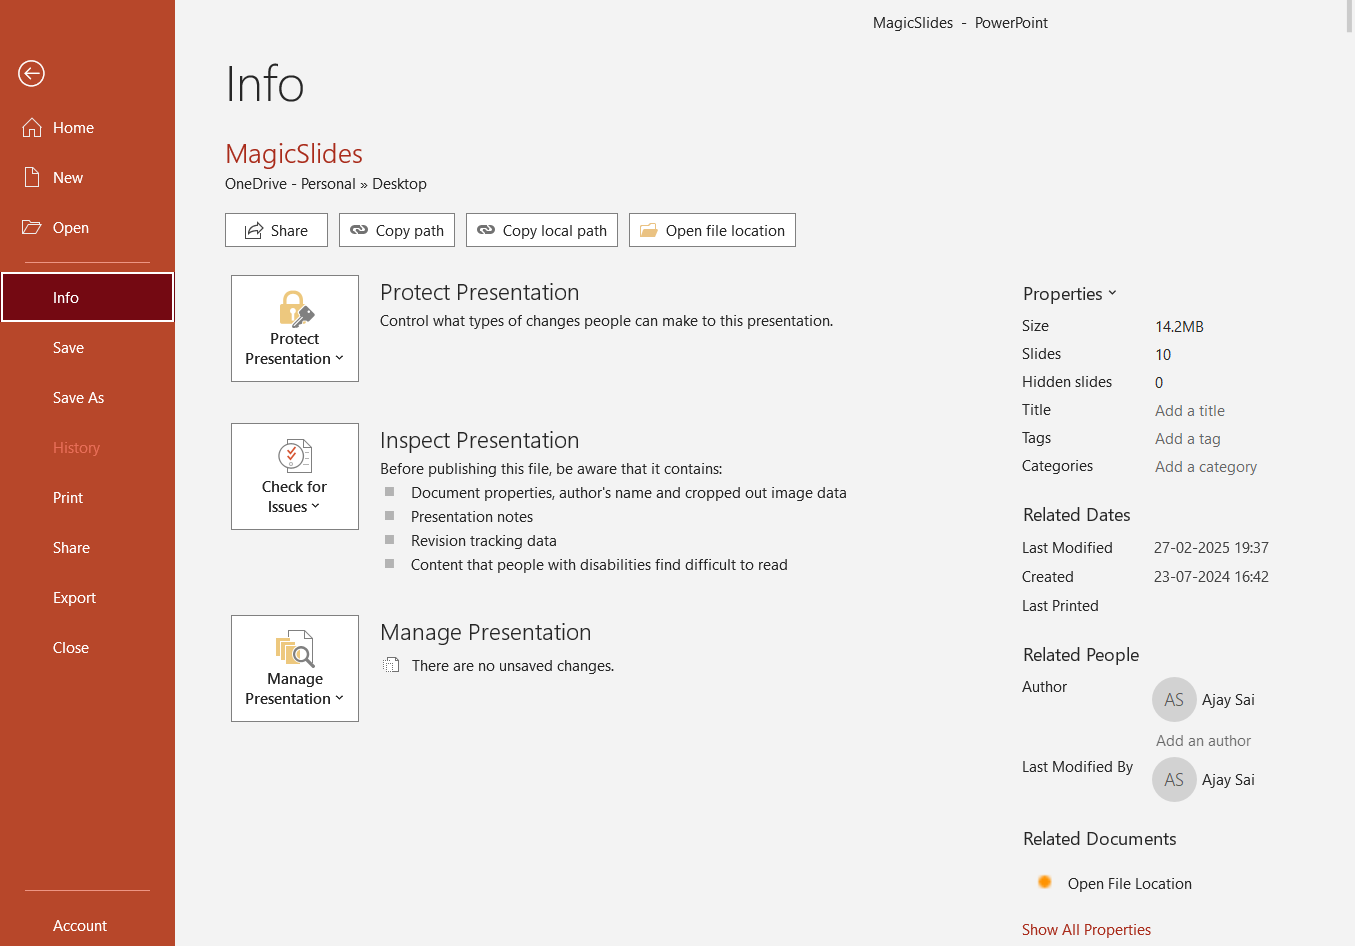
How do I check my PowerPoint file size?
Click File > Info, and under Properties, the file size will be displayed.
Will compressing images lower the quality?
Yes, but you can choose a resolution that balances quality and file size. Use "Web" or "Email" resolution for optimal compression.
Can I recover original images after compression?
No, unless you save a backup copy before compressing. Always keep a copy of the original presentation.