How to Delete a Photo on Google Slides (6 Simple Ways).


How to delete a photo on Google Slides quickly with simple steps. Learn how to delete images on Google Slides using manual and AI methods.
How to Delete a Photo on Google Slides Easily (Quick Guide 2026)
If you’re wondering how to delete a photo on Google Slides, the process is simple but essential for keeping your presentation professional. Removing unnecessary visuals helps to:
- Improve clarity
- Fix design issues
- Update outdated content
In this guide, I’ll show you how to delete images on Google Slides using quick manual methods and a smarter AI-based approach.
Before moving to the steps, I think it’s important to understand why deleting images matters. Many users focus only on how to remove images, but not on when and why they should do it. Knowing this helps in creating more effective and visually appealing presentations.
So, let’s first look at the key reasons why you want to delete a photo in Google Slides.
Why is Deleting a Photo in Google Slides Needed?
Learning how to delete a photo on Google Slides is necessary to maintain a professional presentation. Unwanted or irrelevant images can distract the audience and even reduce the impact of your message. So, removing photos from Google Slides is needed when:
- The image is outdated or no longer relevant to your content.
- The slide looks cluttered and hard to read.
- Want to improve clarity and focus on text.
- The image does not match your presentation theme or design.
- Replacing it with a better or more updated visual.
- The image was added by mistake or is duplicated.
I hope you have a clear understanding of why removing images from Google Slides becomes necessary. Next, let me explain how to do so.
Related guide: How to Create a Presentation in Canva
How to Delete a Photo on Google Slides
In the sections below, I’ll share six tried and tested methods with a proper set of instructions. Depending on your situation, choose the fastest method to remove images while keeping the slide design intact.
#Method 1. Delete a Photo Using the Keyboard
It’s the fastest and most efficient option, especially when you’re editing multiple slides. You can remove images instantly with a single key press, which saves a lot of time.
Here are the steps of the same:
- Open the Google Slides presentation
- Navigate to the slide containing the image
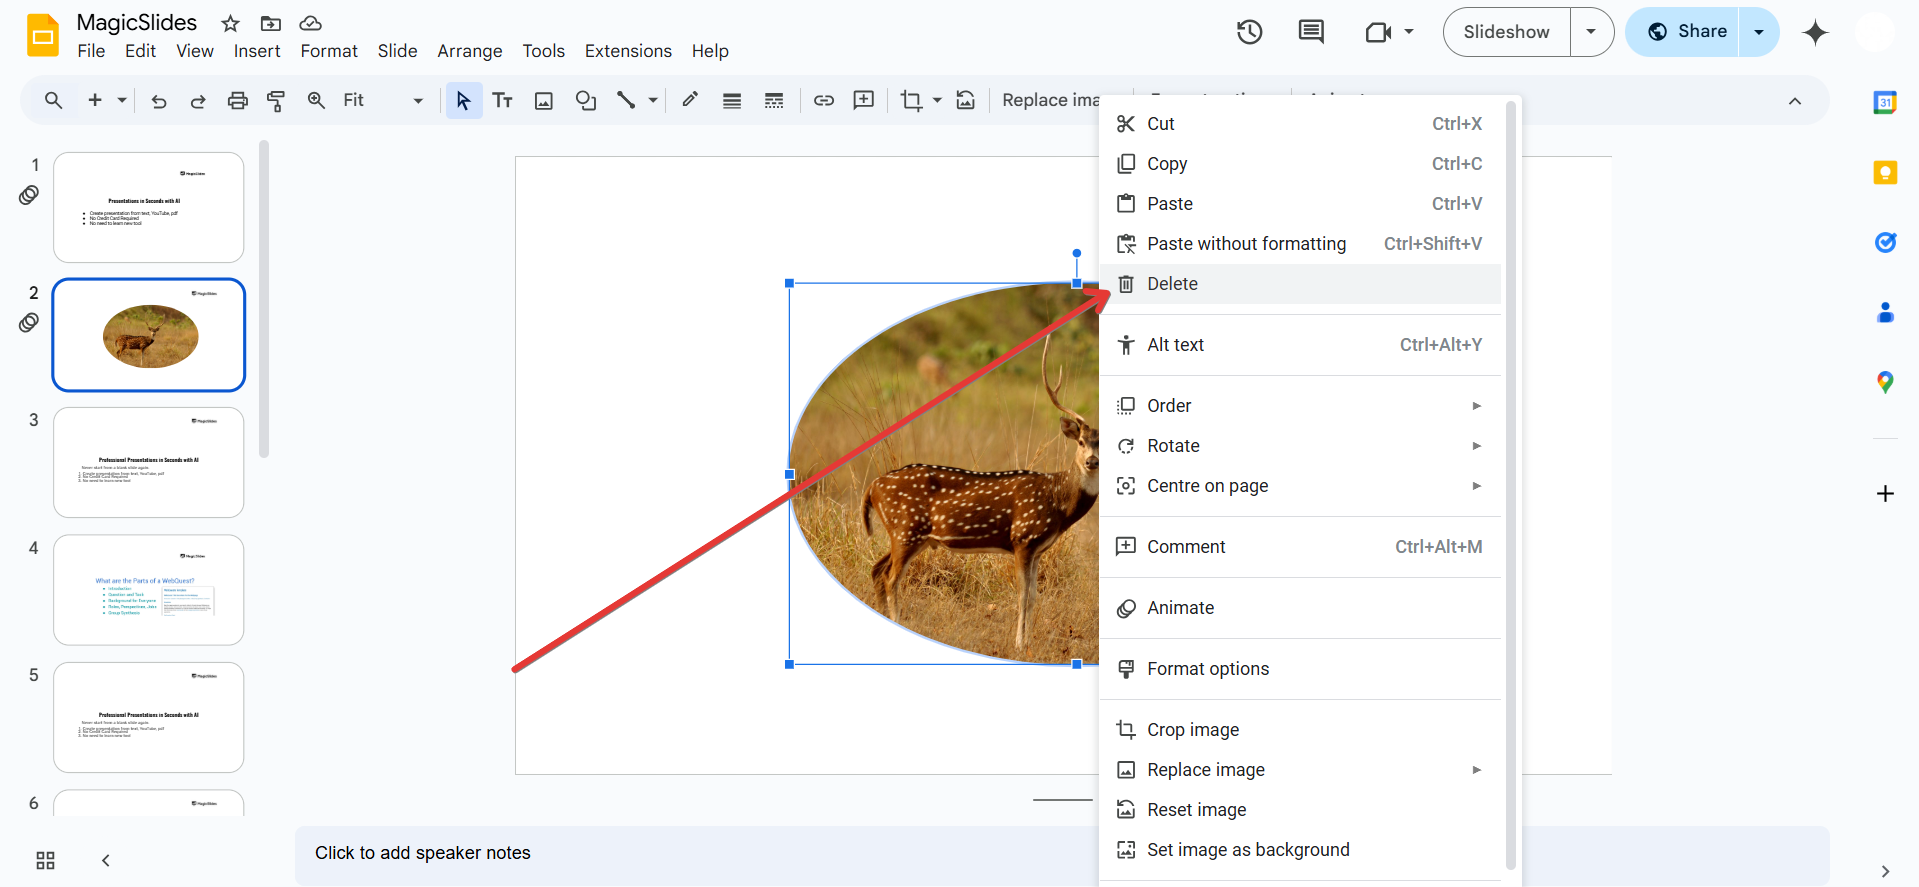
- Click on the photo to remove
- Press the Delete or Backspace key on your keyboard
That’s it, the image will be instantly removed.
Method 2: Manually Selecting Only Images
Hold down the Shift key and click on each image manually to select only the photos.
Step 1: Open Your Google Slides Presentation
Go to Google Slides and log into your account.
Open the presentation from which you want to delete all images.
Step 2: Select All Images
There are two ways to select all images in Google Slides:

Step 3: Delete the Selected Photos
After selecting all images, press the Delete key on your keyboard.
Alternatively, right-click on any selected image and choose Delete from the menu.
Step 4: Review and Save Changes
Scroll through your slides to ensure all images have been removed.
If you accidentally deleted something important, press Ctrl + Z (Windows) or Command + Z (Mac) to undo the deletion.
Google Slides automatically saves changes, so no need to manually save.
Managing images in Google Slides can be time-consuming. For a faster way to create well-organized, AI-powered presentations with the right visuals, check out MagicSlides.app just enter a topic, and your slides are ready!
#Method 3. Remove Images from the Menu Bar
Using the menu bar is another reliable way to handle how to delete a photo on Google Slides, especially for beginners who prefer navigating through options step by step:
- Click on the image
- Go to the top menu
- Click on Edit
- Select Delete
Also read: How to Curve Text in Google Slides
#Method 4. Delete Multiple Images at Once
Instead of removing each photo individually, this method allows you to select several images together and delete them in one go. To do so:
- Hold down the Shift key
- Click on multiple images to delete
- Press Delete
This is perfect for bulk editing slides quickly.
#Method 5. Delete Images from Slide Master
Deleting images from the Slide Master is essential when standard methods don’t work, while handling how to delete a photo on Google Slides. Sometimes, images are embedded in the slide layout itself, which means they can’t be removed directly from individual slides. In such cases, accessing the Slide Master allows you to remove those background or template-based images permanently.
For the same:
- Click on Slide in the menu
- Select Edit theme
- Find the image in the master slide
- Select and delete it
- Exit the theme editor
If an image is part of the layout, deleting it from a normal slide won’t work; you must remove it from the master.
Create Better Slides Faster with MagicSlides
While learning how to delete a photo on Google Slides helps you clean up your presentation, what if you could avoid cluttered slides in the first place?
That’s where MagicSlides, an AI Presentation Maker, comes in.
Instead of manually adding, adjusting, and deleting images, MagicSlides uses AI to automatically generate well-structured slides with relevant visuals—so you don’t have to fix design issues later.

Just try this for free now, and get these benefits:
- Remove all images from multiple slides in one go
- Automatically detects and eliminates irrelevant visuals
- Just need to write a simple text prompt, no technical or design skills required
- Improves the slide layout after removing images
- Saves enough time on bulk editing
- Maintain consistency across slides
- Works directly with Google Slides for seamless editing
- Regenerate slides with better design and formatting
- No tool installation needed
How to Delete Images on Google Slides Using MagicSlides AI
- Open the solution in any browser and connect it with Google Slides
- Upload your existing presentation or choose to edit an existing deck
- Use AI Chat. Enter a prompt such as:

- Let the AI process and update your slides automatically.

- Review the updated presentation and make any adjustments if needed. For modification, just write what to change; don’t do it manually.
Read also: Convert Google Slides to PowerPoint
Best Practices to Follow When Deleting Images
Here’s how to manage slides better:
- Always preview slides before deleting visuals
- Replace instead of delete when necessary
- Keep backup versions of presentations
- Use consistent image alignment after removal
Author’s Verdict
Learning how to delete a photo on Google Slides is a simple procedure. If you regularly work on presentations like I do, learning these small actions, like how to delete images on Google Slides, can make your workflow much smoother and more professional.
People Also Ask
Q1. Why can’t I delete images on Google Slides?
This happens when the image is part of the Slide Master or grouped with other elements.
Q2. Can I delete multiple images at once?
Yes, use the Shift key to select multiple images and delete them together.
Q3. Does deleting an image affect slide formatting?
Sometimes, if you’re doing it manually. However, using a specialised solution like MagicSlides can ensure slide formatting is intact.
Q4. How to delete a photo on Google Slides quickly?
Select the image and press the Delete key; it’s the fastest method.


