How to Record Yourself on PowerPoint


Recording yourself on PowerPoint adds personal narration and video, making presentations more engaging and interactive.
Recording yourself in PowerPoint can bring your presentations to life, allowing you to add narration, explanations, or video introductions directly to your slides.
Whether you're preparing a business proposal or a lecture, the ability to record video and audio adds a personal touch and increases audience engagement.
Here’s a step-by-step guide on how to record yourself using PowerPoint.
How to Record Yourself on PowerPoint: A Step-by-Step Guide
Step 1: Open Your PowerPoint Presentation
Begin by opening the PowerPoint presentation you want to record. Ensure that all your slides are in order and ready for narration or video.
If you don’t have a presentation yet, create a new one by clicking on "File" and selecting "New."
Step 2: Go to the "Record" Tab
Once your presentation is ready, click on the "Record" tab in the PowerPoint ribbon at the top of the screen.

If you don't see the "Record" tab, go to "File" > "Options" > "Customize Ribbon" and check the box next to "Record" to add it to the toolbar.
Step 3: Choose "Record from Beginning" or "Record from Current Slide"
In the "Record" tab, you have the option to either "Record from Beginning" or "Record from Current Slide."
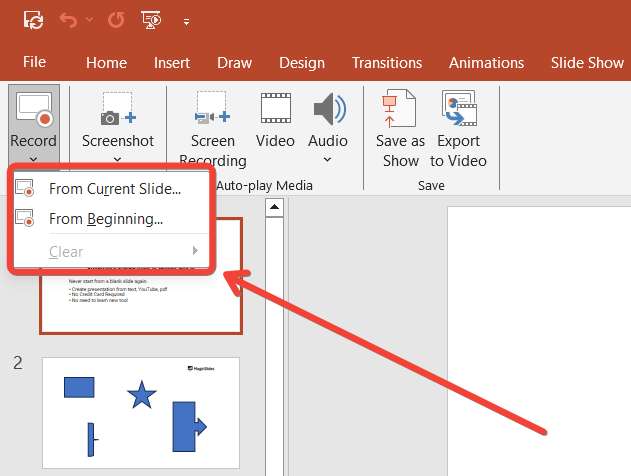
If you want to record the entire presentation, click "Record from Beginning." If you want to start recording from a specific slide, click "Record from Current Slide."
Step 4: Set Up Your Camera and Microphone
Before you begin recording, PowerPoint will show a preview window where you can set up your camera and microphone.
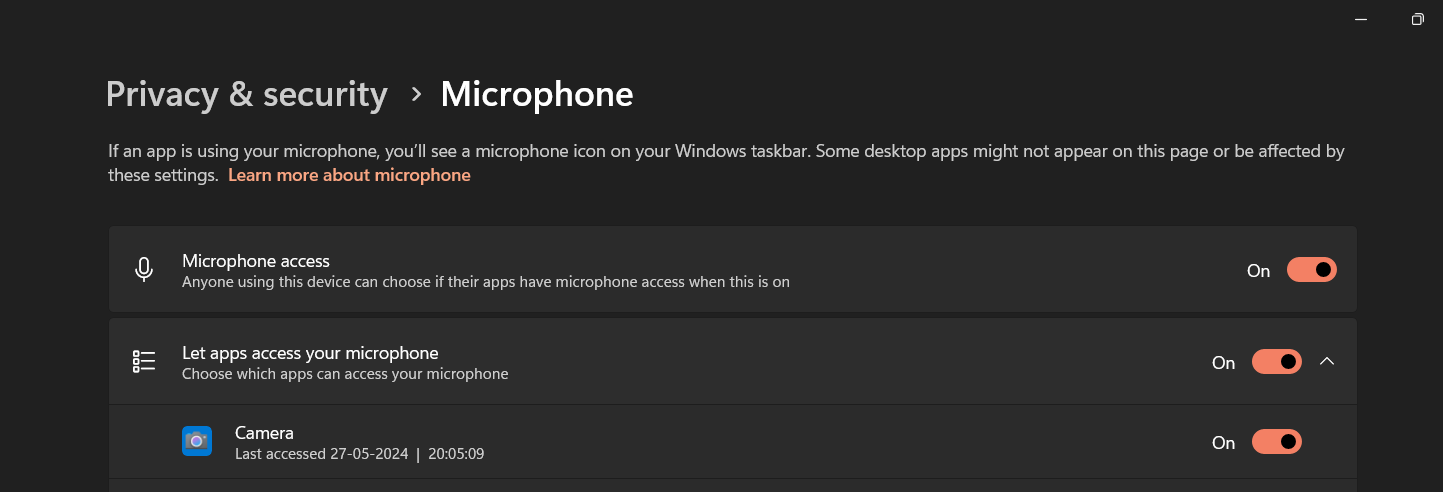
Ensure your camera is connected if you plan to record video, and check that your microphone is working properly for audio narration.
Adjust the camera angle and audio levels as needed.
Step 5: Start Recording
Click the "Record" button at the top-left corner of the screen to start your recording.
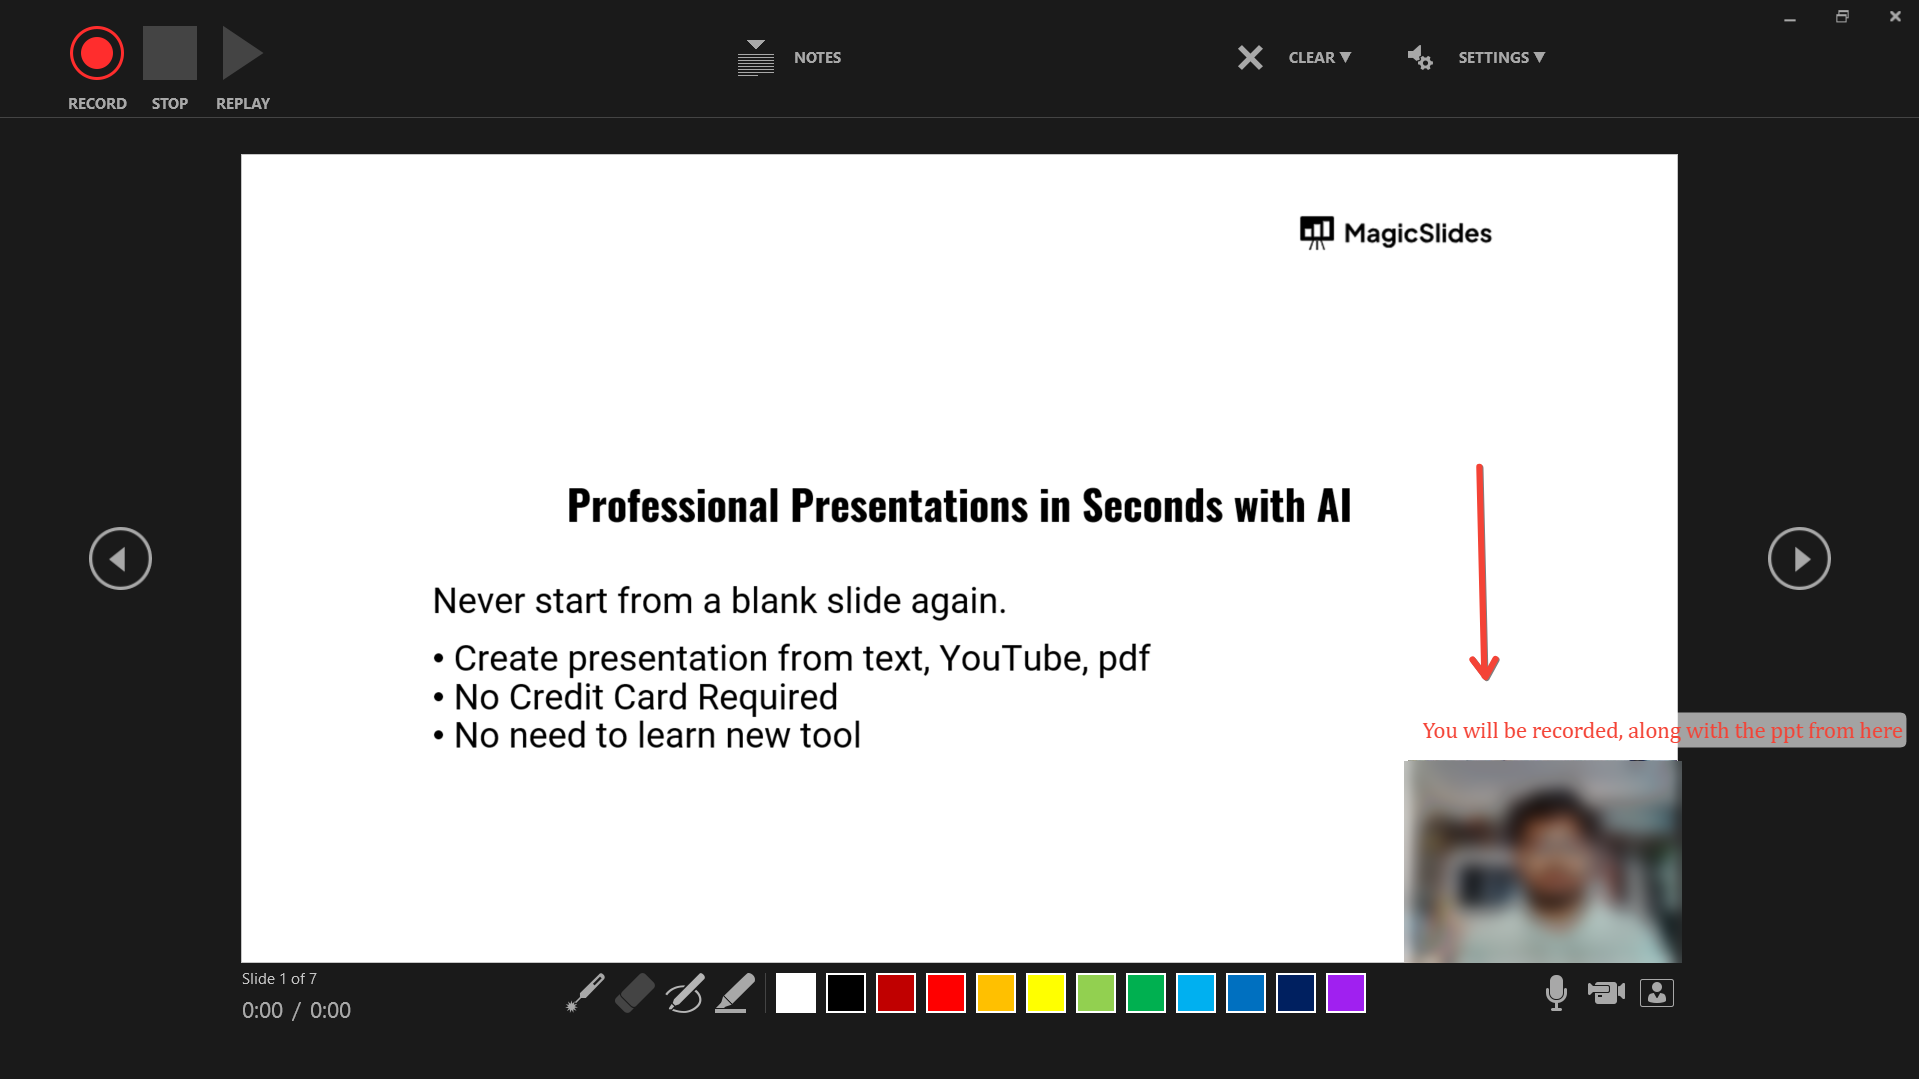
As you go through your slides, you can talk, explain key points, or appear in the corner of the screen if you're using video. Use the "Pause" button if you need to take a break, and click "Stop" once you’re done with the recording.
Step 7: Save and Export the Presentation
Once satisfied with your recording, save your presentation by clicking "File" and then "Save As."
If you want to share the presentation with others, you can export it as a video by going to "File" > "Export" > "Create a Video." Choose the desired video resolution and export format.
💡
Conclusion
Recording yourself on PowerPoint is an excellent way to personalize your presentations and enhance audience engagement.
Whether you're adding voiceover or video introductions, PowerPoint makes the process easy with its built-in recording tools.
Follow this guide to create a professional and dynamic presentation that leaves a lasting impression!
FAQs are here to help!
Can I edit my recording after it's done?
Yes, you can re-record individual slides or trim sections of the recording in PowerPoint.
Do I need a camera to record on PowerPoint?
No, you can record only audio if you don’t want to use video, or if you lack a camera.
Can I export my recorded presentation as a video?
Yes, PowerPoint allows you to export your presentation as a video in various formats.


