How to Change Shape Transparency in PowerPoint – Explained


Unlock the power of transparency in PowerPoint shapes with our easy 5-step guide for stunning presentations.
How to Change Shape Transparency in PowerPoint Easily (Beginner-Friendly Guide)
Adjusting shape transparency is one of the simplest ways to enhance slide design in PowerPoint. It's a quick design fix that anyone can apply. Additionally, modifying shape transparency in PowerPoint takes only a few clicks and works in every modern version of PowerPoint. Here are how to change shape transparency in PowerPoint in some steps.
By the end of this guide, you’ll have everything you need to understand this topic. So, let’s start our discussion with an overview of the same!
What is Shape Transparency in PowerPoint?
Shape transparency means how see-through a shape becomes. For the same, PowerPoint has a built-in feature, i.e. Transparency slider under the Format Shape pane that lets one adjust the opacity in seconds. You can select the transparency level from 0-100%, i.e.
- 100% means fully transparent
- 0% means no transparency
Further, I’ll share the detailed steps on how to change shape transparency in PowerPoint from 0-100% level. But, before, let’s explore why users want to do so.
Also read: How to add a YouTube video to PowerPoint
Why Use Shape Transparency?
When using Microsoft PowerPoint for making slides, shape makes the PPT more engaging and attractive. But, sometimes we need to modify those shapes, which benefits in several ways:
- Making the slide look cleaner
- Helping the text stand out
- Reducing shapes that look too dark or too bold
- Matching the shape with the background
- Highlighting important parts of the slide
- Keeping the slide layout neat
Now, let me show you the exact steps in the next sections.
How to Change Shape Transparency in PowerPoint?
Enhancing or reducing the shape transparency is the easiest task. For the same, below I’ll provide you with 5 different methods with quick step-by-step instructions:
#Method 1. Using Format Shape Pane
One can balance shape transparency via the Format Shape feature available in PowerPoint. Here are the steps which help you to achieve this:
- Open the PowerPoint presentation.
- Go to the Insert tab.
- Select Shapes and choose the shape you want.
- Draw the shape on the slide.
- Now, right-click the shape.
- Click Format Shape.
- A pane appears on the right side of your screen.
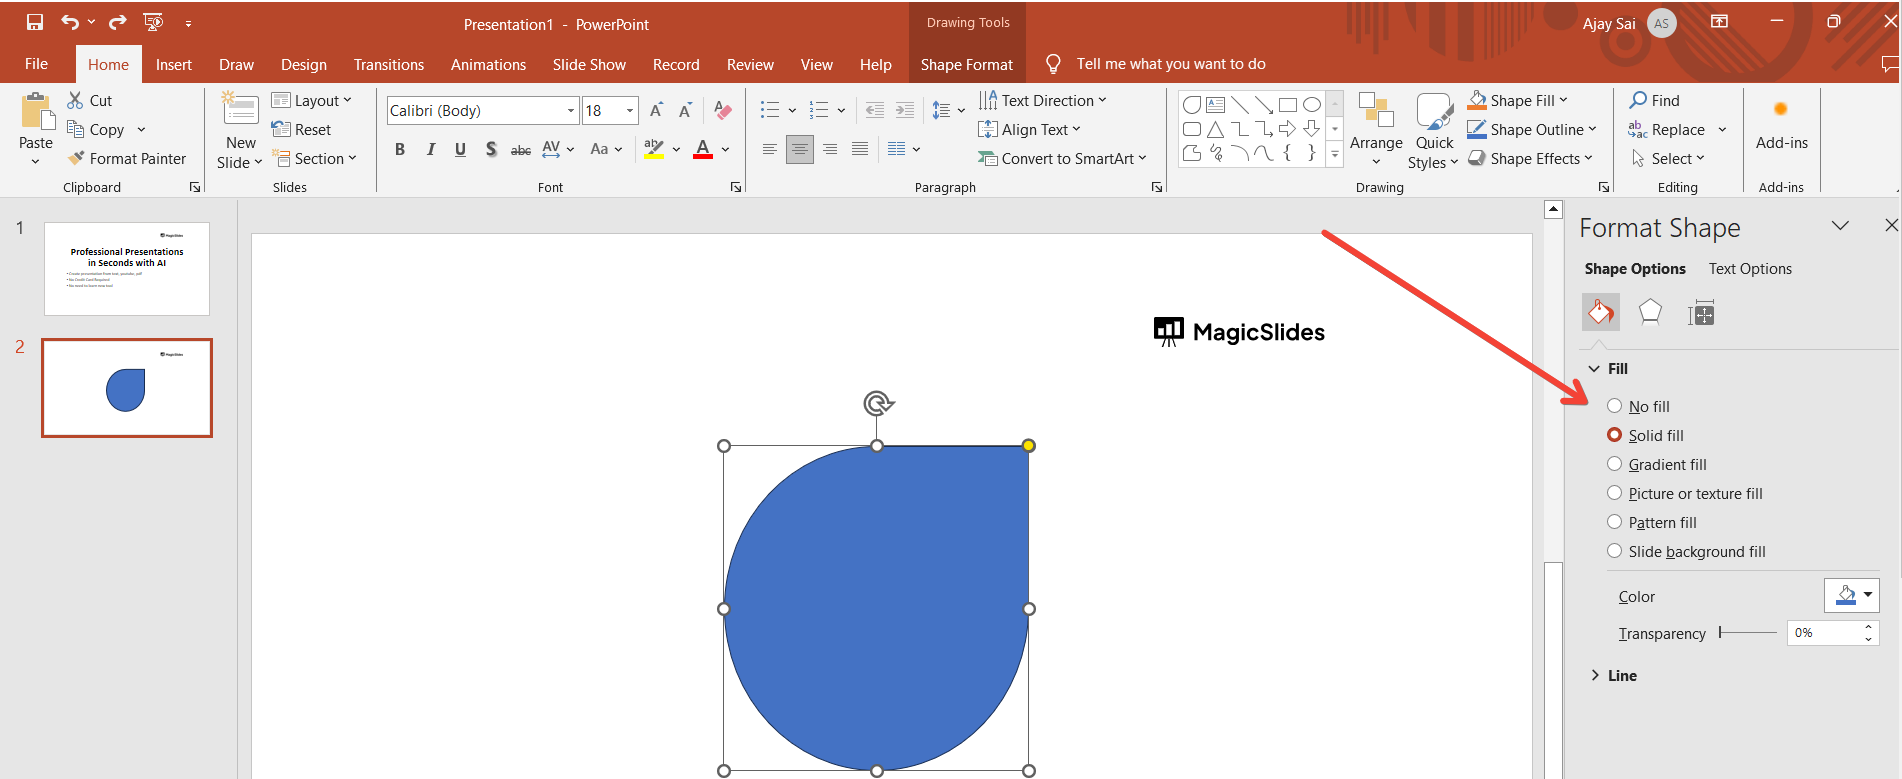
- Afterwards, in the Format Shape pane, select Fill.
- Ensure Solid Fill is selected.
- Move the Transparency slider from 0% to 100%.
This is the quickest and simplest trick, as for this, you don’t need any extension or any third-party service to be downloaded. All the features and options are available under PowerPoint.
#Method 2. How to Change Shape Transparency in PowerPoint Via the Ribbon
Open your Presentation:
Open your PowerPoint presentation and navigate to the slide where you want to add a transparent shape.
Click on the "Insert" tab in the PowerPoint ribbon.
Choose "Shapes" from the drop-down menu and select the desired shape.
Customize the Shape:
After inserting the shape, you can resize and reshape it according to your preferences.
Adjust the fill color and outline of the shape as desired before making it transparent.
Access the Format Shape Options:
Right-click on the shape, and a context menu will appear. Choose "Format Shape" from the menu to open the Format Shape pane on the right side of the screen.
Adjust Transparency:
In the Format Shape pane, navigate to the "Fill" category. Locate the "Transparency" slider and move it to the right to increase transparency. You can preview the changes in real-time until you achieve the desired level of transparency.
Fine-Tune Transparency Settings:
Depending on your needs, you can also adjust the transparency of the shape's outline. Explore additional formatting options in the Format Shape pane to refine the appearance of the transparent shape.
#Method 3. Changing Transparency for Shapes with Gradient Fill→
Sometimes users want only part of the shape to be transparent. In that case, use a gradient fill:
- Right-click the shape and select Format Shape.
- Select the Fill section and click Gradient Fill.
- Edit Gradient Stops:
- Each gradient stop has its own color and transparency.
- Click on a gradient stop.
- Adjust the Transparency slider for that stop.
#Method 4. How to Make Shape Outlines Transparent→
If you don’t want the outline of the shape to stand out, change its transparency separately. Here’ how:
- In the Format Shape pane, click Line or Outline.
- Use the Transparency slider for the outline, just like the fill.
Related article: Convert Canva Presentations to PowerPoint
#Method 5. How to Change Shape Transparency in PowerPoint Using Images Inside Shapes→
If you insert an image inside a shape, PowerPoint doesn’t directly let you change the image transparency inside the shape. In that case, you can:
- Insert the image on the slide.
- Adjust Image Transparency:
- Select the image.
- Go to Picture Format.
- Click Transparency.
- Choose a preset or click Picture Transparency Options for more control.
- Set Image as Shape Fill:
- Copy the transparent image.
- Right-click the shape.
- Choose Format Shape.
- Under Fill, click Picture or Texture Fill.
- Paste the image.
Use AI If You Don’t Want to Adjust Shapes Manually→→
If you don’t want to spend time changing shape transparency or adjusting the design by yourself, let AI do it for you. MagicalSlides AI PPT Generator can create full slides automatically based on the topic you enter.
I’ve used it when I want quick results without manually editing every shape on the slide. It can:
- Create ready-made slides in seconds
- Add shapes, text, icons, and layouts automatically
- Balance the design so you don’t have to adjust transparency or colors
- Save time when you need a full presentation quickly
The best part, which I like the most, one can try this solution for free to try its robust performance.
Author’s Verdict→→
Changing shape transparency in PowerPoint is one of the simplest ways to improve slide engagement. Once you get used to the Format Shape pane, you can control transparency effectively and create modern-looking presentations easily.
That’s why, in this discussion, I used simple language to make you understand how to change shape transparency in PowerPoint within seconds. So, bookmark this guide, and share it with others, those who really need to know this information.
People Also Ask (FAQs)→→
Q1. How to change shape transparency in PowerPoint?
To change shape transparency in PowerPoint:
- Select the shape
- Open the Format Shape pane, and use the Transparency slider under Solid Fill.
- Adjust it from 0% to 100% depending on desire.
Q2. Where do I find the transparency option in PowerPoint?
You’ll find the transparency option inside the Format Shape pane:
- After right-clicking the shape and choosing Format Shape.
- Go to Fill or Line settings.
Q3. Can I make only part of a shape transparent in PowerPoint?
Yes. Use Gradient Fill to control transparency for each gradient stop.
Q4. How to change the opacity of a shape from the ribbon?
To change the opacity level:
- Select the shape.
- Go to Shape Format.
- Click on Shape Fill > More Fill Colors, and enter a transparency percentage.
Q5. Why is the transparency slider not working in PowerPoint?
The transparency slider doesn’t work if:
- The shape has No Fill, and the outline is set to No Line.
- Working with an older PowerPoint version that doesn’t support gradient transparency.
Q6. Does shape transparency work the same on Mac and Windows?
Yes, but the interface looks slightly different. Although the Transparency slider and Format Shape pane work the same on both PowerPoint for Windows and PowerPoint for Mac.


