How to Trim Video in Canva


Learn how to trim videos in Canva easily, enhancing your projects with precise and professional edits
Canva is a versatile design tool that simplifies video editing, including trimming clips to perfection.
Whether you’re creating a professional presentation, a social media post, or a personal project, trimming helps you focus on the most relevant parts of your video.
Follow this step-by-step guide to learn how to trim videos in Canva effortlessly.
How to Trim Video in Canva | Steps to Trim Video in Canva
Step 1: Open Canva and Upload Your Video
Log in to your Canva account and click on Create a Design to start a new project or open an existing one.
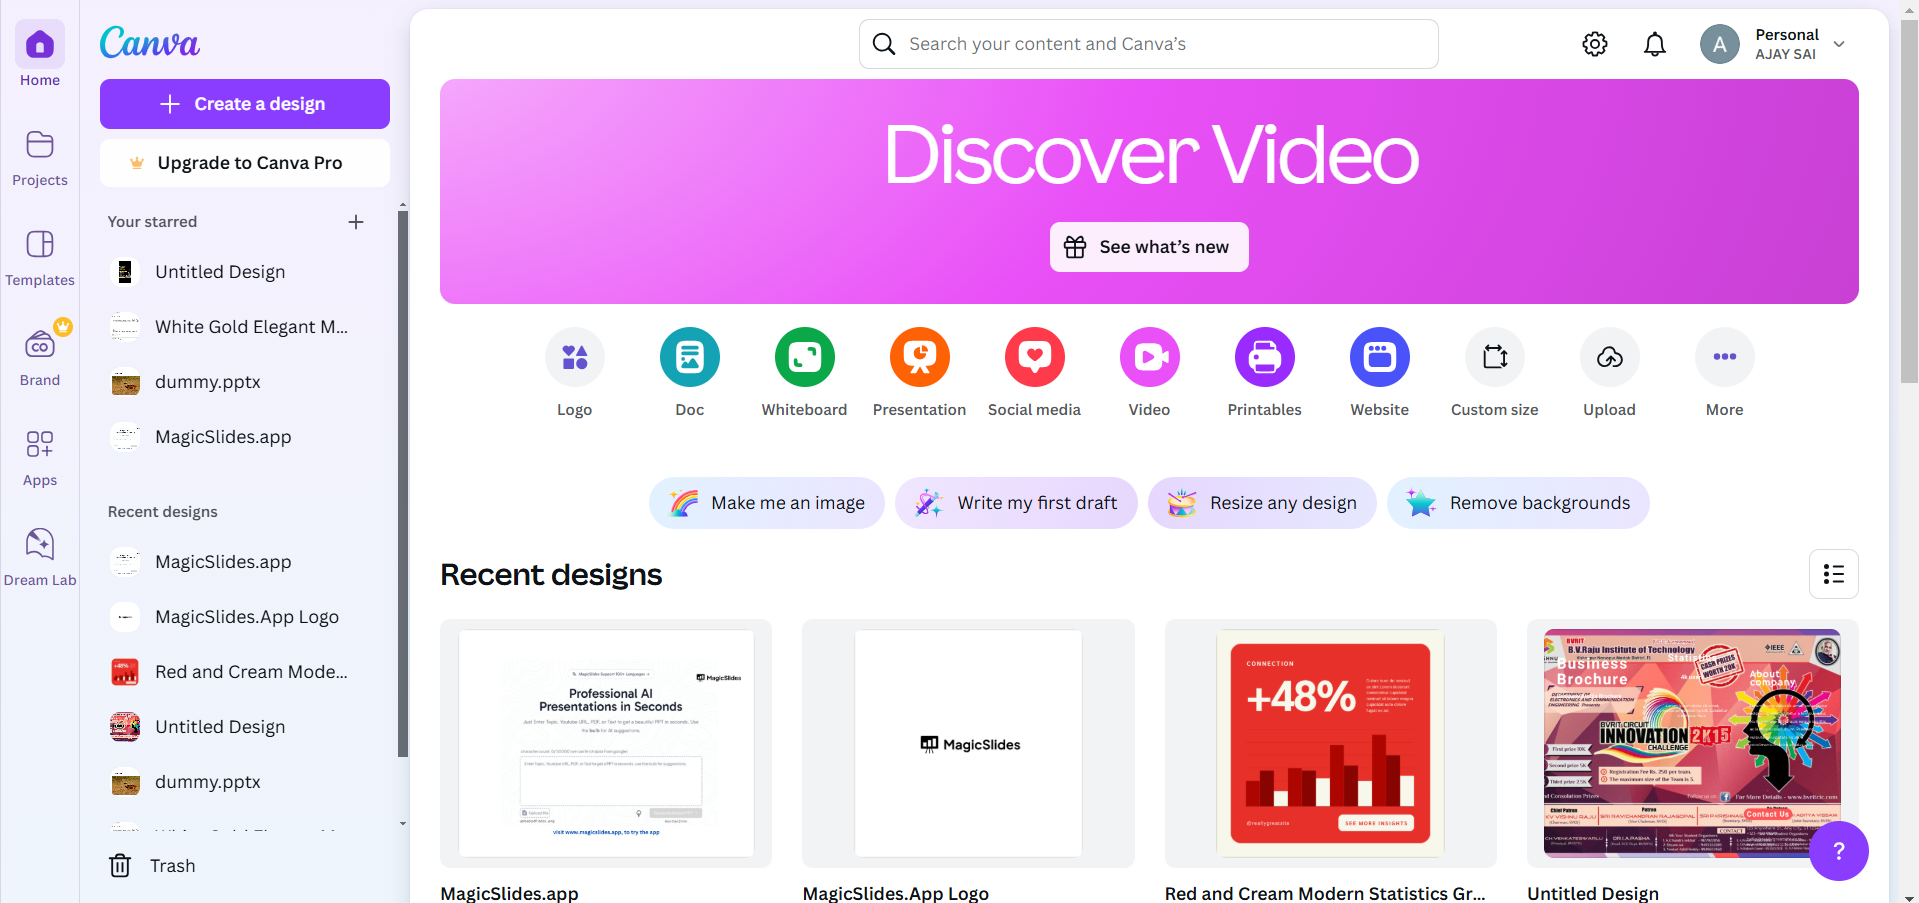
Navigate to the Uploads tab on the left sidebar and click Upload Files to import your video.
Once uploaded, drag the video onto your project canvas.
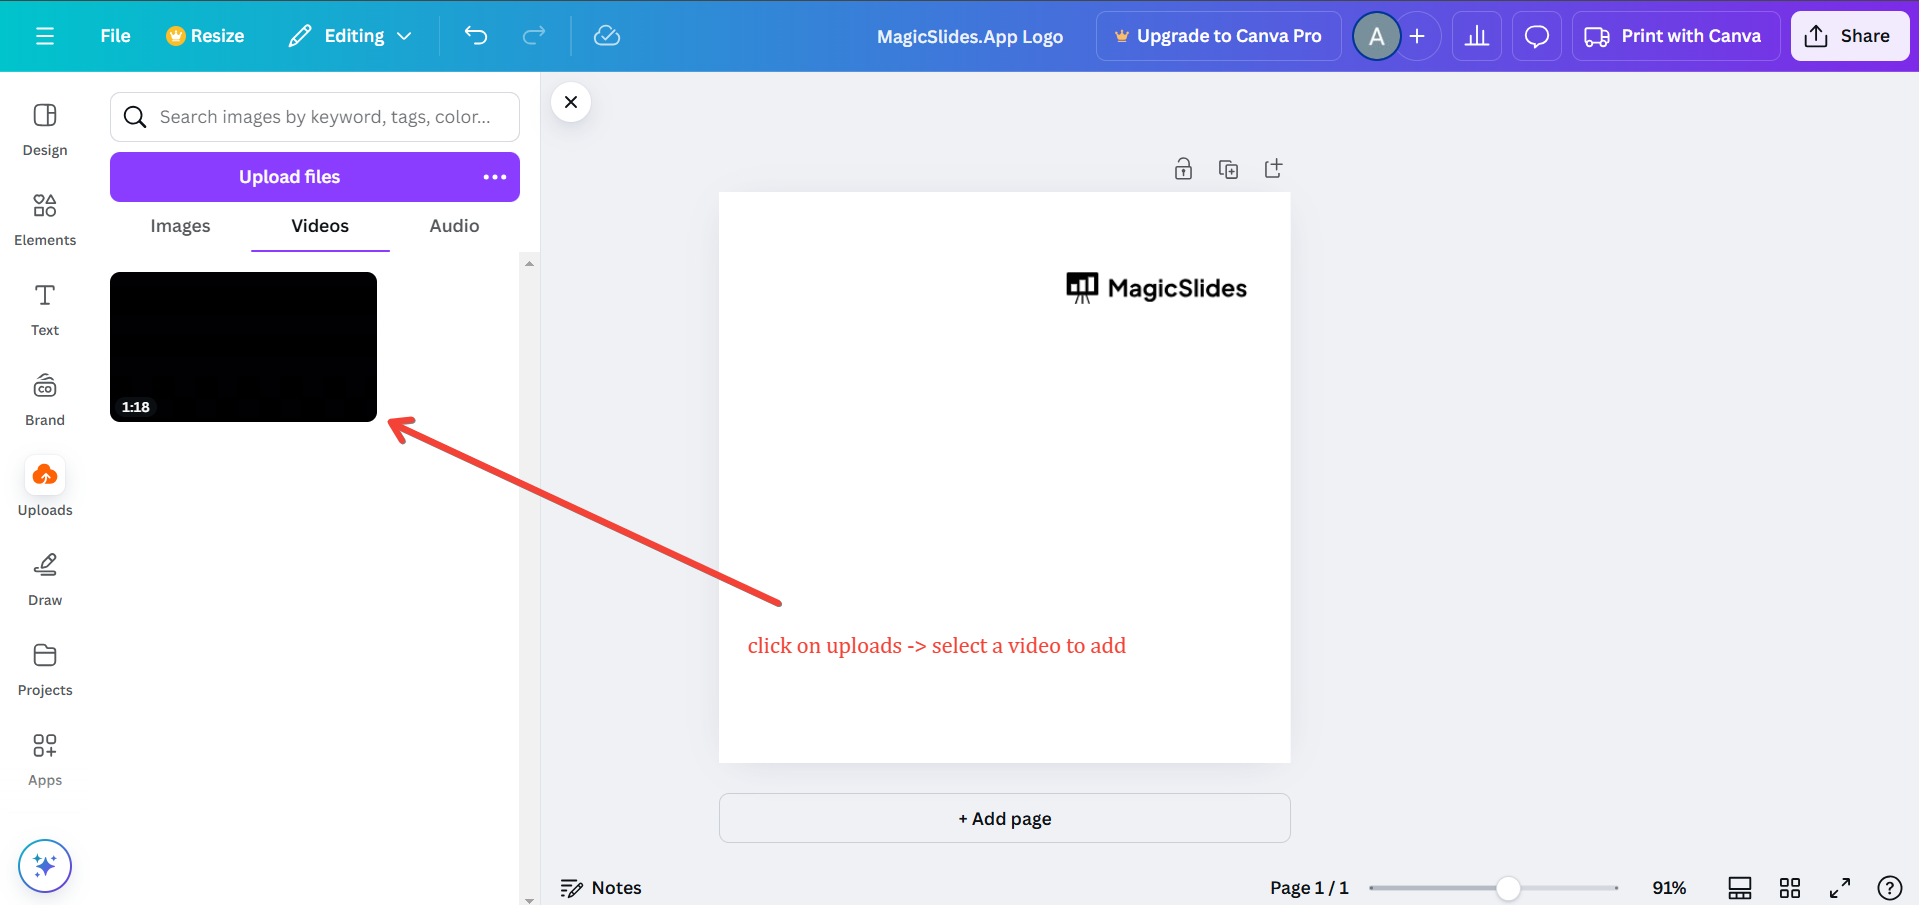
Step 2: Access the Video Trimming Tool
Click on the video to select it.
A toolbar will appear at the top or bottom of the editor. Click the Scissors icon to open the trimming tool.
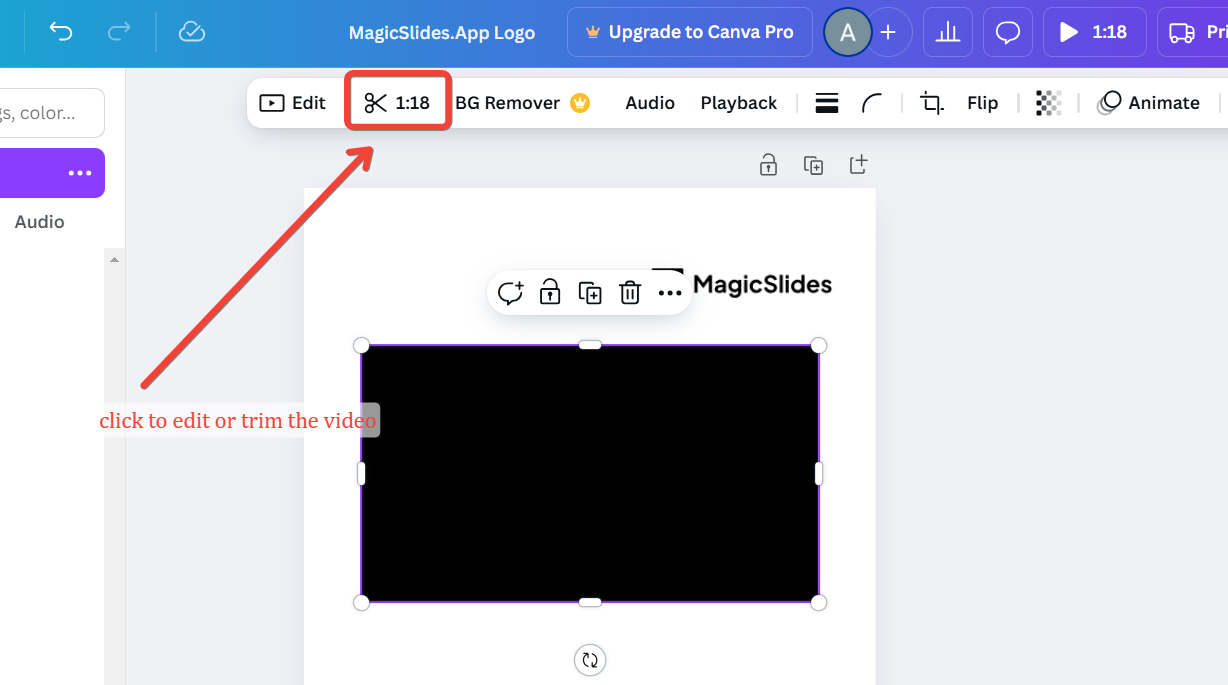
Step 3: Trim Your Video
A timeline bar will appear below the video. Use the purple sliders on both ends of the timeline to set the start and end points of your video.
You can preview your trimmed selection by pressing the play button. Adjust the sliders as needed until you’re satisfied with the result.
Step 4: Apply the Changes
Once you’ve trimmed the video, click Done or Apply to save the changes.

The trimmed video will now appear on your canvas, ready for further editing or placement.
Step 5: Save or Download Your Project
After completing your edits, click the Share button in the top-right corner of the editor.
Select Download, choose your preferred format (e.g., MP4), and save the file to your device.
Conclusion
Trimming videos in Canva is an intuitive process that allows you to focus on the most impactful parts of your clips.
By following these simple steps, you can refine your video projects for presentations, social media, or creative storytelling.
Canva’s user-friendly interface ensures that even beginners can achieve professional results with ease.
FAQs on Trimming Video in Canva
Can I undo trimming in Canva?
Yes, trimming is non-destructive in Canva. You can select the video and readjust the sliders to recover the trimmed parts.
Does Canva support trimming videos of all formats?
Canva supports popular video formats like MP4, AVI, and MOV. Ensure your video is in a compatible format for smooth editing.
Can I trim multiple videos in one project?
Absolutely! You can upload and trim multiple videos within the same project, combining them seamlessly for your final design.
By mastering this feature, you can enhance the storytelling and visual appeal of your Canva projects with minimal effort!


