How to Compress a PowerPoint Presentation to 10MB?


Learn how to compress a PowerPoint presentation to 10MB or less. Reduce PPT file size by compressing images, videos, fonts, and media without losing quality.
Large PowerPoint presentations can be frustrating. They take longer to upload, are difficult to email, and often exceed file size limits on learning platforms, job portals, and collaboration tools.
If your PowerPoint file is too large, don’t worry. There are several easy ways to compress a PPT to 10MB or less without significantly affecting the quality of your presentation.
In this guide, you’ll learn multiple methods to reduce PowerPoint file size, including image compression, media optimization, and an AI-powered alternative for creating lightweight presentations from scratch.
Why Is Your PowerPoint File So Large?
PowerPoint files typically become oversized because of:
- High-resolution images
- Embedded videos and audio files
- Excessive animations and effects
- Unused slide masters and layouts
- Embedded fonts
- Large screenshots and graphics
Reducing these elements can dramatically decrease file size.
Method 1: Compress Images in PowerPoint
Images are usually the biggest contributor to a large PPT file.
Step 1: Open Your Presentation
Launch PowerPoint and open the presentation you want to compress.
Step 2: Select Any Image
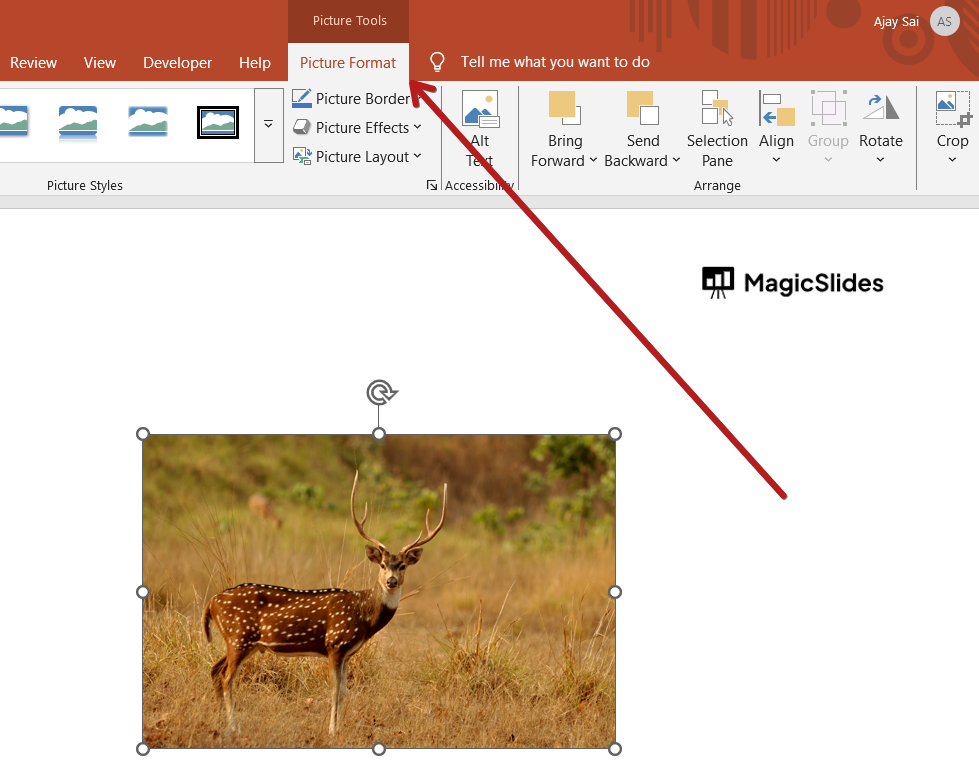
Click on any image in your presentation to activate the Picture Format tab.
Step 3: Go to Picture Format > Compress Pictures
Under the Picture Format tab, click Compress Pictures. A dialog box will appear with compression options.
Step 4: Uncheck “Apply Only to This Picture”
Ensure that Apply only to this picture is unchecked so PowerPoint compresses every image in the presentation.
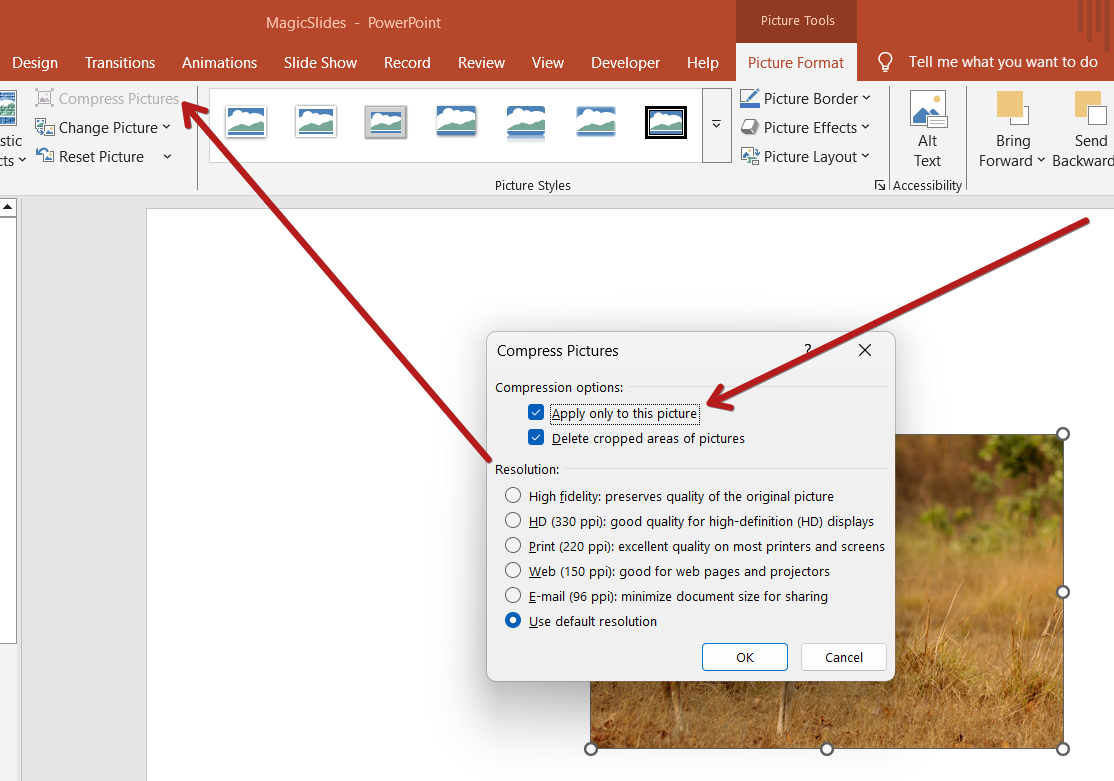
Step 5: Choose a Compression Resolution
Select a lower resolution based on your needs:
| Resolution | Best For |
| Email (96 ppi) | Maximum file size reduction |
| Web (150 ppi) | Online presentations |
| Print (220 ppi) | Better image quality |
If your goal is getting under 10MB, choose Email (96 ppi).
Step 6: Save the Presentation
Click OK, save the file, and check the new size.
Method 2: Compress Videos and Media
Embedded videos can quickly make a PowerPoint presentation exceed 50MB or even 100MB.
Steps to Compress Media
- Open your presentation.
- Click File > Info.
- Select Compress Media.
- Choose:
- Presentation Quality
- Internet Quality
- Low Quality
For the smallest file size, select Low Quality.
PowerPoint will automatically optimize all embedded media.
Method 3: Remove Unused Content
Many presentations contain hidden elements that increase file size.
Delete:
- Unused slides
- Hidden slides
- Unused images
- Duplicate graphics
- Unnecessary animations
A quick cleanup can often reduce file size by several megabytes.
Method 4: Save as PPTX Instead of PPT
If you’re still using the older .PPT format, converting to .PPTX can significantly reduce file size.
How to Convert
- Click File > Save As.
- Select PowerPoint Presentation (*.pptx).
- Save the file.
The PPTX format uses compression by default, making files much smaller than legacy PPT files.
Method 5: Remove Embedded Fonts
Embedding fonts ensures consistent formatting but increases file size.
To Disable Font Embedding
- Click File > Options > Save.
- Locate Preserve fidelity when sharing this presentation.
- Uncheck Embed fonts in the file.
- Save the presentation.
This can noticeably reduce file size, especially if multiple fonts are embedded.
Create Lightweight Presentations Faster with MagicSlides
Tired of spending hours crafting a presentation? Here’s a smarter solution: MagicSlides AI PPT Maker.
Whether it’s for work, school, or a pitch deck, building a presentation from scratch can take hours—from researching and organizing content to designing each slide. But what if you could skip all that and have your presentation ready in under a minute?
That’s exactly what MagicSlides does.
MagicSlides is an AI-powered tool that creates professional, engaging presentations with just one prompt. Simply enter your topic, and the platform will generate a full deck complete with structured content, design elements, and suggested visuals.
Here’s what you’ll love about MagicSlides:
- Instant slide generation with just one prompt
- Smart content organization and bullet points
- Visually polished designs, no design skills needed
- Multiple formats: Download as PowerPoint, use in Google Slides
- Supports customization, edits, and re-generation
- Converts YouTube videos, URLs, or text into full presentations
- Perfect for business, education, content creation, and more
Want to try it yourself? Click here to start creating your first presentation for free!
Conclusion
Compressing a PowerPoint presentation to 10MB is easier than most people think. By compressing images, optimizing media, removing unnecessary content, and saving your file as PPTX, you can dramatically reduce file size while maintaining presentation quality.
If you frequently create presentations, using MagicSlides can save even more time by generating professional, lightweight presentations from a single prompt—helping you focus on your message instead of file management.
FAQs
Q1. Will compressing a PowerPoint reduce image quality?
Yes, image compression lowers resolution, but in most presentations the difference is barely noticeable, especially on screens.
Q2. Can I compress a PPT without PowerPoint?
Yes. You can use online PowerPoint compression tools or upload the presentation to cloud-based platforms that optimize file size automatically.
Q3. What is the ideal PowerPoint file size?
For email sharing, staying below 10MB is recommended. For web uploads and LMS platforms, under 20MB is usually acceptable.
Q4. Why is my PPT still larger than 10MB after compressing images?
Large videos, embedded fonts, and unused media files can still consume significant space. Compress media and remove unnecessary assets.
Q5. Does PowerPoint automatically compress images?
Not always. PowerPoint may preserve the original image quality unless you manually apply compression settings.


