How to enable merge Shapes in PowerPoint


PowerPoint’s “Merge Shapes” tool combines or subtracts shapes to create custom visuals and unique designs.
The "Merge Shapes" feature in PowerPoint allows you to create complex shapes by combining, subtracting, intersecting, or excluding different shapes.
This tool is particularly useful for designing custom graphics and enhancing your presentations with unique visual elements.
In this blog post, we'll walk you through the steps to enable and use the "Merge Shapes" feature in PowerPoint, helping you create more dynamic and visually appealing slides.
How to enable merge Shapes in PowerPoint
Step 1: Open PowerPoint
Start by opening Microsoft PowerPoint on your computer.
You can do this by searching for "PowerPoint" in your Start menu or by clicking on the PowerPoint icon on your desktop or taskbar.
Step 2: Create or Open a Presentation
Once PowerPoint is open, either create a new presentation or open an existing one.
To start a new presentation, click on "Blank Presentation" or select a template that fits your needs.
To open an existing presentation, click on "File" in the top-left corner, select "Open," and choose the presentation file you want to edit.
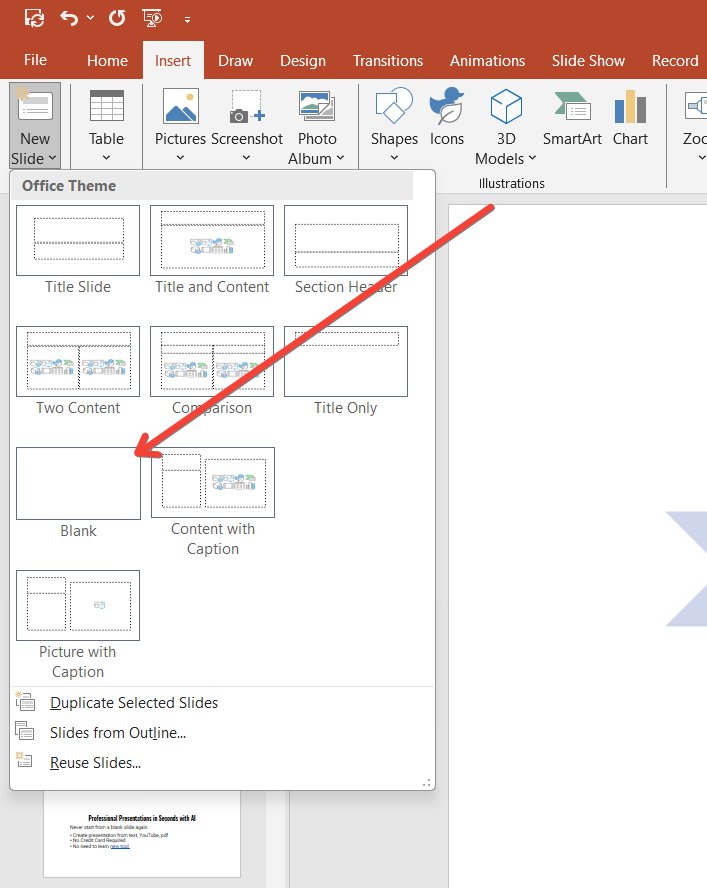
Step 3: Insert Shapes
To use the "Merge Shapes" feature, you need to have at least two shapes on your slide.
Go to the "Insert" tab on the PowerPoint ribbon, and click on "Shapes" to open the shapes gallery.
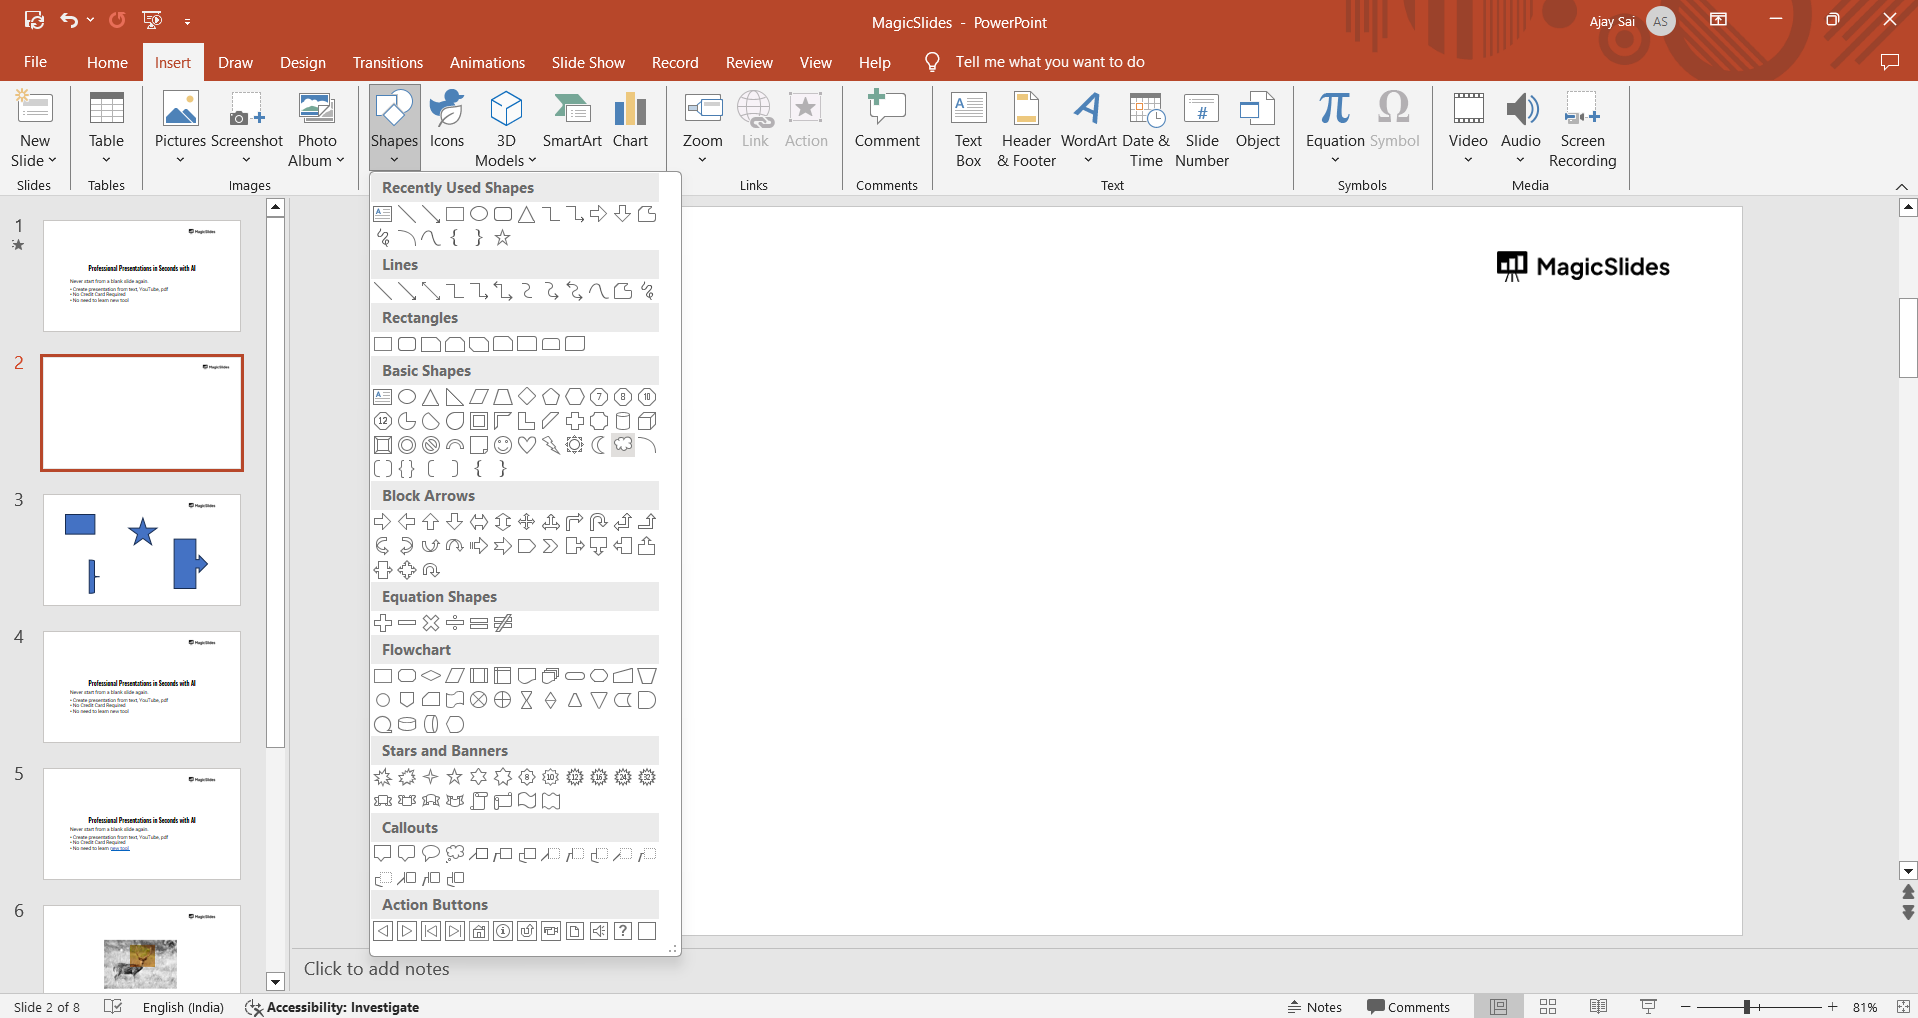
Choose the shapes you want to use and draw them on your slide. For example, you might insert a circle and a rectangle.
Step 4: Select the Shapes
Click and drag to select the shapes you want to merge.
You can select multiple shapes by holding down the "Shift" key while clicking on each shape, or by clicking and dragging a selection box around them.

Discover where most presentation creation work happens, focusing on PowerPoint's primary editing view for optimal design and impact.
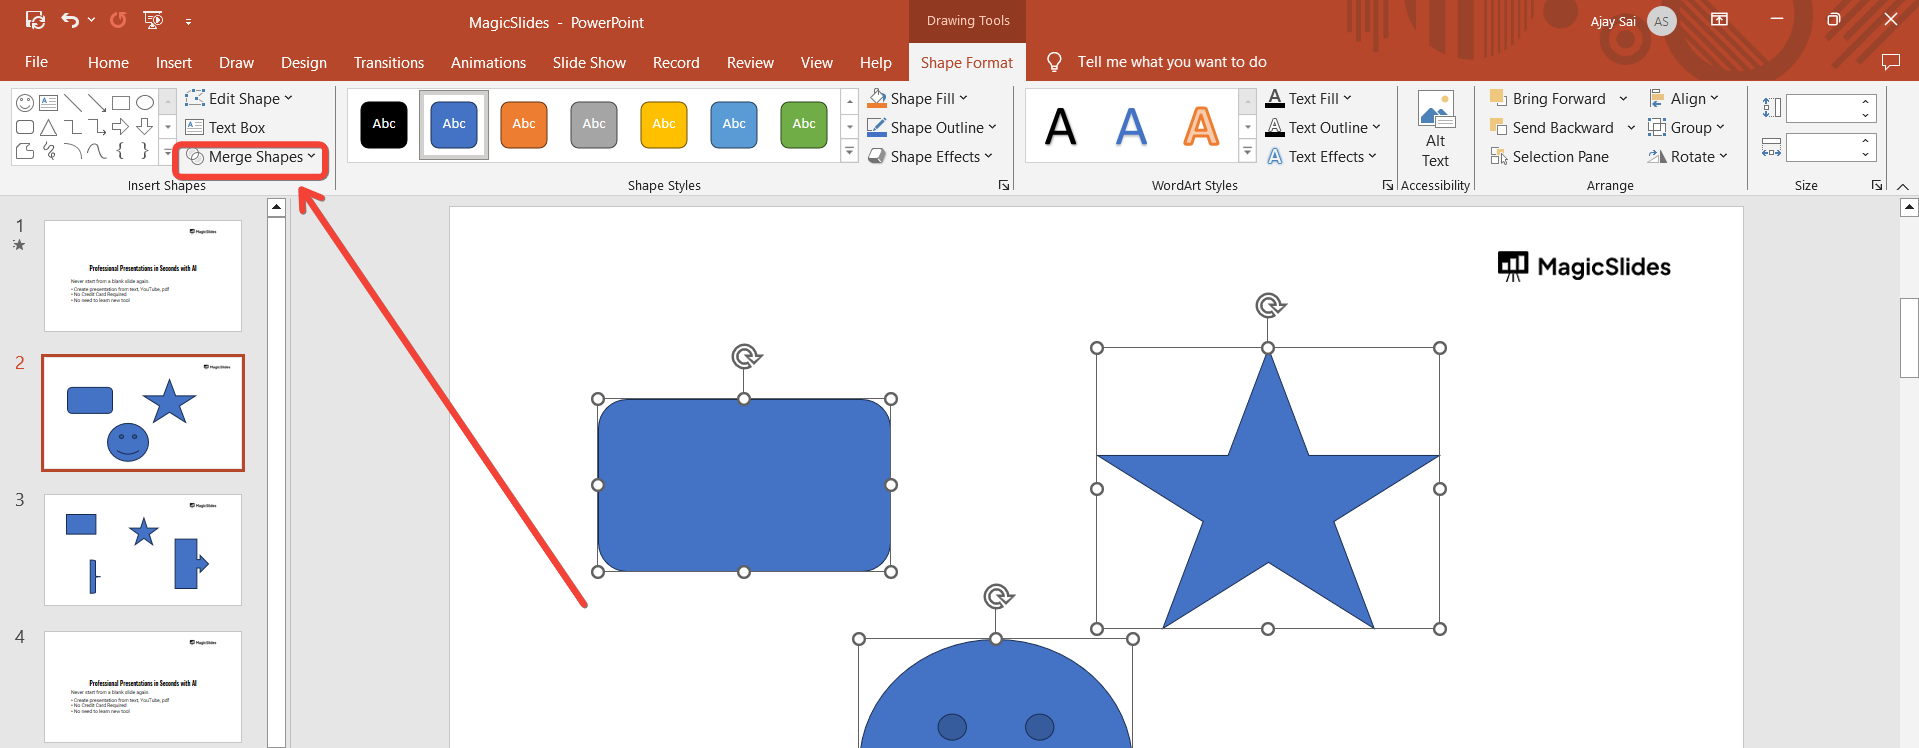
Step 5: Access the Merge Shapes Options
With the shapes selected, go to the "Shape Format" tab on the PowerPoint ribbon. This tab appears automatically when you have shapes selected.
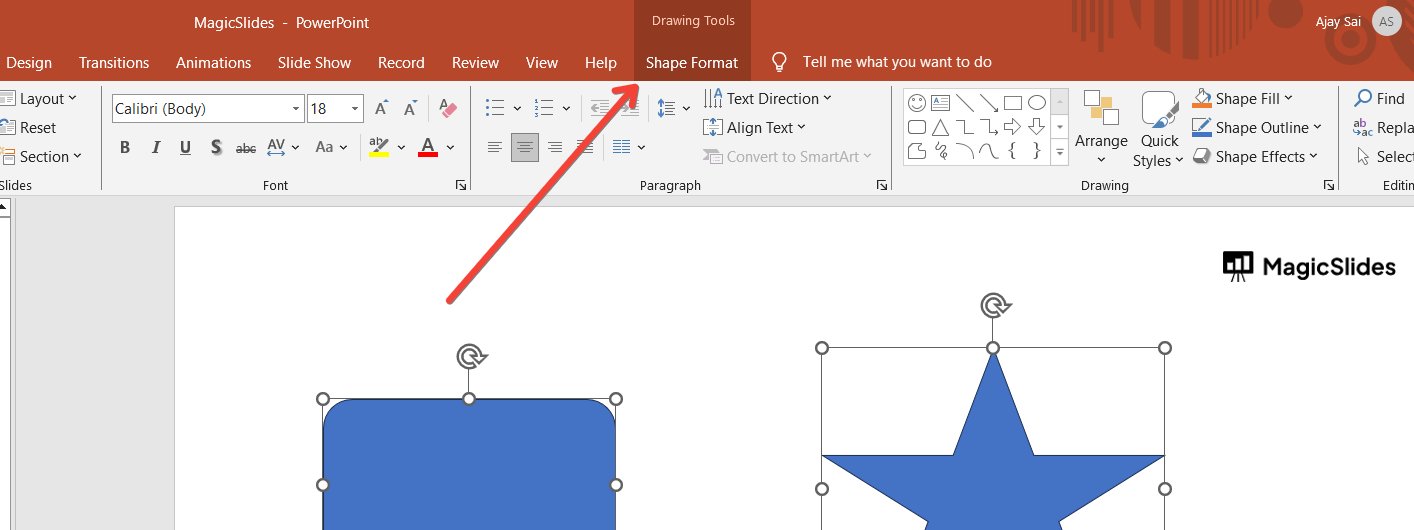
In the "Insert Shapes" group, look for the "Merge Shapes" dropdown menu. Click on this dropdown to reveal the merge options.
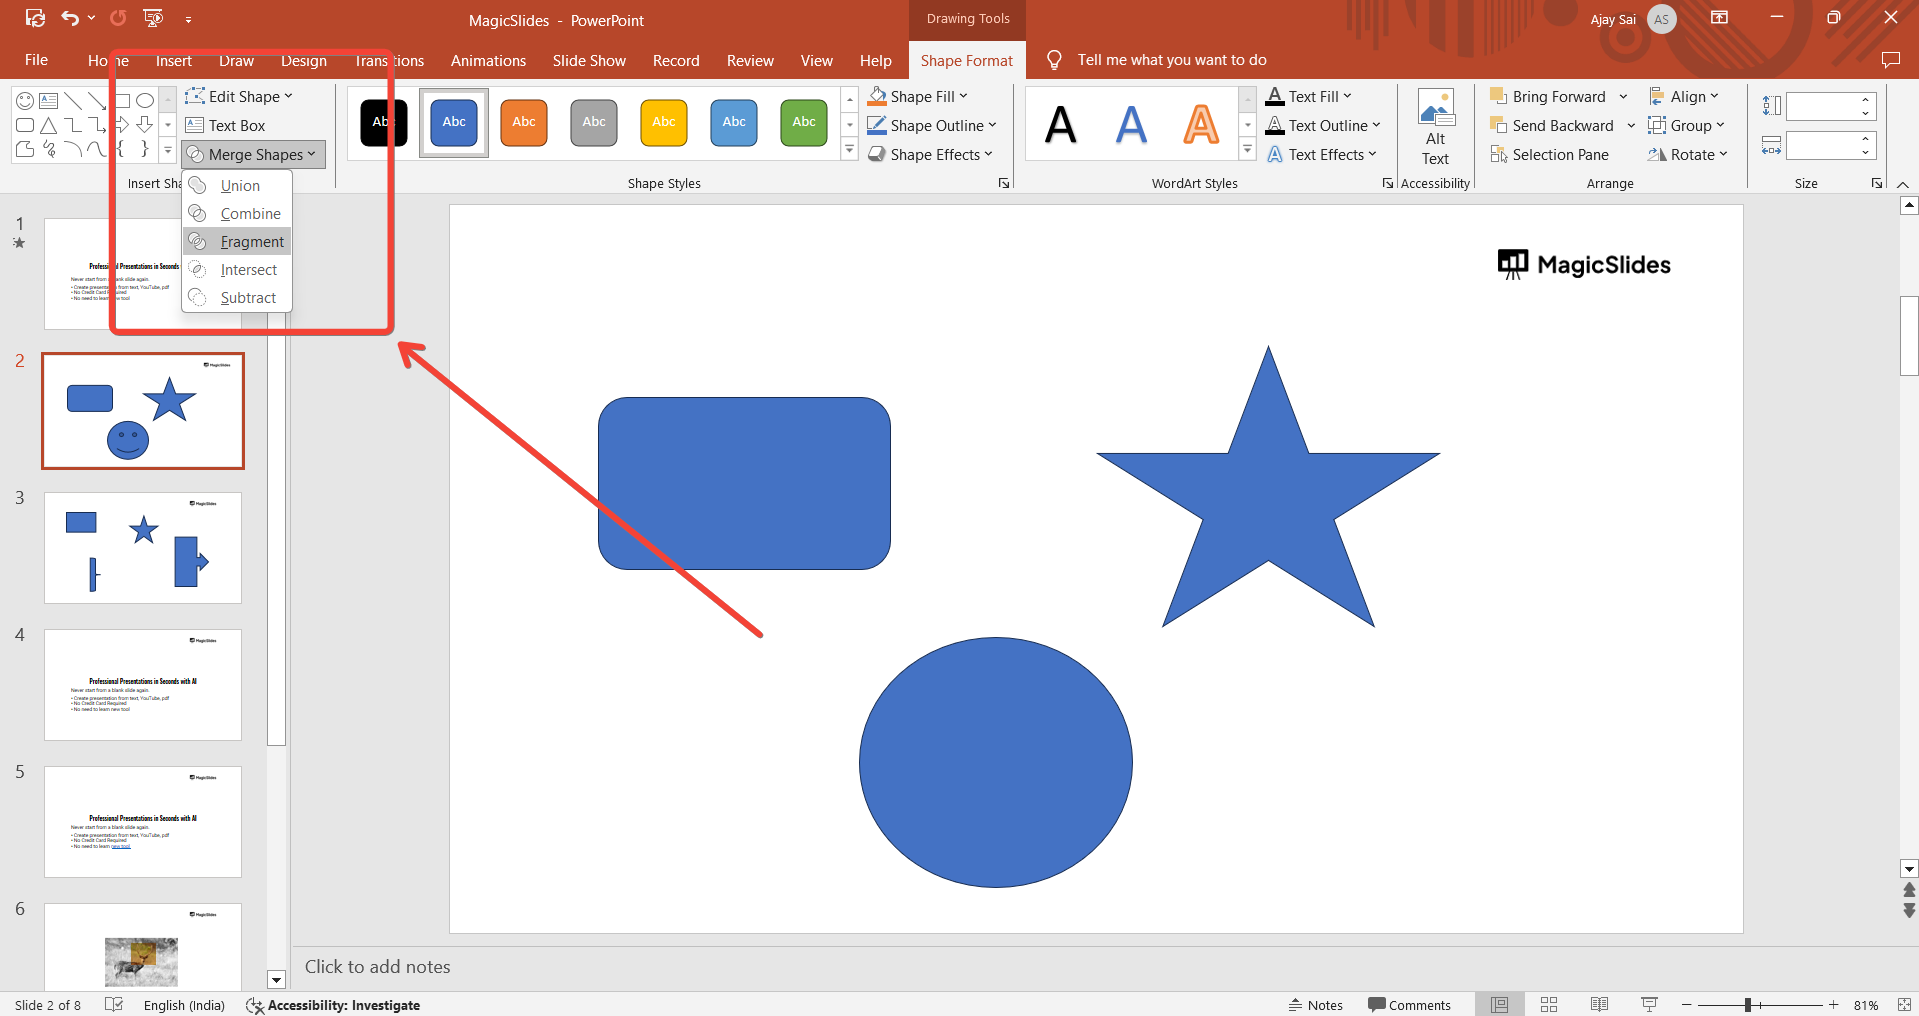
Step 6: Choose a Merge Option
The "Merge Shapes" menu offers several options:
- Union: Combines all selected shapes into one shape.
- Combine: Merges the selected shapes into a single shape, but retains any overlapping areas.
- Fragment: Breaks the selected shapes into separate shapes where they overlap.
- Intersect: Creates a shape from the overlapping area of the selected shapes.
- Subtract: Removes the top shape from the bottom shape.
Click on the option that best fits your needs. For example, if you want to create a new shape that includes the entire area of the selected shapes, choose "Union."
Step 7: Review and Adjust
After selecting a merge option, review the resulting shape on your slide.
You may need to adjust the shape's position, size, or formatting. Use the formatting tools in the "Shape Format" tab to make any necessary adjustments.
Step 8: Save Your Presentation
Once you’re satisfied with the merged shape, save your presentation by clicking on "File" and selecting "Save" or "Save As."
Choose a location and enter a file name, then click "Save" to store your changes.
Conclusion
The "Merge Shapes" feature in PowerPoint is a powerful tool for creating custom graphics and enhancing your presentations with unique visual elements.
By following these steps, you can easily enable and use this feature to combine, subtract, intersect, or exclude shapes, resulting in professional and eye-catching designs.
Experiment with different merge options to discover how they can improve your presentations and make your content stand out.
Tired of making presentations? what if we tell you you can make a presentation with just a prompt, convert YouTube videos to PPTs, convert website content to PPTs? Yes! checkout magicslides.app that does all and enjoy the free credits to make presentations in seconds.
FAQs can come handy!
Can I use the "Merge Shapes" feature with any shape in PowerPoint?
Yes, you can use the "Merge Shapes" feature with any shapes inserted via the "Shapes" menu in PowerPoint, including rectangles, circles, and custom shapes.
What should I do if the "Merge Shapes" option is not visible in the "Shape Format" tab?
Ensure you have at least two shapes selected. The "Merge Shapes" option will only appear when multiple shapes are selected.
How can I undo changes made with the "Merge Shapes" feature?
You can undo any changes by pressing "Ctrl + Z" on your keyboard or by clicking the "Undo" button in the Quick Access Toolbar.


