How to fill a shape with an Image in Google Slides


Fill any shape with an image in Google Slides to create visually stunning and dynamic presentations easily
How to Fill a Shape with an Image in Google Slides
Google Slides is a powerful, user-friendly tool for designing clean and engaging presentations.
One creative way to enhance your slides visually is by filling shapes with images. Whether you’re creating a visual story, a business pitch, or a classroom activity, this technique adds style and grabs attention instantly. Instead of placing your images over or beside a shape, why not place them inside a shape?
In this blog post, we'll walk you through the simple steps to fill a shape with an image in Google Slides, giving your slides that extra professional touch.
https://guidejar.com/guides/734eab4e-78a2-49d0-b30d-775c658461a9
Step-by-Step: Fill a Shape with an Image in Google Slides
Step 1: Open Your Google Slides Presentation
Open the presentation where you want to insert the image-filled shape. You can visit https://slides.google.com and open an existing file or start a new one.
Step 2: Insert a Shape
- Go to the toolbar at the top.
- Click on the "Shape" icon (a circle and square symbol).

- Hover over your preferred shape category (e.g., Shapes, Arrows, Callouts).
- Click on the shape you want, then draw it on your slide.
Step 3: Right-click and Choose “Format Options”
- Once your shape is selected, right-click on it.
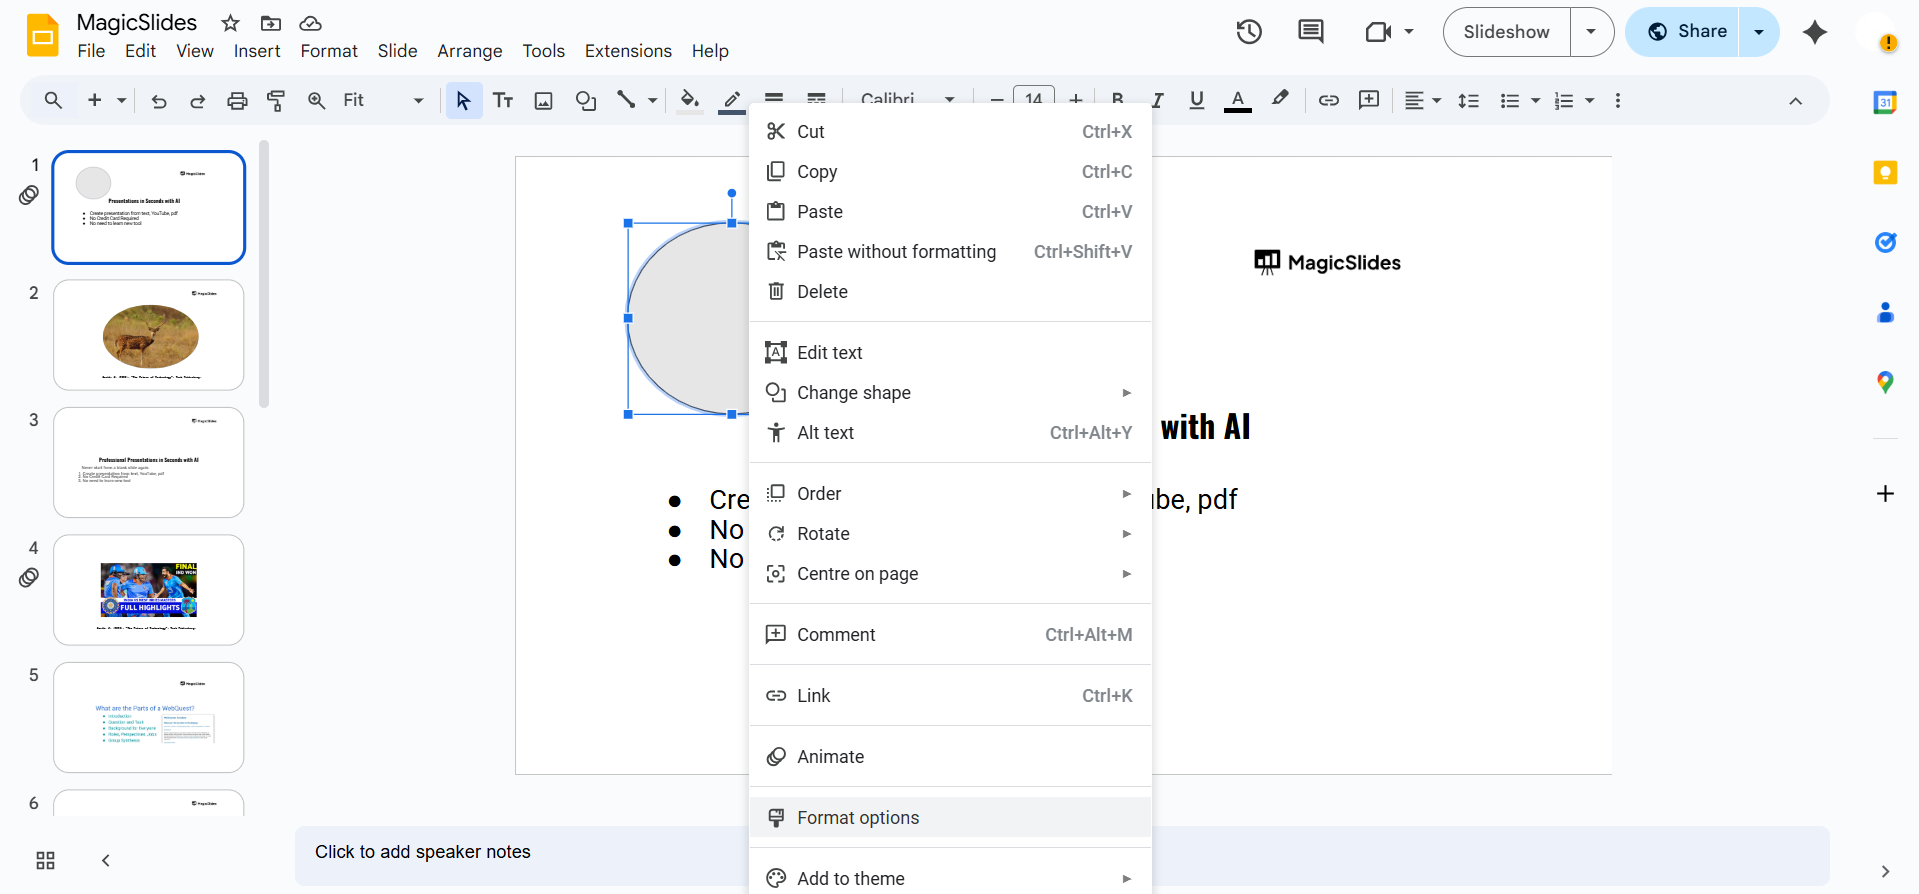
- Choose “Format options” from the dropdown menu that appears.
Step 4: Click “Fill color” > “Custom” > “Image”
- In the Format Options panel (usually appears on the right side), find the “Fill color” option in the toolbar.
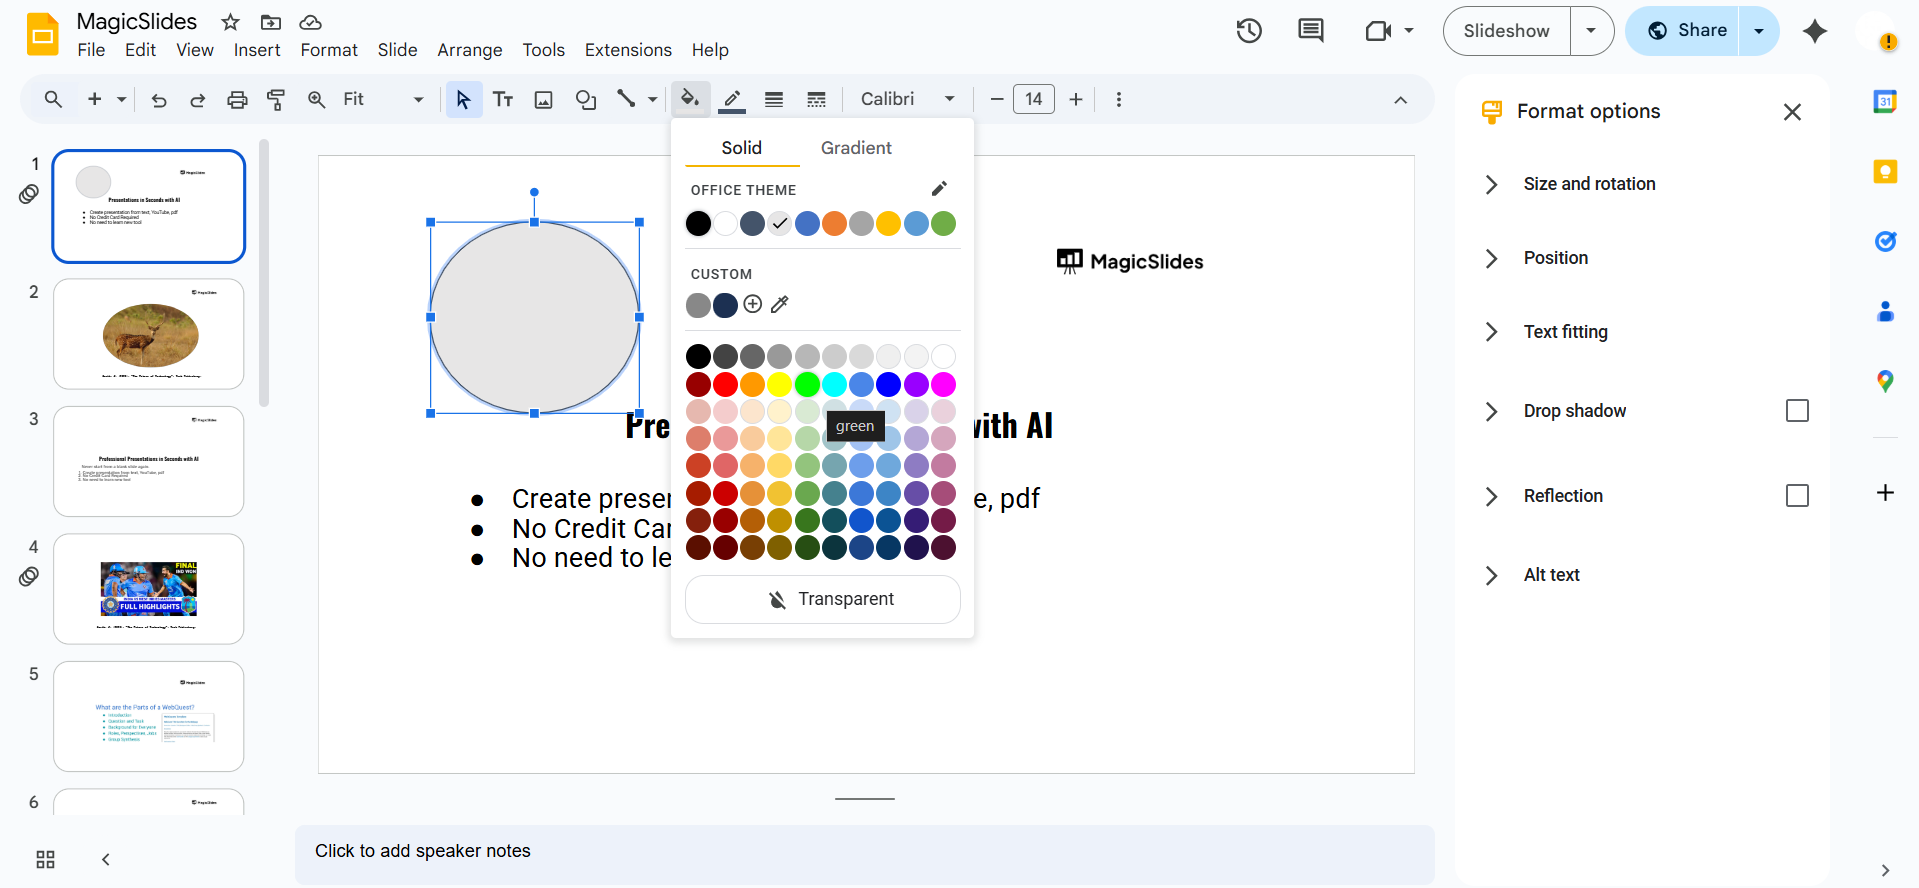
- Click on the paint bucket icon, then choose “Image” at the bottom of the color menu.
Step 5: Upload or Select Your Image
- You’ll now be prompted to upload or select an image.
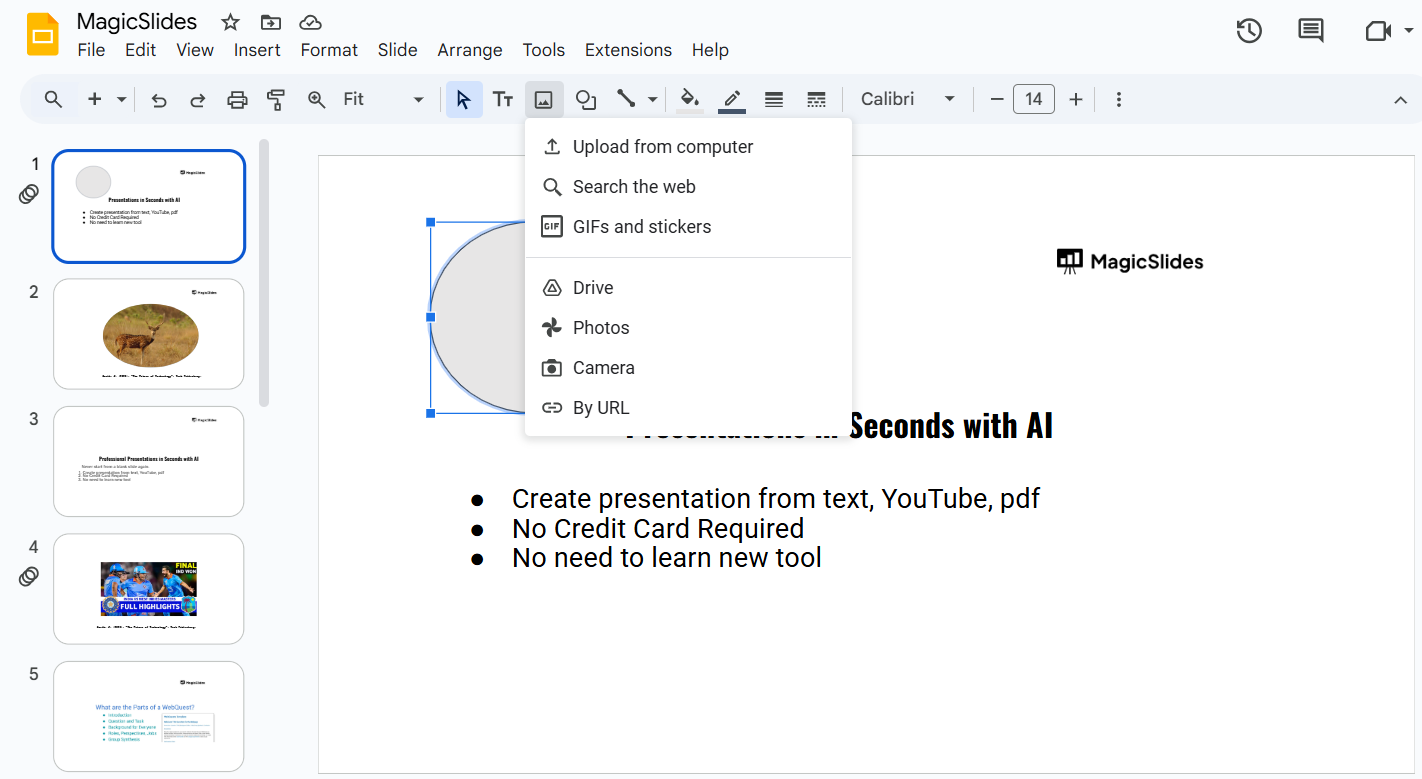
- You can upload from your computer, Google Drive, by URL, or search the web.
- Choose your image and click “Insert”.
Step 6: Adjust the Image (Optional)
- If needed, resize or reposition your shape.

- Use Format Options to apply effects like drop shadows or reflections to enhance the look.
Filling shapes with images adds a creative touch, but if you want AI to handle both design and content for you, check out MagicSlides.app generate professional presentations from any input instantly!
Conclusion
Filling shapes with images in Google Slides is a smart and creative way to make your presentations stand out.
Whether it’s for storytelling, branding, or just a bit of visual flair, it’s a quick trick that makes a big impact.
Now that you know how to do it, start experimenting with different shapes and images to bring your slides to life!
FAQs are here to guide!
Can I crop the image inside the shape in Google Slides?
No, once the image fills the shape, you can’t crop it further. However, you can resize the shape to adjust how much of the image is visible.
Can I fill any shape with an image in Google Slides?
Yes, all basic shapes (circles, rectangles, arrows, etc.) can be filled with images using the same method.
Why doesn't the “image fill” option appear for my shape?
Make sure you’ve selected the shape and not a text box or image. Only shapes support image fills.
Let me know when you're ready for the 15-word intro, or if you want to create the next blog post!


