How to make Columns in Canva


Creating columns in Canva enhances organization, readability, and aesthetics for professional-looking designs. Here’s how!
Creating columns in Canva is a simple and effective way to organize content visually.
Whether you’re designing a flyer, poster, or presentation, columns can help improve readability and give your design a professional look. In this guide, I’ll show you how to make columns in Canva step by step.
How to Make Columns in Canva: A Step-by-Step Guide
Step 1: Open Canva and Select Your Design
Log into your Canva account and open an existing design or create a new one by clicking “Create a design.”

Choose a template or set custom dimensions for your project. This is where you’ll create your column layout.
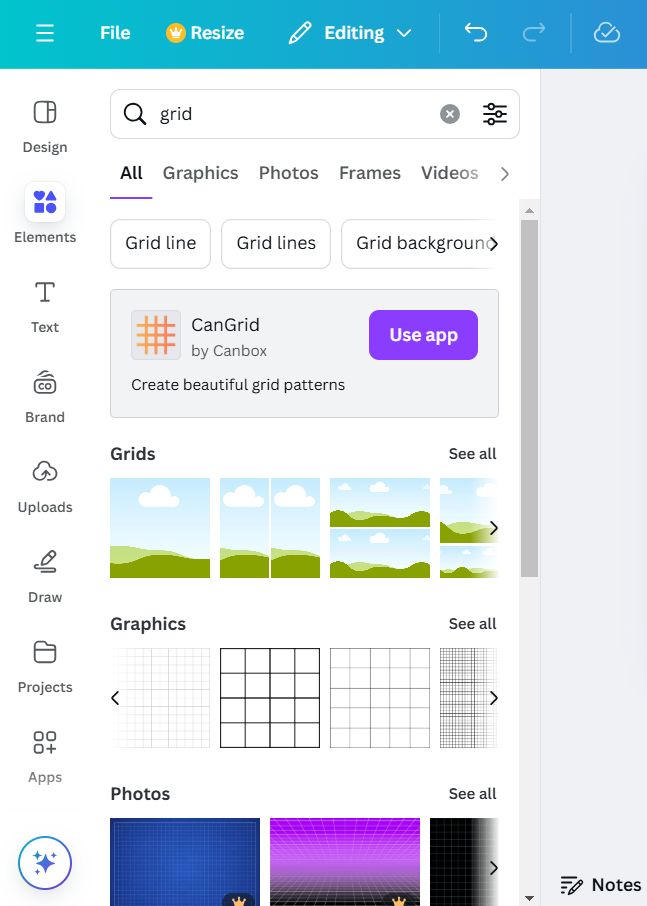
Step 2: Add a Grid Layout
To create columns, you’ll need to add a grid. Go to the left-hand toolbar and click on “Elements.”
Scroll down and look for the “Grids” section or type “Grid” in the search bar. Choose a grid layout that divides your canvas into equal sections or columns and drag it onto your design.
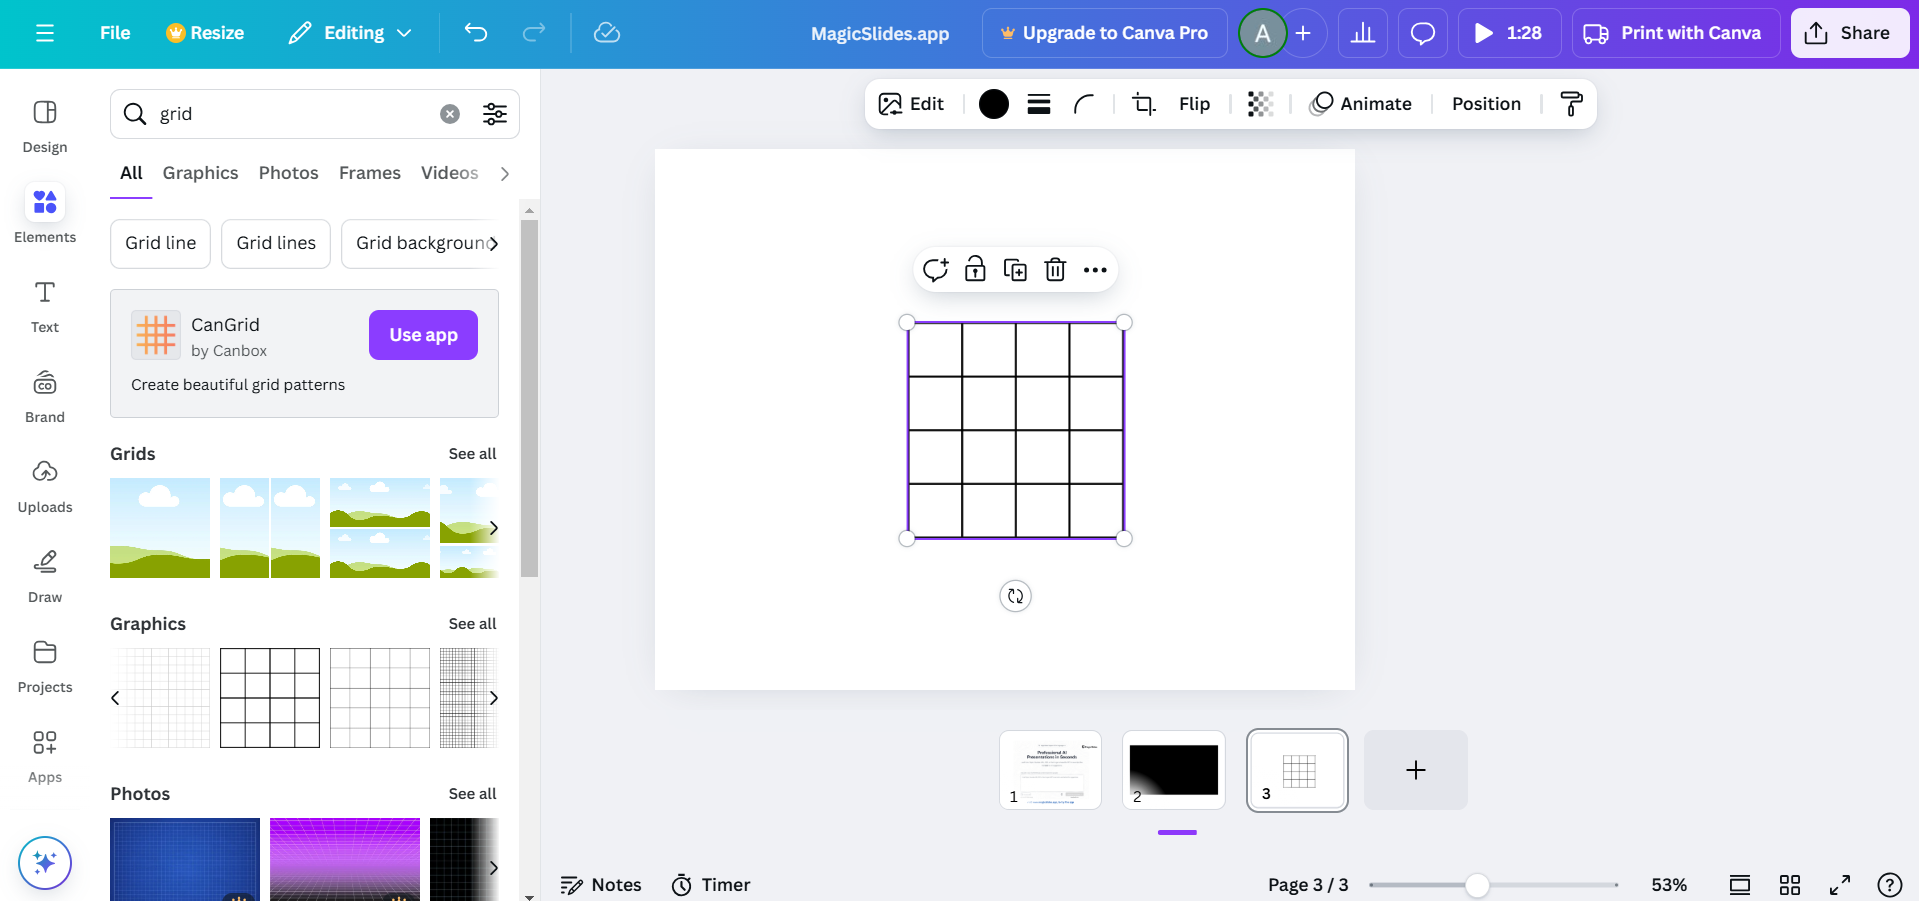
Step 3: Customize the Grid for Your Columns
Once the grid is added, you can adjust the spacing between columns by dragging the dividers.
If you need more or fewer columns, delete the current grid and select one that matches your requirements. You can also resize the grid to fit your canvas.
Step 4: Add Text or Images to the Columns
Click inside each column to add text boxes, images, or any other elements.
To add text, select “Text” from the left toolbar, drag a text box into the desired column, and start typing.
For images, drag them into the columns, and Canva will automatically snap them to the grid.
Step 5: Adjust and Style the Columns
After adding content, customize the columns further by changing font styles, colors, or images.
Use the alignment tools to ensure everything looks balanced. You can also apply background colors or borders to individual columns for added visual appeal.
Step 6: Save or Share Your Design
Once your columns are ready, click the “Share” button at the top-right corner to download your design in formats like PNG, JPG, or PDF.
You can also share it directly via a link or on social media platforms.
Conclusion
Using columns in Canva is a great way to structure your designs and make them more visually engaging.
Whether you’re organizing text, showcasing images, or presenting data, this step-by-step guide will help you create well-aligned and aesthetically pleasing columns effortlessly. Try it out in your next Canva project!
FAQs are here to help!
Can I manually create columns without using grids in Canva?
Yes, you can manually create columns by adding rectangles or lines to divide your canvas into sections. However, using grids is faster and ensures precise alignment.
Are grids customizable in Canva?
Yes, you can adjust the size, spacing, and number of sections in a grid to match your design needs.
Can I use columns in Canva’s free version?
Absolutely! Grids and most alignment tools are available in Canva’s free version, making it accessible for all users.


