Addon google slides iconPPT with AISlide TemplatesPPT TemplatesPricingBlog
    PPT with AISlide TemplatesPPT TemplatesPricingBlog
    1. Home
    2. Blog
    3. How to make Text Mask in Canva

    How to make Text Mask in Canva

    Ajay Sai

    Published By

    Ajay Sai

    Approved By

    Admin

    Published On

    January 13th, 2025

    Reading Time

    3 min read

    Learn how to create stunning text masks in Canva to enhance your designs with image-filled text

    Text masking is a creative design technique where text is filled with an image, creating a visually stunning effect.
    Canva makes it easy to achieve this effect with just a few simple steps.
    Whether you’re designing for social media, presentations, or personal projects, this guide will walk you through the process of making a text mask in Canva.

    How to Make Text Mask in Canva | Steps to Make Text Mask in Canva

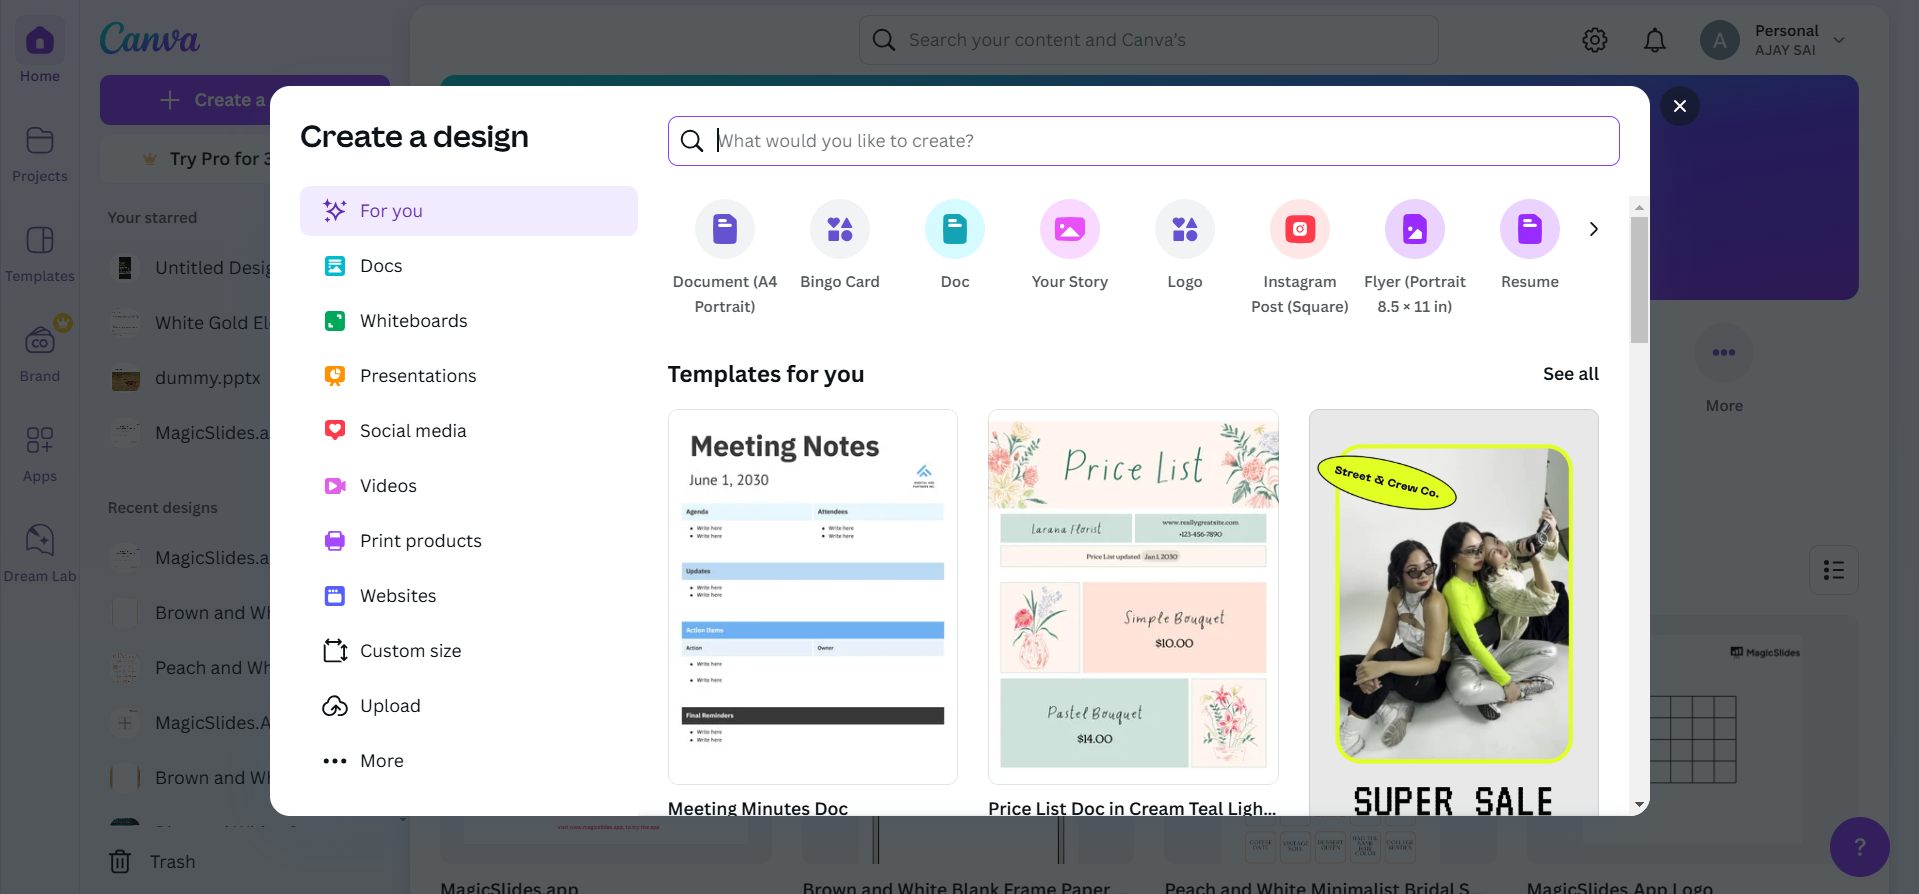
    Step 1: Open Canva and Start a New Design

    Log in to your Canva account or sign up if you’re new to the platform.
    notion image
    Create a new design by clicking on “Create a Design” and selecting the desired canvas size, such as Instagram Post or Presentation.
    notion image

    Step 2: Add Text to Your Canvas

    Click on the “Text” tab in the left-hand menu.
    notion image
    Choose a text style or click “Add a Heading” and type your desired text. Use bold and thick fonts like Impact or Anton for the best masking results.

    Step 3: Customize the Text

    Resize the text by dragging the corner handles to fit your canvas. Center the text or place it where you want the mask effect to appear.
    notion image

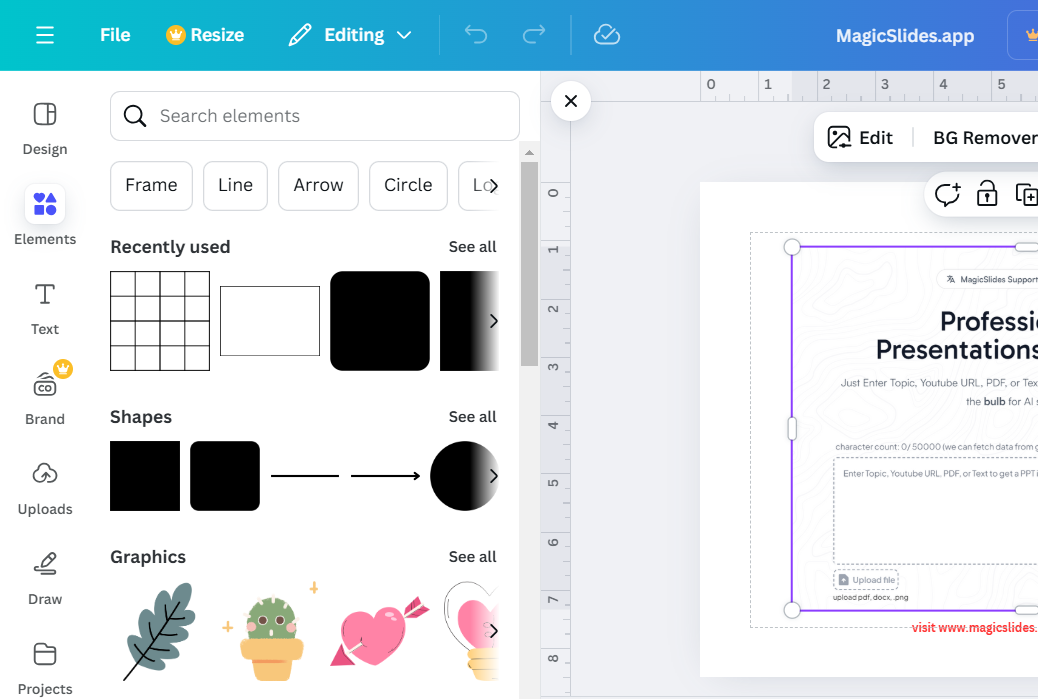
    Step 4: Add an Image or Background

    Go to the “Elements” or “Uploads” tab to choose an image.
    notion image
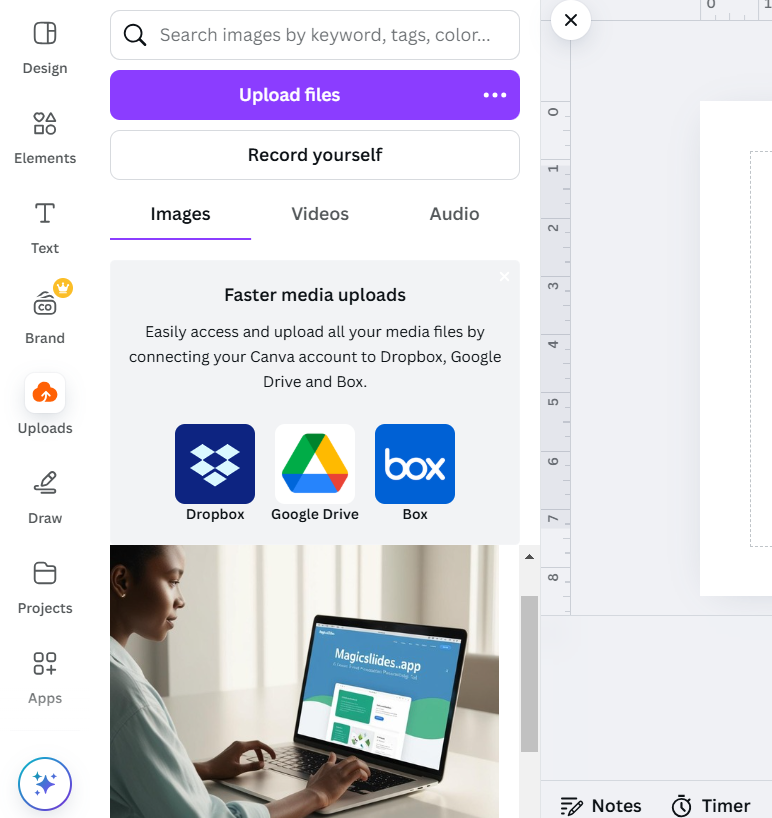
    Drag and drop the image onto the canvas, ensuring it covers the text entirely.
    notion image
    Adjust the image’s position and size as needed.

    Step 5: Mask the Text with the Image

    Select the image, then hold Shift and click on the text to select both elements.
    notion image
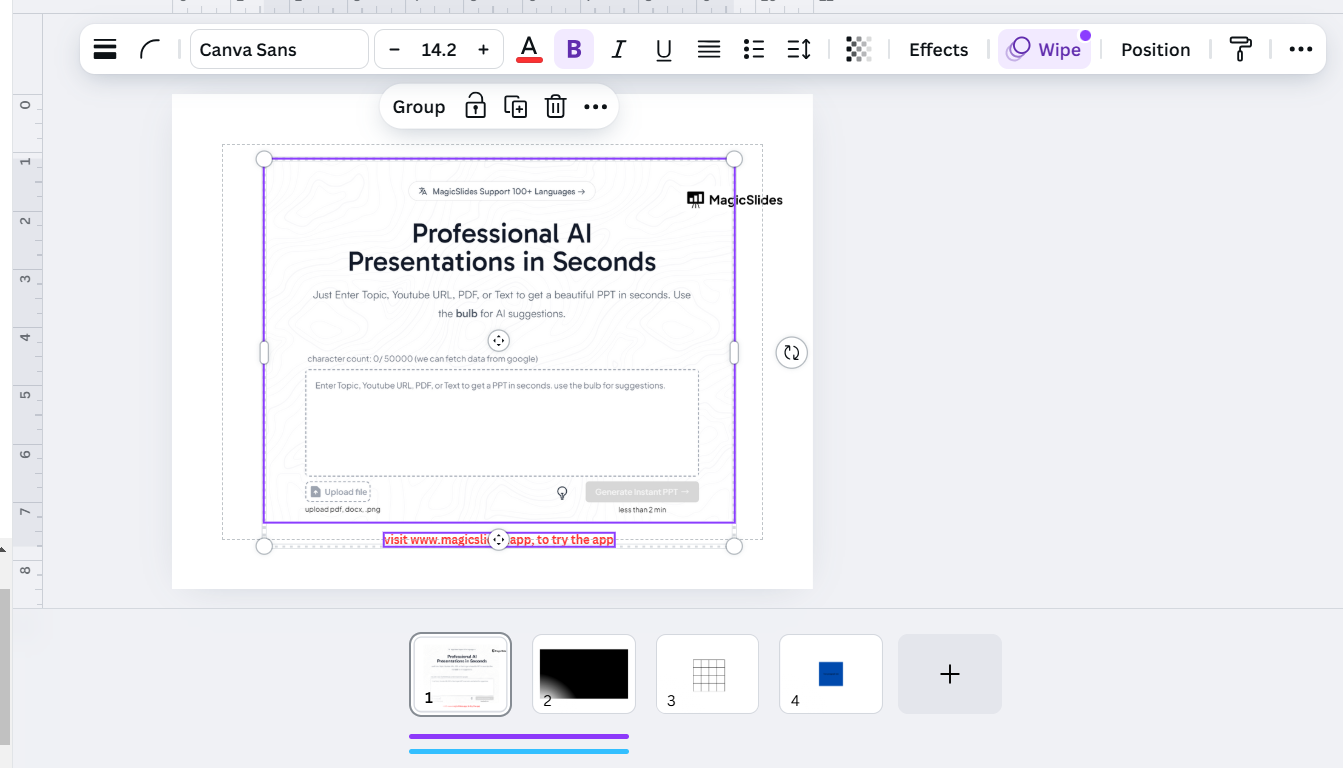
    Right-click and choose “Set as Mask” (or look for masking tools in the top toolbar). Canva will automatically clip the image to fit inside the text.

    Step 6: Finalize and Download Your Design

    Add additional design elements, such as a background or decorative shapes, to enhance the overall look.
    When satisfied, click “Share” > “Download” to save your design in the desired format (e.g., PNG, JPG).

    Conclusion

    Creating a text mask in Canva is a simple yet impactful way to elevate your designs.
    With just a few clicks, you can turn ordinary text into an eye-catching element that stands out.
    By following these steps, you’ll master text masking in Canva and unlock new creative possibilities for your projects.

    FAQs on Making Text Mask in Canva

    Can I use any font for text masking in Canva?

    It’s best to use bold and thick fonts as they allow the image details to appear clearly.

    Is text masking available in Canva’s free version?

    Yes, text masking can be done in the free version, but some advanced features may require Canva Pro.

    Can I edit the image after applying the text mask?

    Yes, you can reposition or resize the image within the text mask by double-clicking on it.
    By mastering text masking in Canva, you can add a professional and artistic touch to your designs!

    Share on socials

    About the author

    Ajay Sai profile photo
    Ajay Sai— writer at MagicSlides.app

    Ajay have been a techincal writer for more than 2+ years. from coding tutorials to using day to day apps he have helped 100k+ visitors with their various queries

    More from Ajay

    More from the blog

      100+ Best Seminar Topics for Students in 2026

      3 February 2026

      Best Presentation AI Tool of 2026 (with Real Use Cases + Comparisons)

      2 February 2026

      250+ Good Morning Messages for Her (Romantic, Deep, Cute & Sweet)

      30 January 2026

      200+ Heart Touching Birthday Wishes for Sister (Short, Funny and More)

      29 January 2026

      50+ History Presentation Topics For 2026

      28 January 2026

      How to Add Music to Your Canva Presentation: A Step-by-Step Guide

      27 January 2026

      15 Quick Tips To Use ChatGpt At Work

      22 January 2026

      11 Best AI Tools for Business in 2025

      22 January 2026

      How to Create an Infographic That Clearly Communicates Your Message

      20 January 2026

    Table of Contents

    Create Presentations in Seconds

    Transform your ideas into professional presentations with AI. No design skills needed.

    Try MagicSlides Free

    Create Stunning Presentations with AI in Seconds ✨

    Transform any topic, text, YouTube video, PDF or URL into beautiful presentations instantly with MagicSlides AI.

    Try MagicSlides AI Presentation Maker
    MagicSlides AI Presentation

    Footer

    Solutions

    • MagicSlides App
    • Google Slides Add-on
    • MagicSlides in Chrome
    • MagicSlides in Figma
    • MagicSlides in ChatGPT
    • MagicSlides in Telegram
    • MagicSlides in Zapier
    • MagicSlides in Figma Slides

    Tools

    • AI PPT Tools
    • QR Code Generator
    • Design Tools
    • PPT Templates
    • Slide Templates
    • PDF Tools

    Examples

    • AI Presentations
    • PPT by MagicSlides
    • Quizzes
    • Charts
    • Coloring Pages

    Resources

    • Changelog
    • Documentation
    • API Docs

    Top Blogs

    • How to Create Presentation Using ChatGPT
    • 100+ Best Seminar Topics for Students in 2025

    Company

    • Help
    • MCP
    • Blog
    • Pricing
    • Affiliate Program
    • Manage Subscription
    • Privacy Policy
    • Contact Us
    • Terms & Conditions
    • Refund & Cancellation Policy

    We also built

    • SheetAI - GPT For Sheets
    • MagicForm - GPT For Google Forms
    • SecondBrain.fyi
    • BlogBee - Free Blogging Platform

    © 2026 IndianAppGuy Tech Pvt Ltd. All rights reserved.