How to set a Picture as a background on PowerPoint


Setting a picture as a PowerPoint background enhances slide visuals, creating an engaging, customized presentation
Using a picture as a background in PowerPoint can help create visually engaging slides that capture your audience’s attention.
Whether it’s for a business presentation or a creative project, PowerPoint makes it easy to set a background image, adjust its transparency, and make it fit seamlessly with your content.
Here’s how to set a picture as a background in PowerPoint, step by step.
How to Set a Picture as a Background in PowerPoint: A Step-by-Step Guide
Step 1: Open Your PowerPoint Presentation
Begin by opening the PowerPoint presentation where you want to add a background picture.
Navigate to the specific slide or select multiple slides where you’d like the picture background to appear.
Step 2: Go to the "Format Background" Menu
In the PowerPoint toolbar, go to the "Design" tab, and on the far-right side, click on "Format Background."
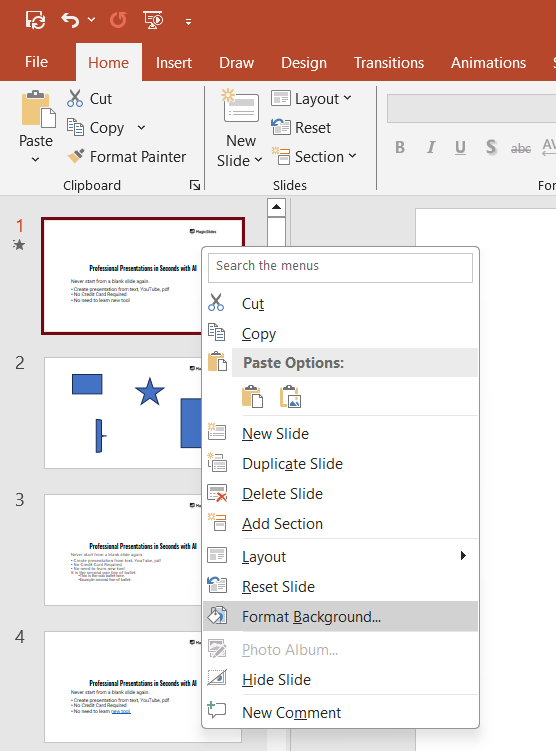
This opens a panel on the right side of your screen, where you can choose different background options.
Step 3: Select "Picture or Texture Fill"
Within the "Format Background" panel, select the "Picture or texture fill" option.
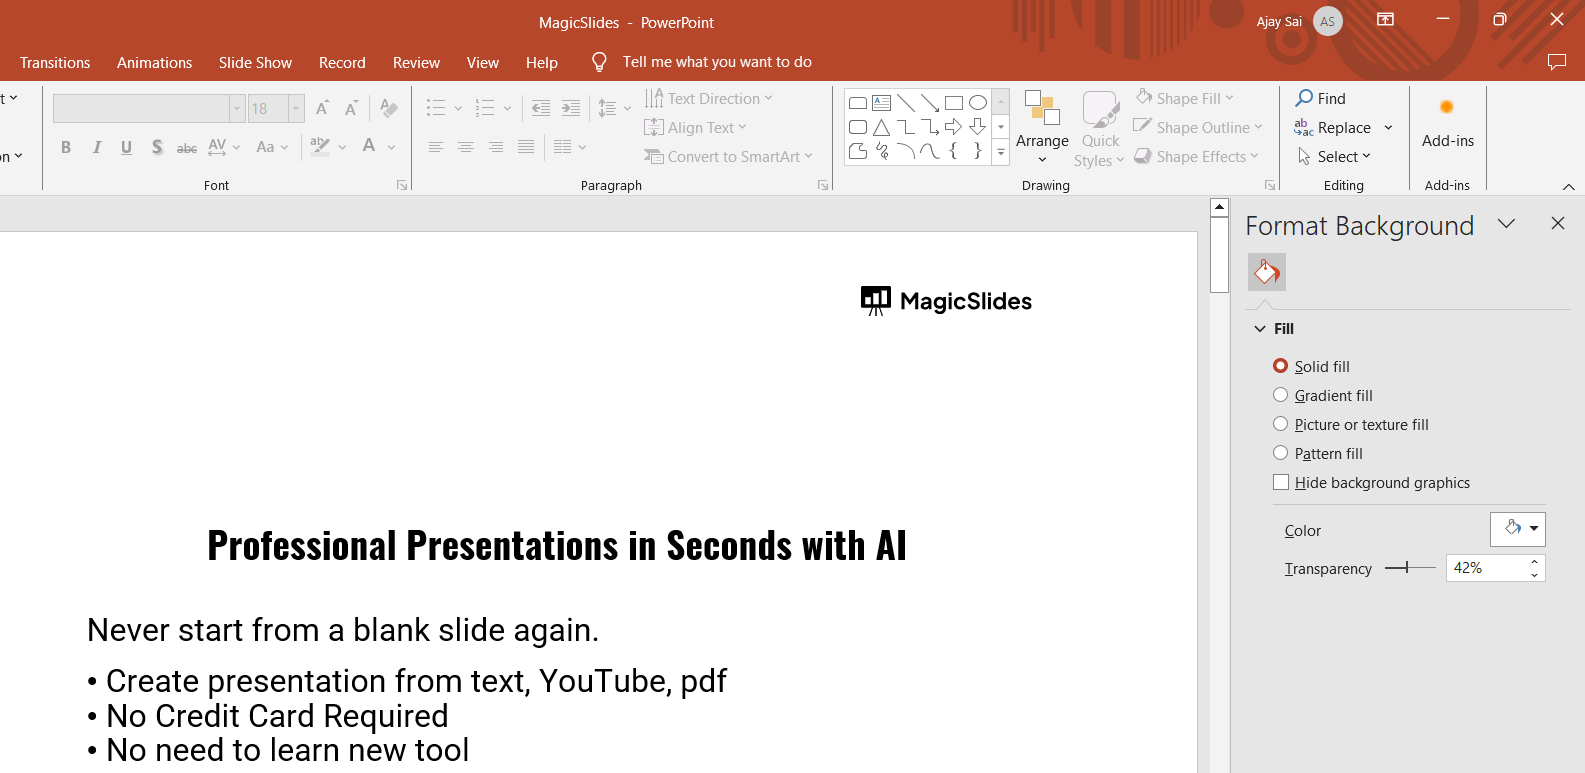
This allows you to insert an image from your computer, clipboard, or online sources directly as your slide background.
Step 4: Insert the Picture
Under the "Picture Source" section, click "Insert" and choose where you want to retrieve the picture from.
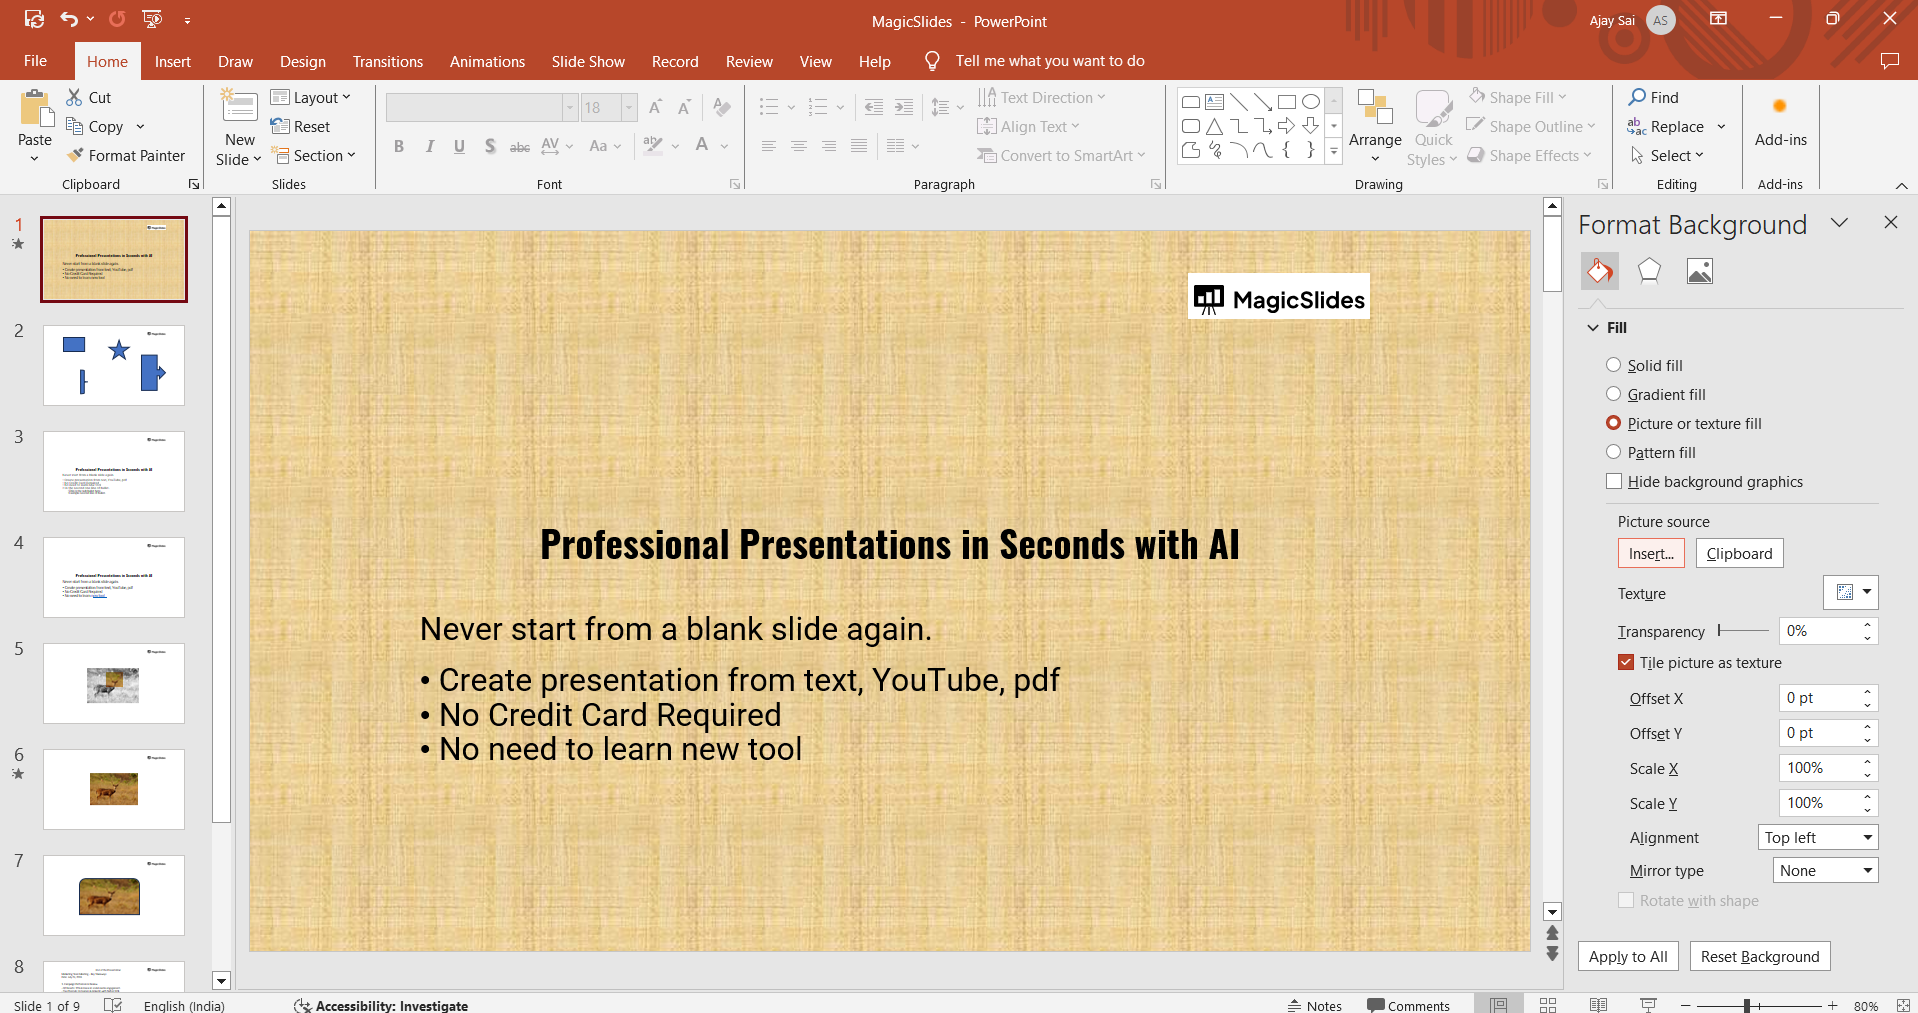
Options include inserting from a file on your computer, online sources, or clipboard if you've copied an image.
Once you choose and insert your picture, it will automatically fill the background of the selected slide(s).
Step 5: Adjust the Background Picture’s Settings (Optional)
To customize how the picture looks, use the options in the "Format Background" panel.
You can adjust transparency to make the picture less bold, allowing text and other elements to stand out.
You can also experiment with "Tile picture as texture" if you want a repeating pattern or adjust the "Offset" sliders to change the position of the picture within the slide.
Step 6: Apply to All Slides (Optional)
If you want the same background picture on every slide in your presentation, click on the "Apply to All" button in the "Format Background" panel.
This will instantly set the background image across all slides for a consistent look.
After setting a picture as a background in PowerPoint, learn how to crop a shape in PowerPoint to further customize your slides.
Conclusion
Setting a picture as a background in PowerPoint is a quick and easy way to add visual appeal and create a memorable presentation.
By following these steps, you can make your slides look more engaging and professional, all while keeping your content visually cohesive.
Experiment with different images and settings to find the perfect background that complements your message!
FAQs can take you forward!
Can I remove a background picture once it’s set?
Yes, go back to the "Format Background" panel, select "Solid fill," and choose a different color or setting.
How do I make a background picture less distracting?
Use the "Transparency" slider in the "Format Background" panel to lighten the image, making it subtler.
Can I use different background pictures on each slide?
Yes, simply select each slide individually and set a unique picture background using the same steps above.


